
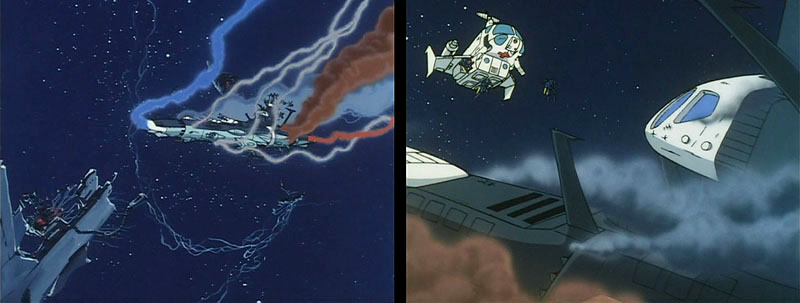
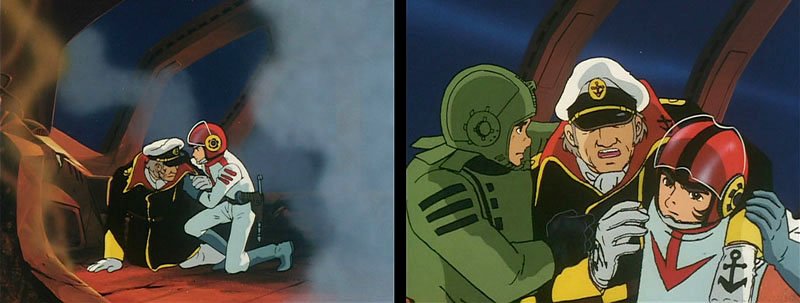
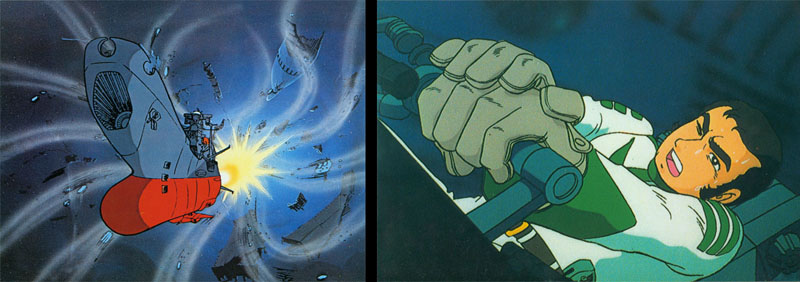
Yamato embarks a leisurely tour of the Solar System, passing Mars, Jupiter, and Saturn. Reaching the outskirts, they receive a distress call and immediately go to investigate. In the vicinity of the fictional Planet 11 [Brumis], they find the remains of the local patrol fleet. Only one cruiser has survived, although just barely. Kodai leads a small rescue party, which includes Saito, to look for survivors. Kodai finds the captain still alive on the bridge. The captain identifies himself as Hajikata [Gideon], one of Kodai’s teachers from the Space Fighter Training school. Hijikata insists on going down with his ship, but Kodai says his duty is to report to EDF command, so they drag him off the bridge over his objections.
The idea of a Captain going down with his ship has a long tradition, and sometimes seems tied to the Japanese Bushido code of death before dishonor. But even in wartime Japan it wasn’t a requirement, and there were differences of opinion about its application. Echoes of this were found at the beginning of Series 1, where Okita tried (unsuccessfully) to talk Mamoru Kodai out of making a suicidal last stand. Similar arguments can be found in history. For example, when the Japanese carrier Hiryu was fatally crippled during the Battle of Midway, Admiral Yamaguchi and Captain Kaku lashed themselves to a railing and had their ship torpedoed. Toshio Abe, the commander of the ship that made the requested torpedo strike, tried to talk them out of it.
I also recall reading a Japanese officer’s lament about these “honorable suicides.” He indicated that they played a significant role in Japan’s defeat in WWII, that many of Japan’s most experienced and sharpest military minds chose to die needlessly when their skills could have been used in the war effort. Admiral Yamaguchi himself is noted to have been one of Japan’s most brilliant carrier commanders, so his death had a major impact on the Japanese Navy.
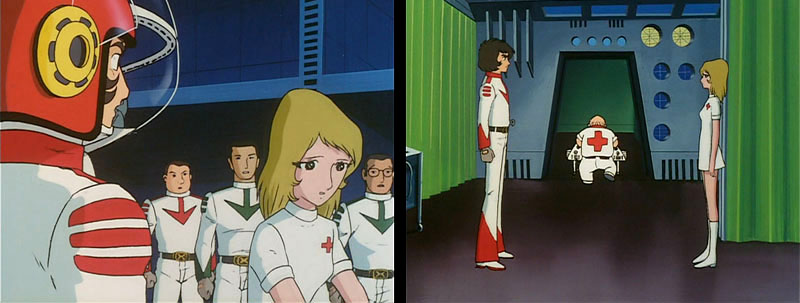
Hajikata is rushed on board and put under the care of Dr Sado and his nurse, Yuki. Kodai is shocked to see Yuki on board. She seems to have expected Kodai’s reaction, and behaves coolly toward him. After Sado and Hajikata leave, the two exchange a few heated words before they explain themselves. Kodai wanted Yuki home where it’s safe. Yuki insists that her duty is to Yamato, just like the rest of the crew.
Commander Todo contacts Yamato to ask if they have any news on the 11th planet fleet. Kodai reports that they arrived too late to do more than rescue Captain Hajikata of the Yanagi. Welcomed back under EDF command, Kodai surrenders command to Hajikata. Todo reveals that he was sympathetic to Yamato‘s insurrection and the Space Cavalry actually joined them under his orders.
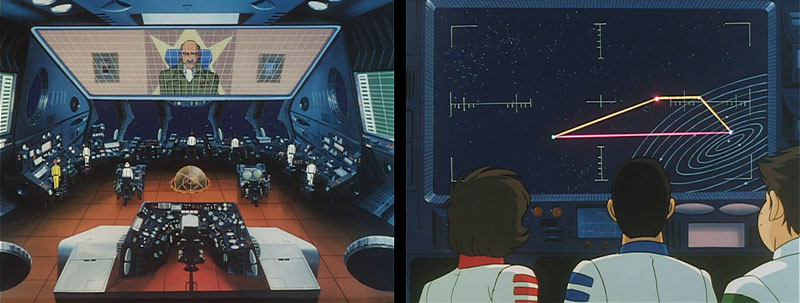
Suddenly, Aihara reports they are receiving another message from the mysterious Teresa [Trelaina], the same person who sent them the previous message. Sanada is able to track the message’s origin point. From the map he uses, it looks like it is on the edge of the Milky Way, above the galactic plane. Kodai asks for permission to warp to the radio signal and Hajikata nods his consent. What’s strange about this scene is that Hajikata didn’t appear to be on the bridge when it began (I assumed he was still in the sick bay), but he’s suddenly there at the end.
As Yamato gets underway again, a dark enemy craft floats into view and activates a signal. The Comet Empire’s eyes are everywhere.
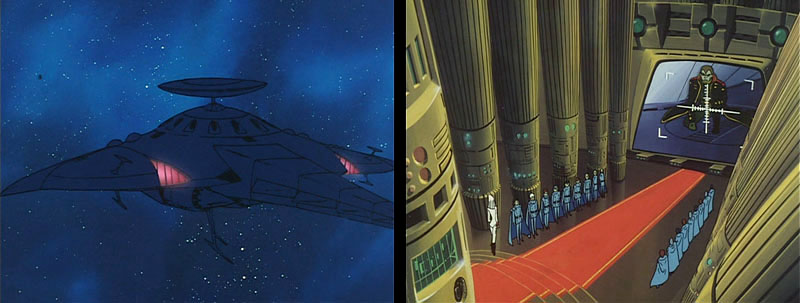
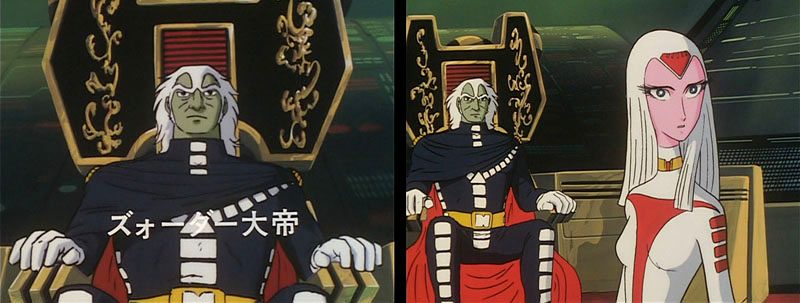
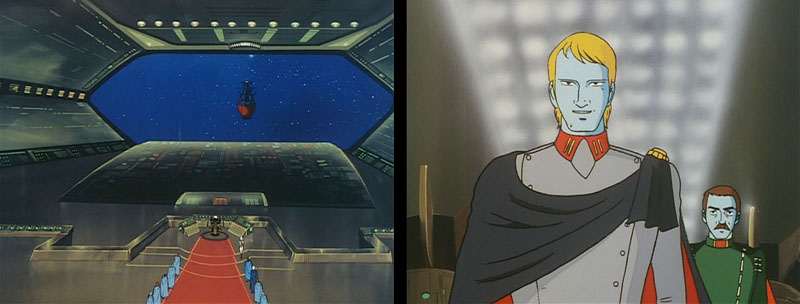
Next we’re introduced to some of the Comet Empire command staff. They are all lime-green colored, except for the lone woman, Lady Sabera [Princess Invidia]. Commander Baruze [Bleek], in charge of the 7th Mobile Division, reports that General Naska has had great initial success, but now his scout ships have spotted Yamato heading for Telezart. Sabera seems a bit flustered at hearing the ship’s name and wonders aloud whether it’s the same ship that destroyed Gamilas single-handedly. She looks to the throne, where Prince Zordar, introduced with a caption, simply nods. At this, Zordar’s distaff mouthpiece finds her courage and has a warning sent to Admiral Goland [Torbuck] of the Telezart Defense Forces.
Note that General Naska was mentioned, but did not make an appearance. He’d have to wait until the TV series to get his spot in the limelight.
Yamato prepares to make a huge warp directly to the area of the radio transmission. Despite the implied danger of such a large jump, the ship makes it with no trouble. Then, moments later, the ship starts to drift, caught in a “space current” leading to what is described as a “Sargasso Sea of space.” The Sargasso Sea is an area of the North Atlantic bordered by currents on all sides, and it’s gained a reputation (more myth than reality) of trapping ships. Yamato can easily get through the current, but they discover Admiral Goland’s fleet waiting for them on the other side. Behind them is a planet, identified as the source of Teresa’s broadcasts.
Kodai and Shima decide to push through the current and use the Wave-Motion Gun on the fleet, but Hajikata overrules them. If they do that they will hit the planet, he explains. Hajikata has them cut all power to the engines and drift down the current. Goland figures their engines have failed, so he repositions his fleet to meet them “downstream.” Things seem a bit tense on the bridge. Kodai looks toward Hajikata, who has his eyes closed as if he were trying to guide the ship by sheer will. Finally, he orders them to turn around and break away from the current. After a brief but considerable struggle, Yamato works its way free.
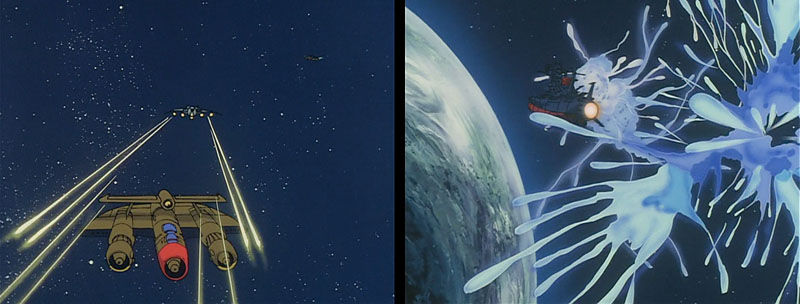
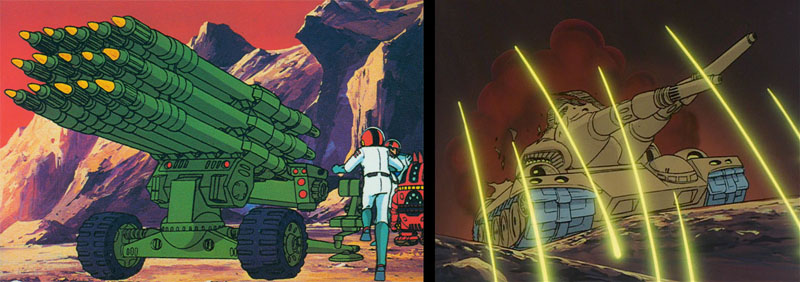
Goland is furious that he fell for the ruse and orders all missiles fired at the ship. Dozens of missiles are launched; the smaller ones first, followed by huge twin missiles mounted on the front of each capital ship. In the face of these attacks, Hajikata orders the Wave-Motion Gun prepared for firing. The first wave of missiles explodes near Yamato with no direct hits. Warned that a much larger wave is coming, Hajikata orders no evasive action or defensive maneuvers, but has the WMG preparation continue. The gun fires, first disintegrating the missiles, then Goland’s fleet, and finally Goland himself. The beam continues on, and as Hajikata planned, does not hit the planet.
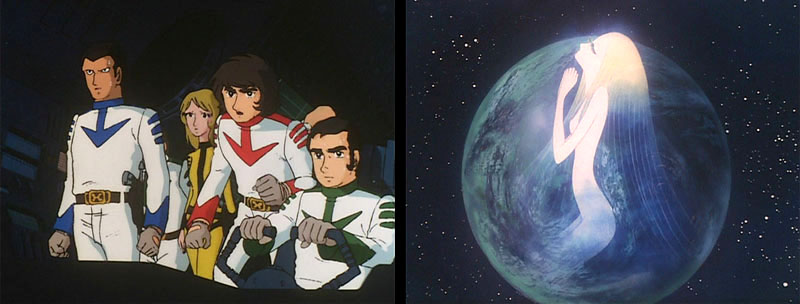
Sanada does an analysis of this planet, called Telezart, and reports that it is hollow. The crew then sees an image of Teresa floating above the planet. She appears much like Starsha — very thin, delicate features, and long blonde hair. She’s also naked and appears in profile, legs bent and hands clasped as in prayer. Before her image fades away, she tells them she’s stuck in a gravity trap in an underground cave. Sanada notes that her message sounded urgent so they will likely have to fight their way to her.
Production note: In what must have been a Herculean effort, this entire film was storyboarded by one man: Yasuhiko Yoshikazu. By the time production started, he was the single most experienced Yamato storyboard veteran, having done half the episodes of the original TV series. (He’s also a living legend in Japan with some pretty major credits to his name; read more about him here.) Out of necessity, his storyboards could not be very detailed, which left room for animators to bring their own personal style to the game. This upcoming sequence is a perfect example. Animation layout was done by another giant of anime, Yoshinori Kanada. He handled the entire descent and land battle on Telezart. His energetic, spontaneous filmmaking style is most evident in the fighter combat and hand-to-hand fight between Saito and Zabaibal. Read our tribute to Kanada here.
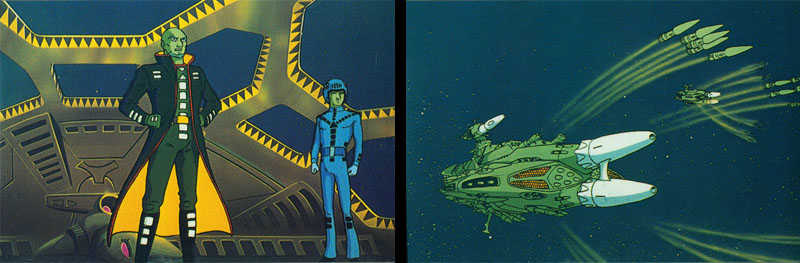
A crevasse opens up on Telezart, revealing a base with a landing strip. A squadron is launched to attack Yamato, which launches the Cosmo Tigers in response. The new Tigers perform well on their first outing, although they lose at least one fighter. I’m not certain, but the pilot killed looks like it could be 3rd squad leader Jiro Tsurami, which would explain why he wasn’t seen again. Some enemy fighters manage to make it to Yamato, only to be quickly destroyed by the pulse lasers.
The base launches missiles. Previously, Yamato‘s bow torpedoes were almost exclusively used as offensive weapons, but apparently they are useful as interceptor missiles as well, and they successfully destroy the entire wave. I have a particular fondness for one shot here, where we see a head-on view of Yamato emerging from an explosion as it fires another round of torpedoes.
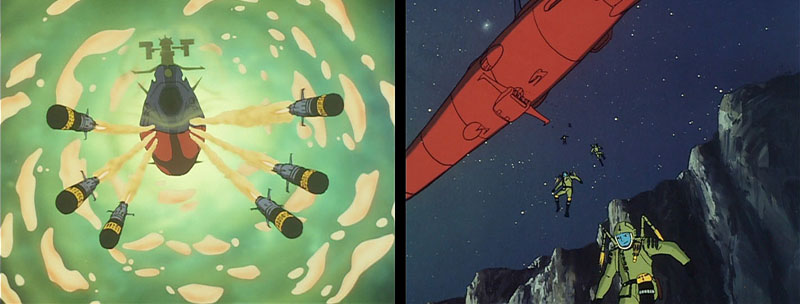
The Cavalry descends to the planet. Despite looking fairly massive, Telezart’s hollow nature apparently means it has low gravity, because the Cavalry uses their personal jet-packs. Nevertheless, low gravity does not seem to be an issue once they touch down. They walk into the huge center cavern, where they see a large desert plain which is remarkably well lit for being underground.
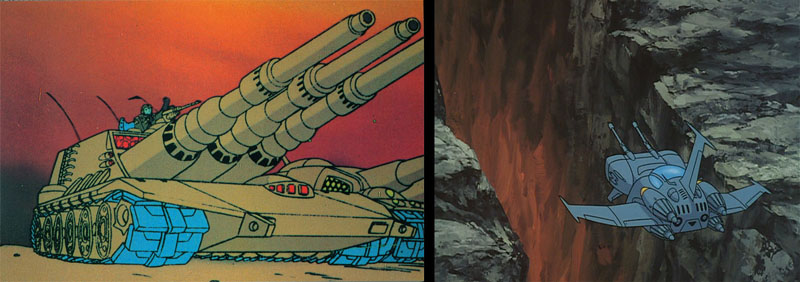
They soon meet the opposition: a tank battalion commanded by General Zabaibal [Scorch]. The Cavalry calls for reinforcements. Soon, Sanada, Kodai and Analyzer descend in a landing boat. The Cavalry puts up a fierce fight. Saito singlehandedly leaps on a tank, tosses out its the three-man crew, and commandeers it.
Sanada finishes constructing a multi-missile launcher which is quickly aimed and fired. It shoots about 15 mini-missiles high above the battlefield. Near the top of its arc, the missiles explode, unleashing a rain of energy that burns through the tanks. The only tanks that survive are Zabaibal’s and Saito’s. Zabaibal retreats, pursued by Saito.
Meanwhile, Sanada, Kodai and Analyzer travel to the cave in which Teresa is trapped. The trio is assisted by two anonymous men. They seem to be from Yamato‘s combat group, but in one scene they appear in Space Cavalry uniforms, then go back to combat red. Further in the cave, they discover a large gate surrounded by guards. Although it’s a dark cave and they’re not using sniper rifles, Kodai and Sanada manage to take out several guards with well-placed shots.
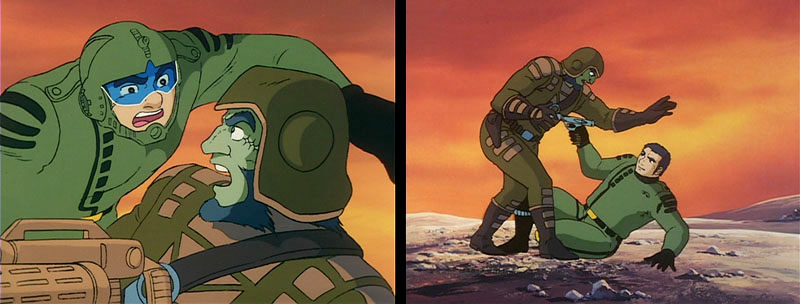
We then catch up to Saito and Zabaibal. It’s not known what happened to Saito’s tank or the men he was with. Zabaibal mans his tank’s antipersonnel guns, firing down at Saito. Saito manages to sneak behind Zabaibal and tackles him to the ground, where the two start wrestling for control of a handgun. They appear to be evenly matched with Zabaibal having a slight height/weight advantage. Eventually, Saito gets hold of the gun and sticks it in Zabaibal’s chest. Zabaibal freezes. There is brief hesitation on Saito’s part, then he pulls the trigger. Zabaibal falls dead. Saito has a blank look on his face as he gets up. After a moment’s silence, he tosses the gun down. I’m not sure how to read Saito’s expression there. Is he shocked at this execution he just performed? Is he shrugging it off without a care? Is he just exhausted? Perhaps all three?

Kodai and his group (who have lost their two subordinates somewhere) finally get through the gate, which Analyzer says is the center of the planet. High above a lake is a set of energy projectors which look somewhat like floodlamps. Within small ripples of energy, they see Teresa. Kodai shoots the energy projector above her, which is enough to free her.
Now unfettered, this strange floating lady thanks them for being the only ones who answered her call. She tells them about the Comet Empire, that it intends to rule the universe. Her own planet was destroyed by it, and she was taken prisoner. With a gesture, she creates images of her world being attacked. Some of the images match the scenes in the movie’s prologue, so we can perhaps assume it was her planet being attacked in those opening scenes.

Teresa reveals that Earth is the next target, and will be destroyed just as her world was. The White Comet conceals a base inside, but in order to get to it they must first break through the Comet’s plasma field, something she says can’t be done even with Yamato‘s Wave-Motion Gun. Unfortunately, she doesn’t know of anything that can penetrate it. Teresa says she has watched Earth and encourages them to fight not just for themselves, but for the universe. Kodai suggests fighting the Comet together, but she says she cannot come with them. She is made of antimatter and cannot come into contact with anything in this universe lest she destroy it. She says her goodbyes and fades away.
Story note: we should probably assume Teresa was somehow converted into an antimatter being sometime after she lived on her planet, which must have been composed of solid matter for the Comet Empire to have conquered it.
Next we cut back to the Comet Empire, where they are discussing Yamato‘s liberation of Teresa. General’s Goenitz [Dire] and Razera [Gorce] are concerned about both Teresa and Yamato. Zordar says Teresa won’t be a problem, that she will be defeated easily. As for Yamato…that’s the cue for Dessler [Desslok] to announce his presence, flanked by Talan. Surprisingly for such a proud man, Dessler has no problem bowing before Zordar’s throne. Dessler promises to take care of Yamato personally. Sabera mocks him, asking if he can really defeat them this time. After being given a small fleet to command, Dessler leaves. Sabera calls upon Miru [Morta] to go along with Dessler and watch over him.

Several of the Comet Empire characters got redesigned for the TV series Yamato 2. In the movie, Sabera has white hair and a fuller, rounder face. Miru seems a bit more delicate and feminine than his TV counterpart. See a gallery of these design changes here.
The movie never fully explains how Dessler survived his last encounter with Yamato. Sabera mentions that they revived him after discovering his body drifting through space and leaves it at that.