
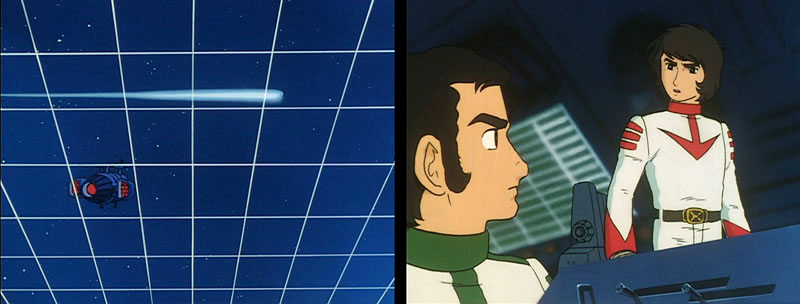
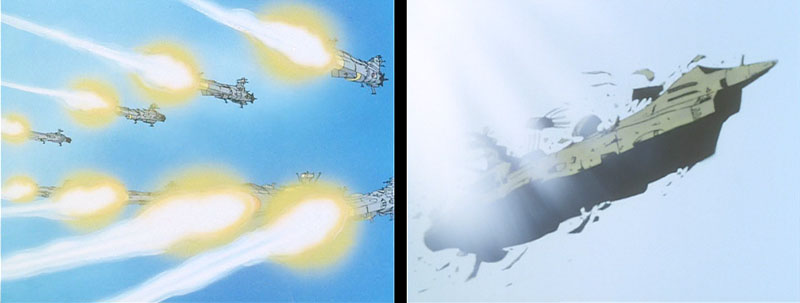
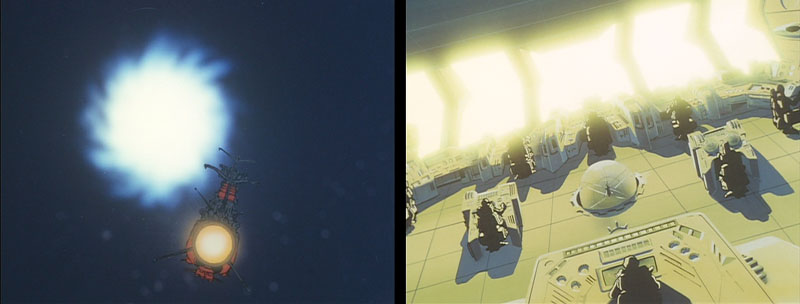
Abruptly, Yamato is attacked. This is as sudden for the viewers as it is for the crew. Comet Empire destroyers appear from nowhere and circle the ship, making strafing runs as they pass. Within minutes, Yamato is all but crippled. This surprise was achieved by Dessler’s new flagship, similar to the blue “flashlight” model we saw at the end of Series 1. It uses warp projectors (a.k.a. “SMITE” devices) to teleport the destroyers directly in front of Yamato.
The passage of the White Comet behind Dessler’s command ship makes the intent of this attack clear, and calls for an urgent counterattack. Kodai plans to make a small warp over to Dessler’s ship to ram and board it. After deciding this course of action he suddenly seems to remember he’s not in charge. He looks to Hajikata, who grunts and nods his approval.
Nanbu [Dash] had suggested using the Wave-Motion Gun and frankly, there’s no good reason given for why they don’t, other than Kodai saying the situation requires hand-to-hand combat. Perhaps Kodai thought, “This guy survived getting hit by his own Dessler Cannon Beam. I’m going to fight him face-to-face and make sure he stays dead this time!”
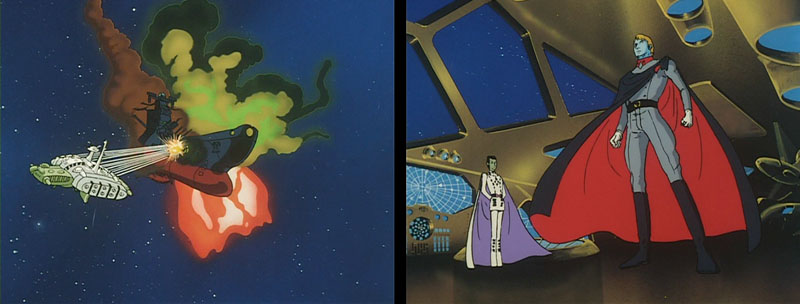
With the Empire’s ships keeping Yamato in place, Dessler prepares to finish it off with the Dessler Cannon. This does not sit well with Miru, since their destroyers are still in the line of fire. Dessler doesn’t care. As fate would have it, both sides lock in on identical countdowns. Dessler fires just as Yamato warps. The Comet Empire ships are caught in the Dessler Cannon beam and are disintegrated. Before the glow from the beam fades, Yamato materializes right in front of Dessler’s flagship! The ships collide side by side. Yamato soldiers and Cavalrymen pour out of the ship and into Dessler’s. Kodai is among the boarders. Yuki goes out in the field as well, to help Dr. Sado take care of battlefield casualties.
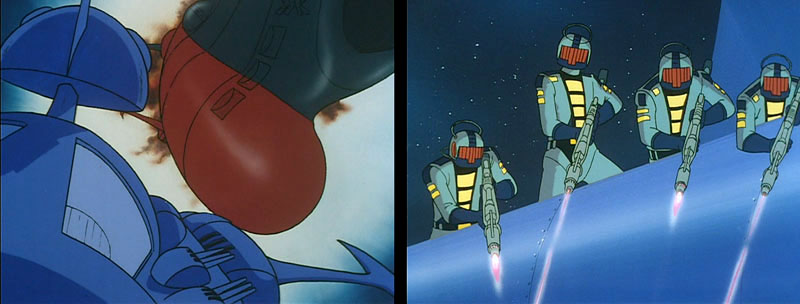
Sanada soon discovers that the soldiers defending the ship are all androids. From his position on the bridge, he guides Kodai to the control station so he can destroy it. With the control center destroyed, the robot soldiers are useless. “Robot soldiers” were used fairly often in Star Blazers; killing a living, breathing enemy was a no-no on a TV show aimed at young American viewers, so the re-writers usually “fixed” the script by saying the enemies were all robots. Thus, they could be “destroyed” with no moral qualms. As derided as the robot soldier idea is, it might be a revelation to some that Space Battleship Yamato featured them as well. And it’s not a bad idea in real life either — US Armed Forces are increasingly relying on drones to reduce the risk to soldiers’ lives. The in-story reason for the robots is revealed in the next scene: Dessler and Talan are the only Gamilas citizens left, so they’re using robots as a necessity.
Production note: After completing the storyboard for the film, Yasuhiko Yoshikazu continued as an animation layout artist for two key sequences. This is the first, Kodai’s showdown with Dessler. “Yas” made a name for himself with character design and animation techniques which brought life and warmth to the medium as few others could. The true art of storyboarding is finding the perfect camera angle for every scene, and Yas has always been a master of the craft, as this sequence demonstrates.
With his main defense down, Dessler realizes the game is nearing its conclusion. He thanks Talan for his service. Miru begins to leave, smugly telling Dessler he’s going to report to the Emperor. He only gets a few steps before Dessler shoots him in the back. I have to say, for someone who is seen as having a code of honor, shooting someone this way does not seem like a very honorable thing to do. Just then, explosions rip through the bridge, and Talan and Dessler are caught in the blast. Dessler, though injured, manages to get up. Talan is dead. Dessler is now the only Gamilas man left.
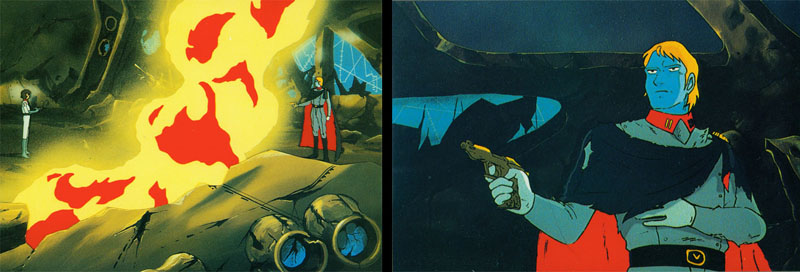
At the sound of his name being called, Dessler turns to see Kodai, “the boy from Yamato” who has come alone to face him. Kodai asks why he is fighting on after Gamilas was destroyed. Dessler responds that it’s to avenge his humiliation at the hands of Yamato. The two pull their handguns and aim at one another. Behind Kodai, Yuki watches. (Note that neither Kodai nor Yuki wear helmets in this scene. More proof that humans and Gamilas can breathe the same air.) Before he can fire, Dessler succumbs to his injuries and drops to his knees. Yuki, showing extraordinary compassion to such an implacable enemy, runs past Kodai to Dessler’s side. Dessler realizes his dream of the restoration of Gamilas will never come true, but seems satisfied that he fought well.
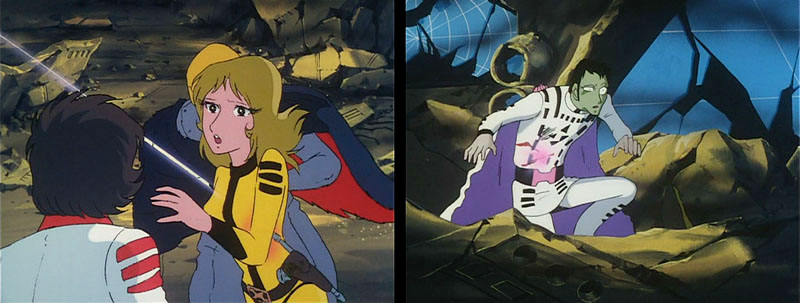
However, Miru is still alive. Pulling himself out of part of the collapsed ceiling, he aims his pistol at Dessler. Unknowingly, Kodai moves into his line of fire. Yuki sees him and tackles Kodai as Miru fires. In acting to save Kodai, she takes a beam through her torso. Dessler gets a second wind, grabs his gun off the floor and puts three rounds into Miru, including a kill-shot to his head.
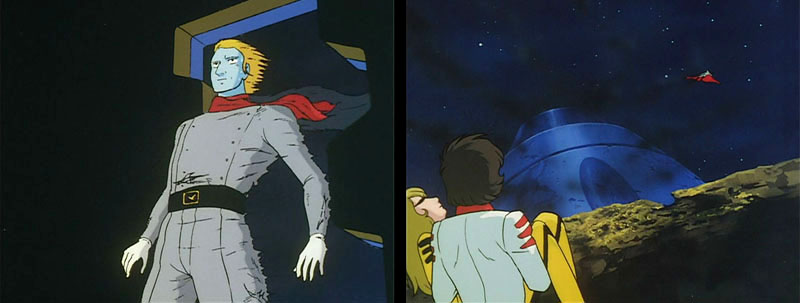
Watching Kodai’s concern for Yuki, Dessler asks for forgiveness. He now realizes that his spirit is closer to Yamato than the Comet Empire. He encourages Yamato to fight on, and gives them a clue to the Empire’s weakness: the spiral core. As he’s speaking, he edges over to a door on the wall. He hits a button and it opens, voiding him into space. (This seems like a strange place to put a door. It’s not even a proper airlock with a pressure chamber, just a direct entry to outer space.)
Zordar is informed that Dessler has failed. He’s not concerned with Yamato, however, and orders Baruze to start attacking Earth bases.
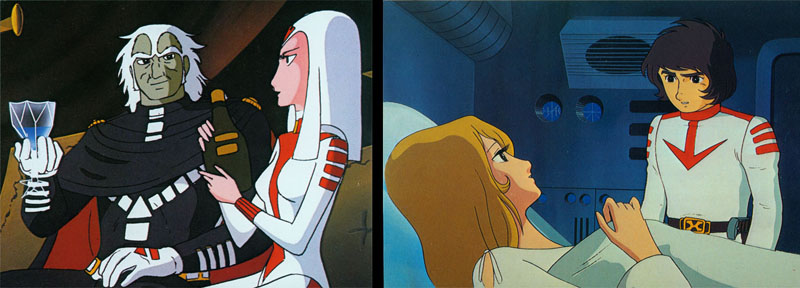
On Yamato, Yuki is attended by Dr Sado. She’s obviously in great pain, but puts on a brave face when Kodai enters the room. Dr Sado isn’t as good an actor and smiles awkwardly. Eventually, Yuki’s mask cracks and Kodai can see how badly she’s hurt. She just wants to be home with him. She realizes that her chances of living happily ever after are slim to none.
Production note: Yoshinori Kanada picked up the animation layout baton at this point and delivered some absolutely stunning work. He was an expert at capturing large-scale action scenes that overflowed with power and energy. This was the touch he brought to all the space battle scenes from here through the invasion of the Comet Empire city. If it’s a scene with a spaceship in it, chances are Kanada brought it to life.
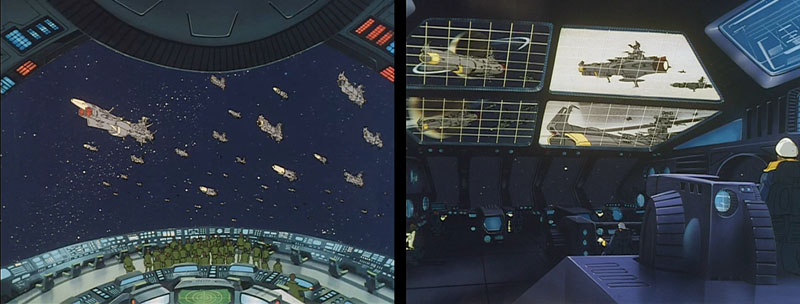
The attack on Earth’s outer planetary bases begins. Yamato is urged to hurry and join with the defense forces. Andromeda, lead by its unnamed captain, leaves the Moon base with a fleet of warships. According to the script, there are 36 Battleships, 86 Cruisers and “a large number” of Destroyers in the EDF fleet. Just two years prior to this, Earth was down to one last battleship, and now there are well over a hundred vessels. Most seem to come equipped with Wave-Motion Guns, indicating they were built after Starsha’s message. I’m sure that while Yamato was on its way to Iscandar, Earth started rebuilding its forces. After Yamato took out the Pluto base (Episode 9), Earth was free to resume mining operations in the Solar System, providing raw materials to build up the fleet.
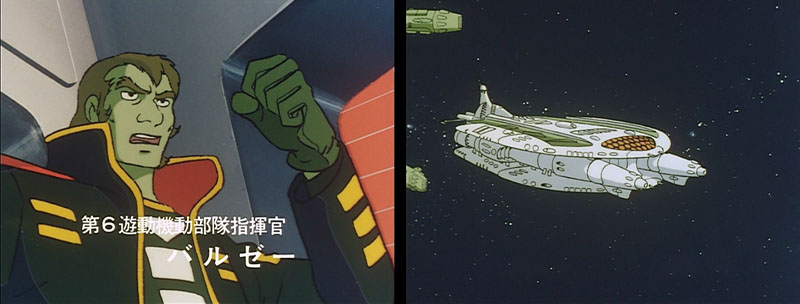
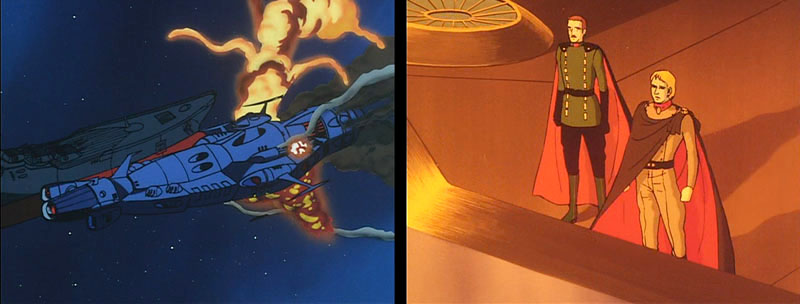
The first major battle between the EDF and the Comet Empire fleet occurs in the Saturn area. The Comet Empire forces are lead by Commander Baruze. In Series 1, it was relatively easy to see Nazis as a template for the Gamilas officers. Some of the Comet Empire personnel also have conceptual roots. Razera and Zabaibal don’t have any real-world counterparts that I’m aware of, but Goenitz is likely based on Karl Doenitz, Grand Admiral of the German navy in WWII. Zordar and Sabera, are reportedly based on the English words Sword and Saber, respectively. Baruze can be pronounced “Balsey,” which immediately calls to mind Admiral William “Bull” Halsey, Commander of the US Third Fleet and vicious opponent of the Japanese during WWII. This battle may have been inspired by the Battle of Leyte Gulf, which involved both Bull Halsey and the original Yamato.
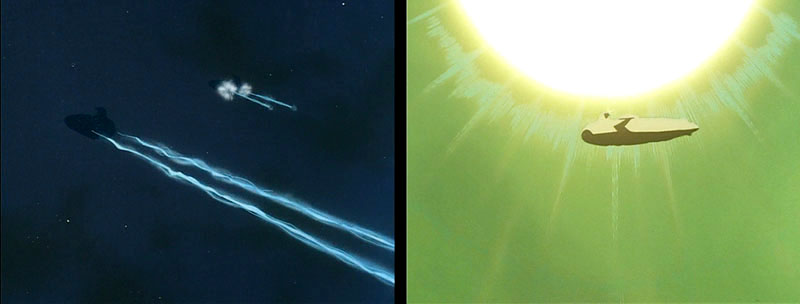
The Earth Forces destroy the first wave of bombers without a loss. Baruze’s second wave of “Space Subs” manage to take out several EDF ships before getting destroyed themselves. The concept of Space Subs and the EDF’s electronic countermeasures aren’t adequately described in-story. The subs are dark and hard to see. Since they apparently haven’t been detected on radar, the answer is to fire off sonar devices. In the ocean, these customarily locate other ships using sound waves. That wouldn’t work in space of course, so the EDF sonar operates more like giant floodlamps. The sub’s silhouette stands out against the bright light, allowing the EDF guns to quickly target them.
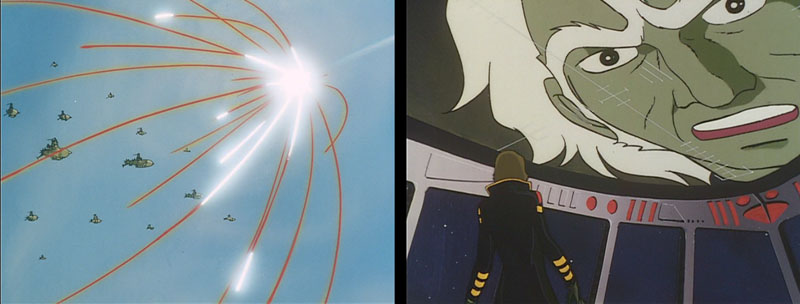
Baruze obviously expected to be doing better than this. He orders his forces to surround the EDF fleet, but Andromeda fires its Dispersion Wave-Motion Gun before this can be done. The Dispersion Wave-Motion Gun unleashes a powerful beam of energy that creates a destructive shower over a wide area. One blast destroys almost the entire fleet. Baruze is personally chastised by Zordar for this rout.
Andromeda prepares for a second firing, this time accompanied by all the other WMG-equipped ships. Their target is the White Comet itself. Yamato emerges from warp in time to see the firing. The Dispersion Gun does the same thing, bursting into an umbrella of energy that hit the White Comet in many areas all at once…and has no effect. The Comet continues forward and smashes the fleet. All EDF forces, including Andromeda, are destroyed. Yamato, having missed the battle, is the only survivor.
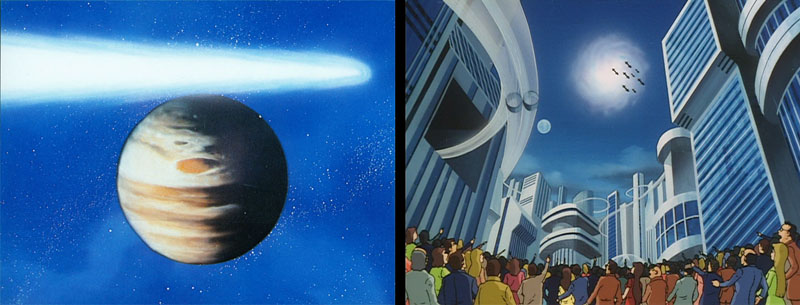
The Comet Empire moves at incredible speed past Jupiter and Mars before stopping at Earth. Zordar gives the humans the choice of surrender or death. They have one hour to decide.
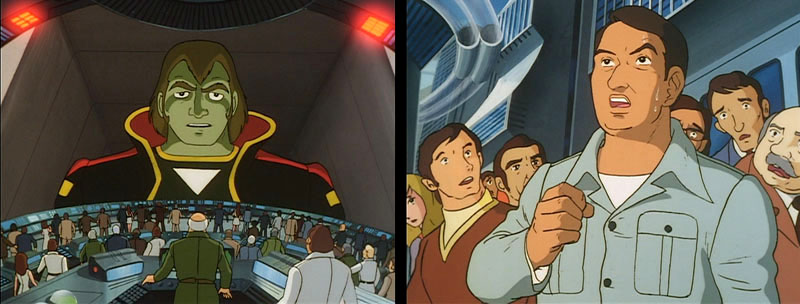
Production note: This sequence does justice to Producer Yoshinobu Nishizaki’s title as Yamato‘s greatest cheerleader when he himself is shown standing in a frightened crowd participating in a chant for Yamato to fly in to the rescue.
Sanada is able to figure out what the “spiral core” is. Now that the White Comet has stopped, they are able to see the origin point of the plasma shield. The shield emanates from a point in front of the comet and spreads out to surround the fortress. The plan is to warp in and fire the Wave-Motion Gun directly at the core. Yamato can do this because its Wave Gun isn’t a dispersion variant and shoots a single beam, allowing them to specifically target the core.
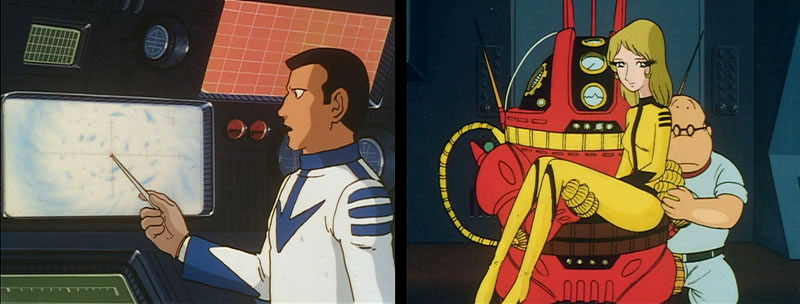
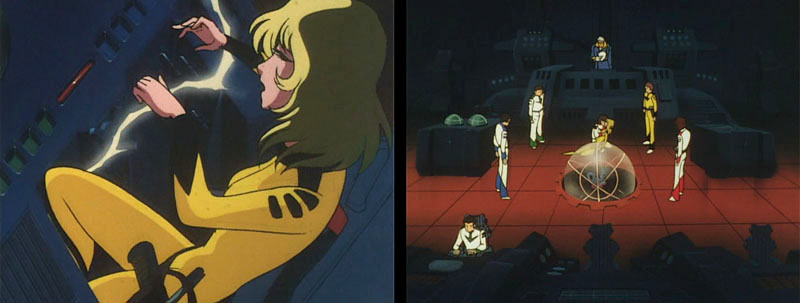
Yuki arrives on the bridge. Although injured, she still plans on performing her duties just as any other crewman. It says something about her character that she stowed away so she could be a part of the team and now, gravely injured, she’s still determined to do her job. She’s so weak that she has to be carried to her chair by Analyzer.
The deadline passes and the Comet Empire starts to move forward. Yamato warps directly into its path, aims the Wave-Motion Gun and fires. It hits the target dead on, and the result seems to ignite the Comet like a sun. However, the wave of joy that sweeps across the Earth and Yamato‘s bridge is short-lived. After the plasma shield burns away, the Imperial City Gatlantis stands revealed.
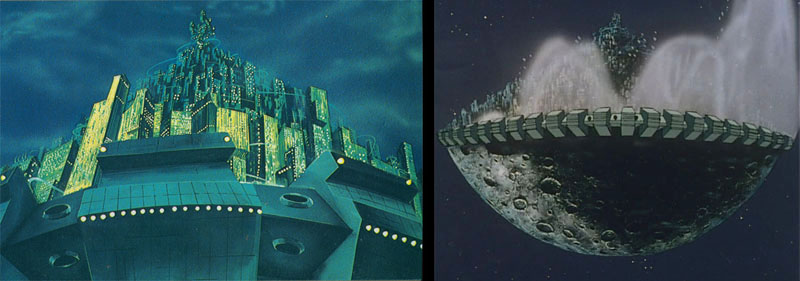
The city/fortress appears to be two halves: the bottom looks like the hemisphere of a small planet, while the upper half is a towering, glittering city. Since the bottom appears as thick rock and the city on top looks much more vulnerable, Yamato concentrates the attack on the city. Unfortunately, by the time the Cosmo Tigers and armaments are ready, the city is covered by a barrier. This secondary plasma shield is generated from the spinning belt at the fortress’ center. Nothing Yamato has can get through.
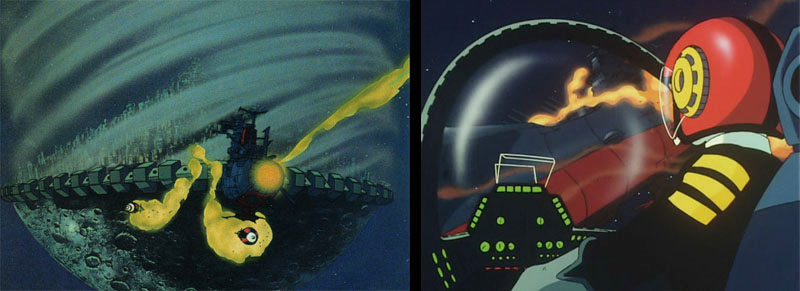
The spinning belt also serves as a missile launcher, which fires several times. Each missile hits with a tremendous explosion. Unfortunately, some of the discrepancies of the animation get in the way for a moment. We’re shown the forward turrets hit a few times, but when the ship goes into its dive, all the turrets seem to be in perfect shape!
The multiple hits are too much for some of the bridge stations to take, and both Ohta and Yuki’s consoles explode. Ohta is fine, but Yuki, already seriously hurt, is dealt a fatal blow. Kodai holds her and shares a few final words. She tells him not to give up, that the battle has only begun.
Story note: Yuki’s final words, “Kodai, defeat them…I know you will…” were heard as voice-over in the trailer for the movie. Of course, no one could know at the time that this was her dying wish. For those caught unaware, particularly the girls in the audience, this had to be a very dark moment. As of now, the stakes are enormous and nobody is guaranteed to get out alive.
I wonder why every time a ship travel across the Solar System, we witness a flyby over most of the planets. The same applies to Star Trek (for example the famous episode “The Best of Both Worlds”). While a slingshot maneuvre makes sense when we travel outward (as in another Star Trek scene, the Enterprise launch from Earth in “Star Trek: The Motion Picture” when the mighty ship flies past Jupiter), the opposite has no sense at all. Seems that these encounters are fortuitous, that makes even less sense because the Solar System is mostly empty and the chances to intercept a planet without deliberately aiming at it are pratically zero.
I never realized the dispersion beam was the key weakness in the original, this makes perfect sense and adds to the ‘ newer is not better ‘ overall theme of Andromeda and the EDF fleet in both Comet Empire movie and series 2 — Its worth noting the improbability of Earth rebuilding an Entire massive fleet of capital ships in so short a time ( these time frames always brief to keep the characters young ) — a fact which clearly irked many and even on the production staff as this was rather impressively handled head on with the 2202 remake and the ” capital idea ” of making a story specific element to address this fact.