
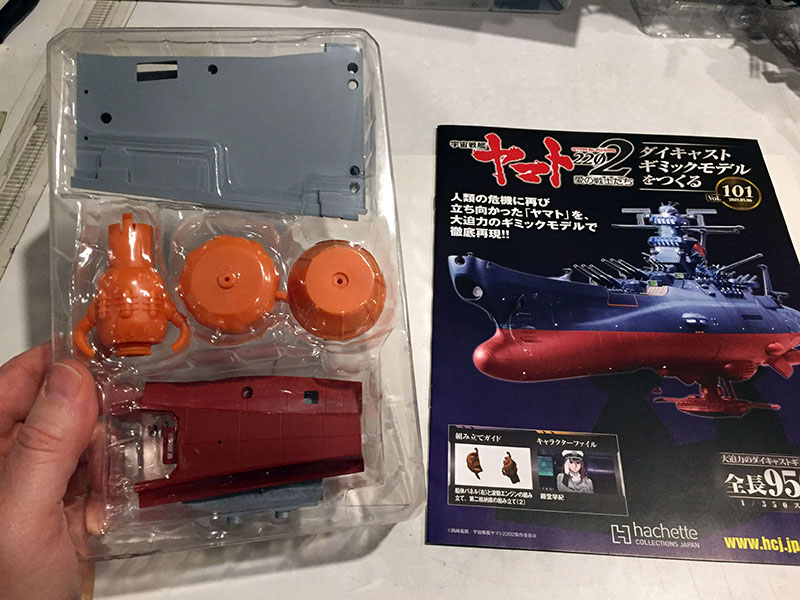
Down to the last ten! The parts are getting bigger! Exciting! Let’s dig into 101.
Continuing work in the aft section.
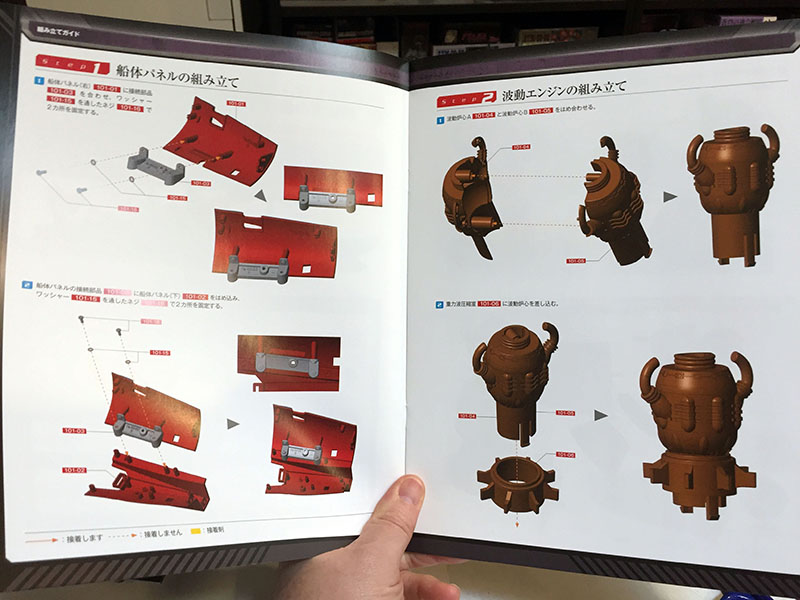
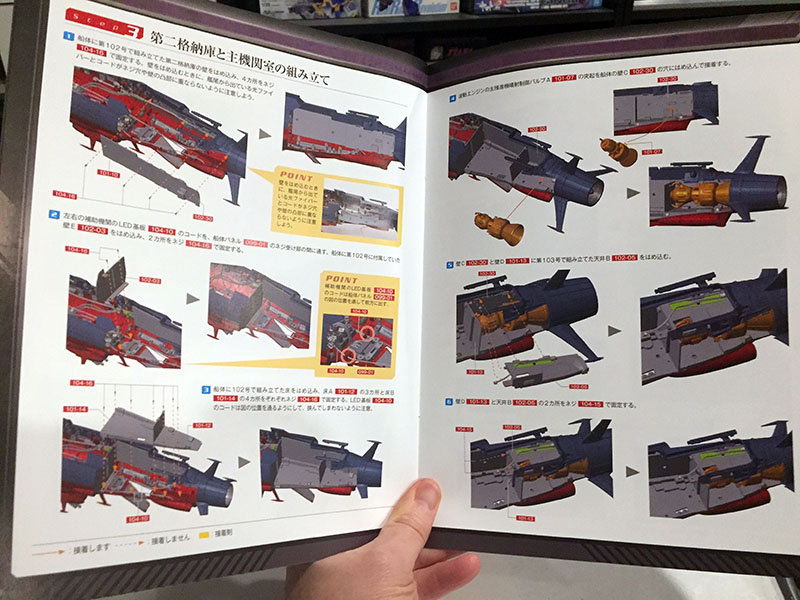
We’ll attach some hull plates and assemble the WM engine.
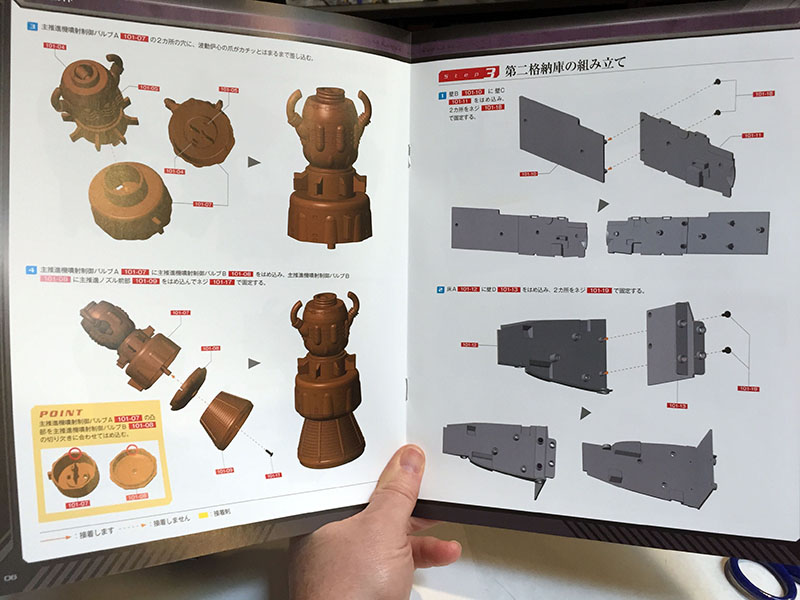
The engine is super easy. Snaps together. And the flywheel turns. After that we’ll start building the bulkheads for the interior block.
When we’re done, we’ll have the back wall and the floor with a divider between compartments.
There we are. Remember, I painted the bulkheads black so they don’t look like the photo.
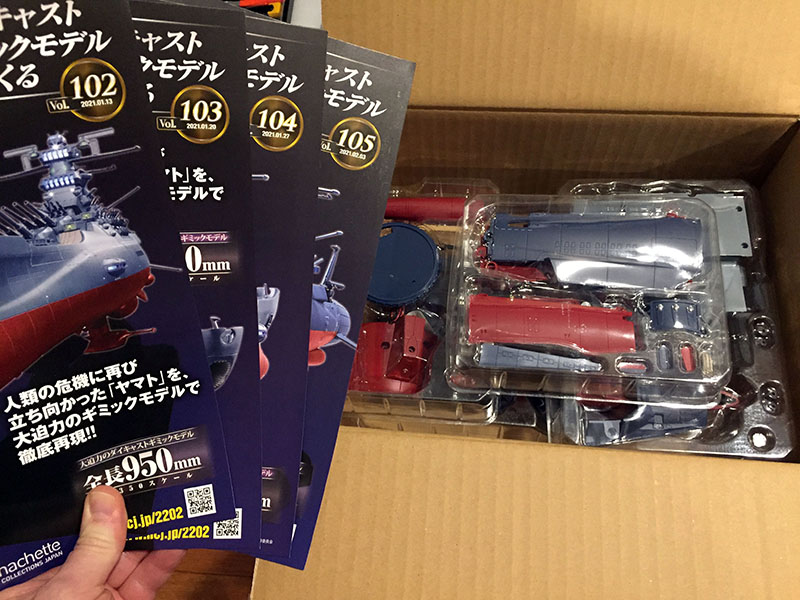
Next box open! More big parts!
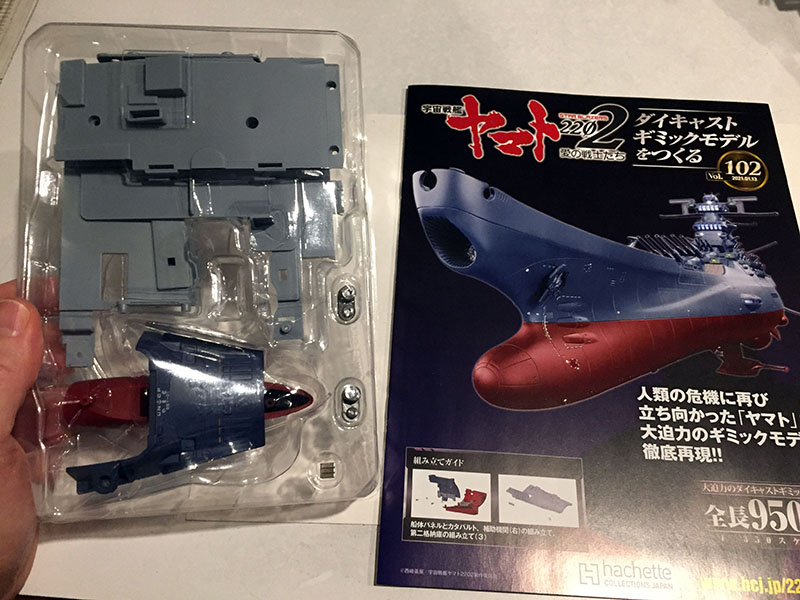
Volume 102 is next.

Aft section interior again.
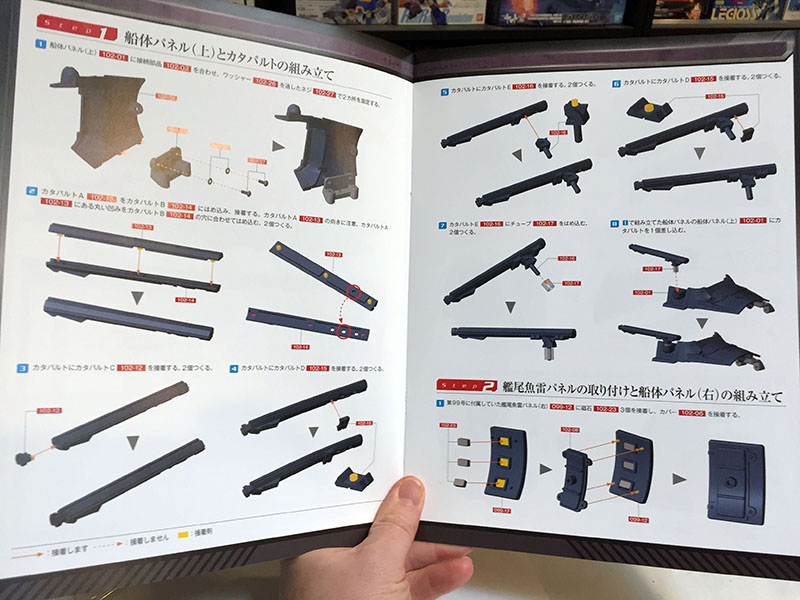
We also have some external parts. The stern deck, the catapults, and the torpedo launcher panel.
Then more hull plates with some fiber optics.
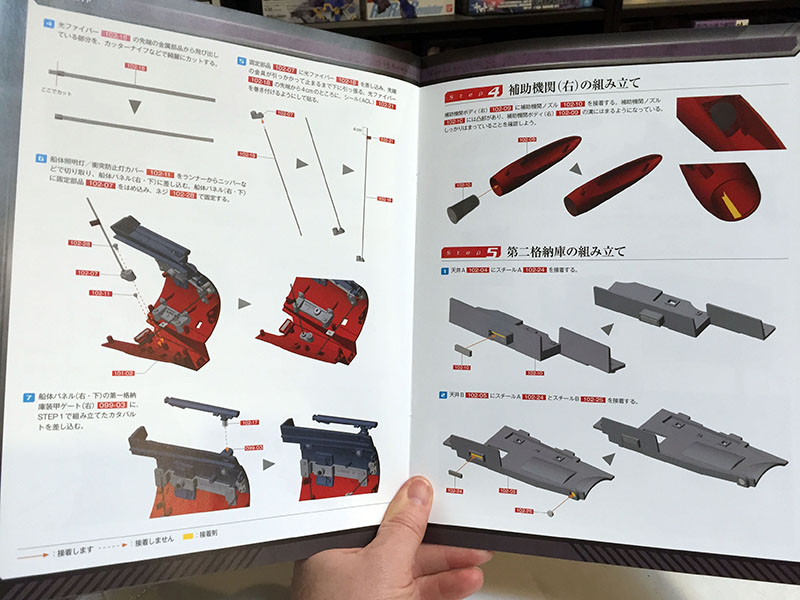
When the hull plates are done, we’ll do the first of the sub-engines and then return to the interior bulkheads.
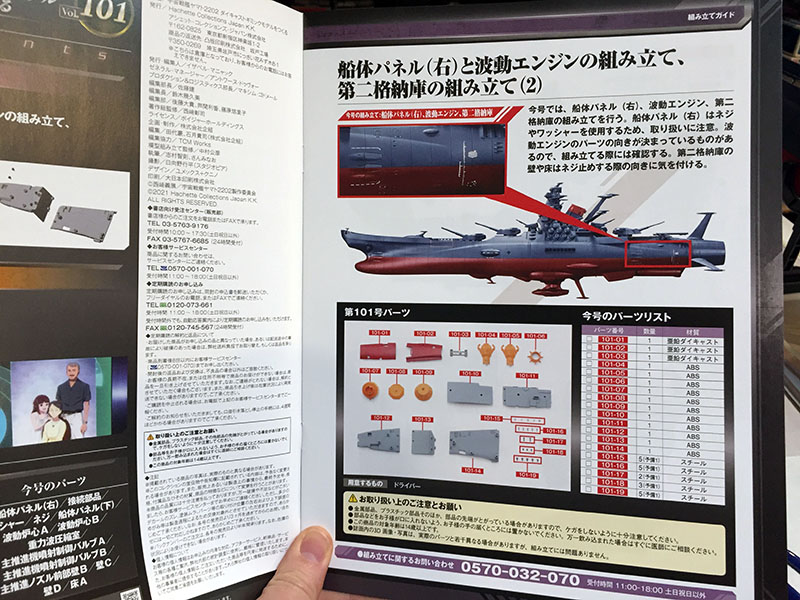
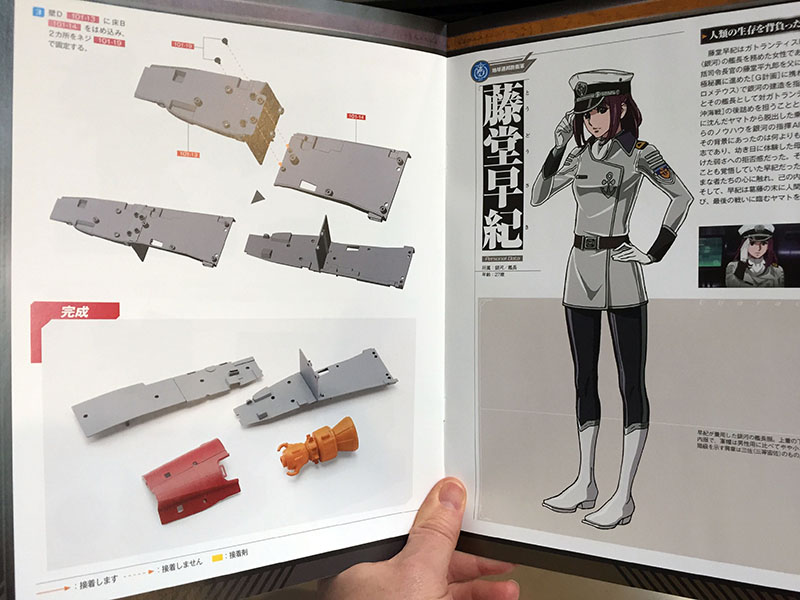
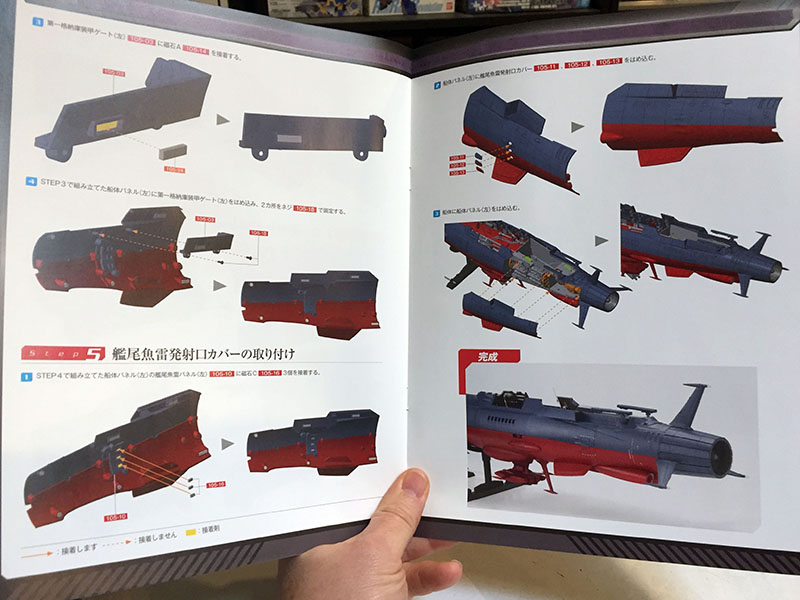
By the way, the page on the right is another “oops, we goofed” message to builders.

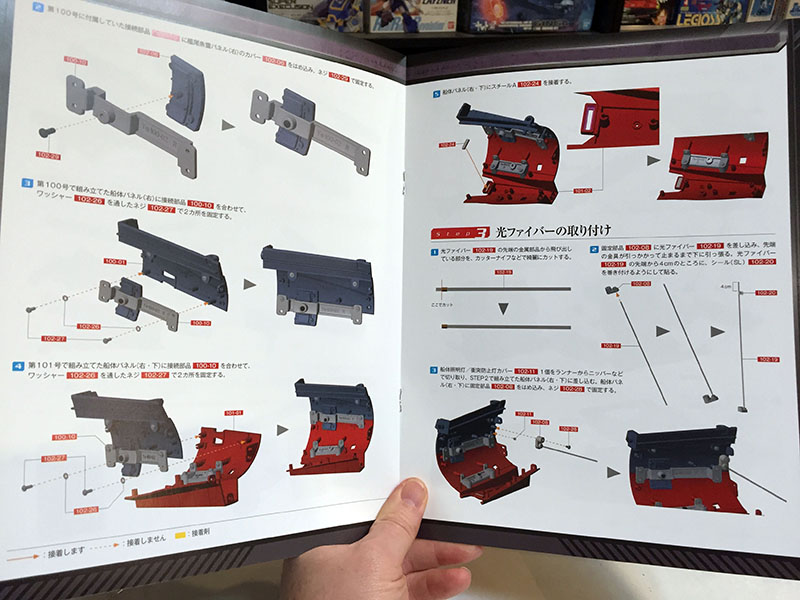
Here’s the back wall for the engine compartment. At left is the version from Vol. 101. At right is the replacement part from Vol. 102. That socket is where you attach the engine. The 101 version has it in the wrong spot. I read up on this ahead of time and avoided using it. At least Hachette got the replacement together in just one week. Last time it took them almost a year.
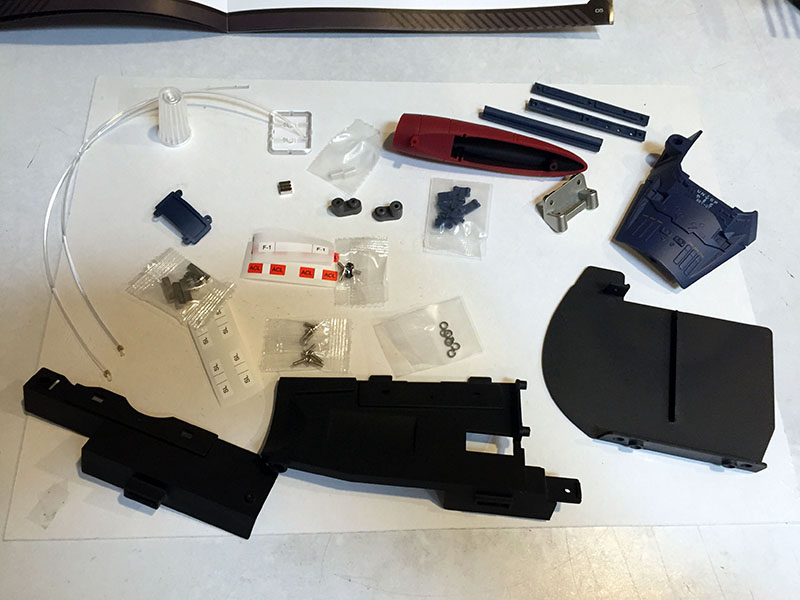
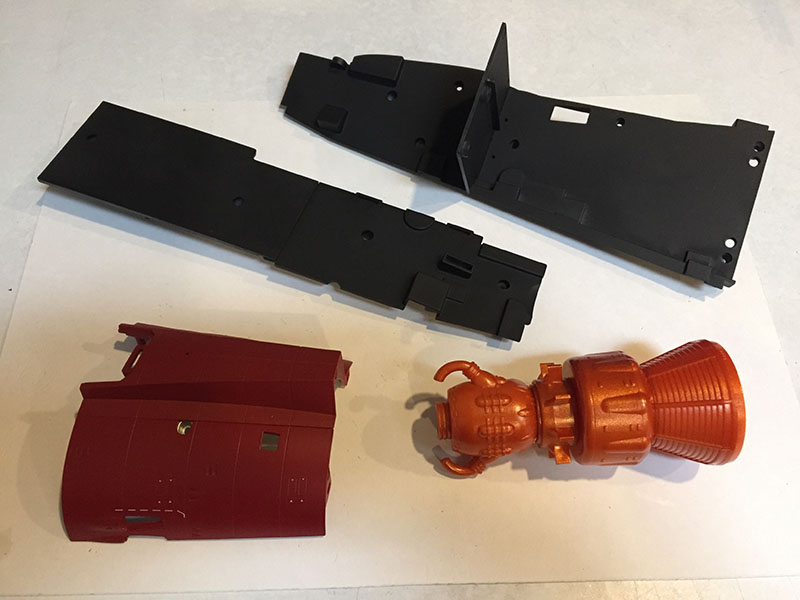
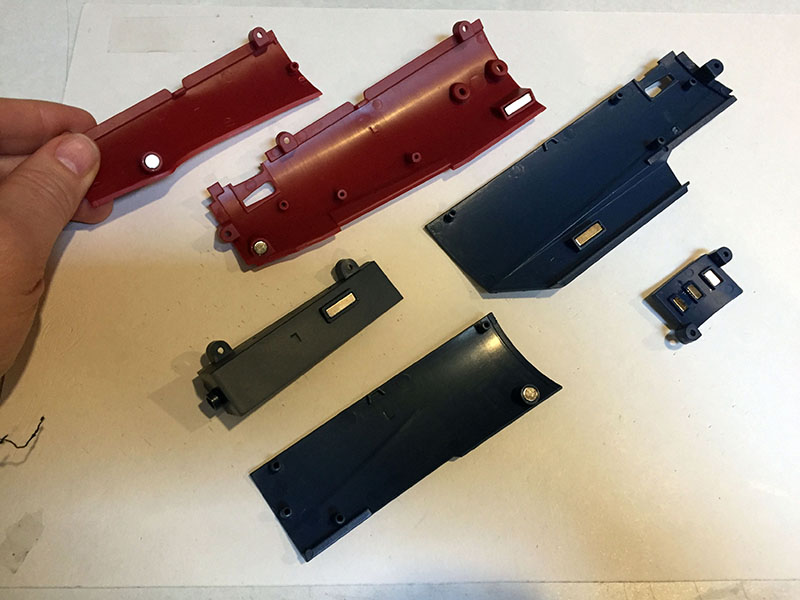
Here are all the parts we’re dealing with in Vol. 102. Some sub-assembly work is required.
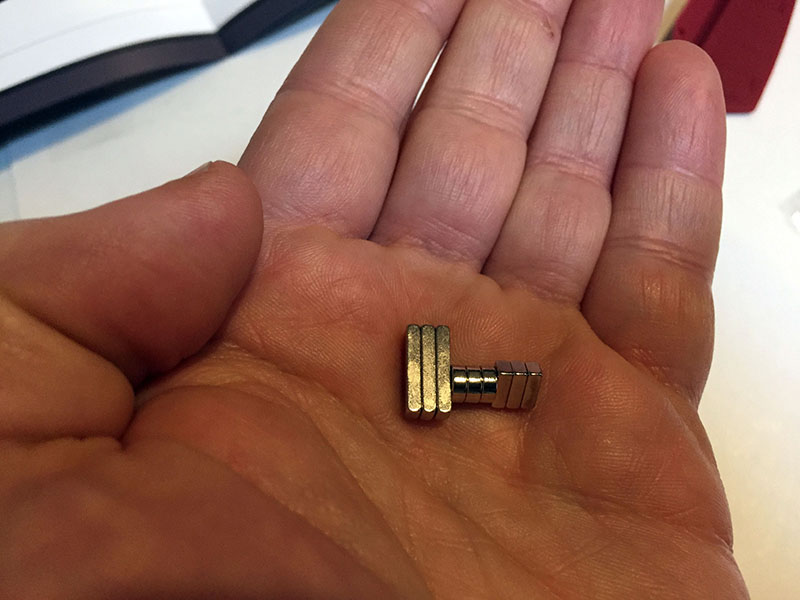
The sub-engine has a clear part inside it and will be lit. The bulkhead gets a metal plate for a magnet to attach. (You’ll see.) The catapults have polycaps on their stems. I haven’t seen a polycap in YEARS. The torpedo launcher plate has three little magnets in it, just like the ones at the bow. And they are DEMONS to work with, constantly leaping out of their sockets to stick together. Superglue is required. Never my preference, because accidents can be catastrophic.
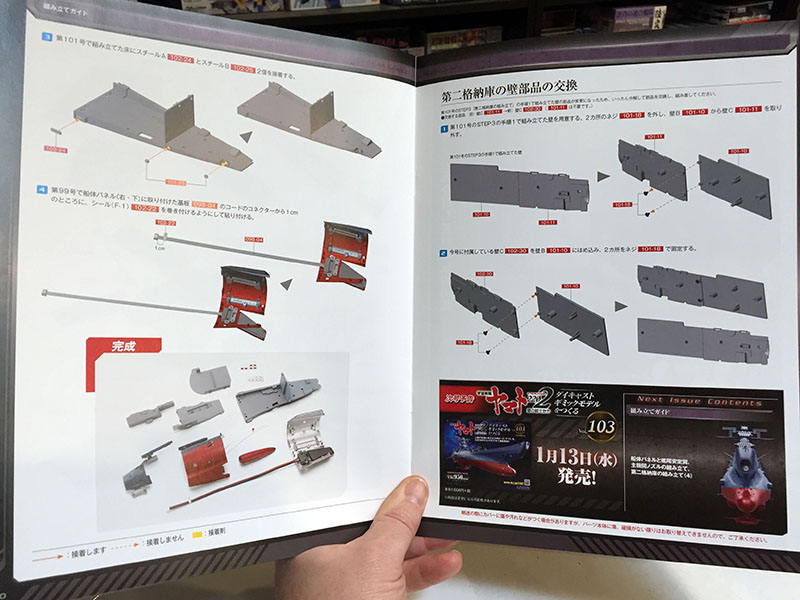
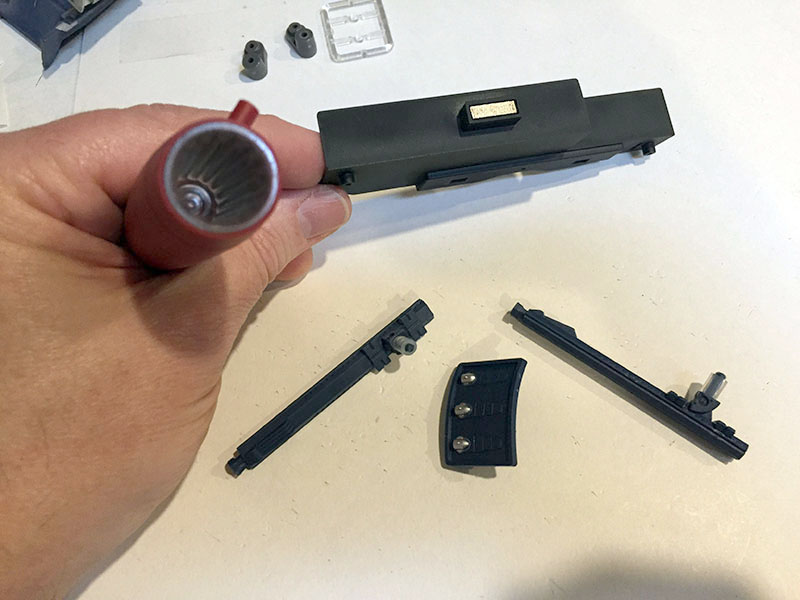
Assembly done. Both catapults are in their sockets, but they’re a bit floppy, so I’ll remove them to keep them out of the way.
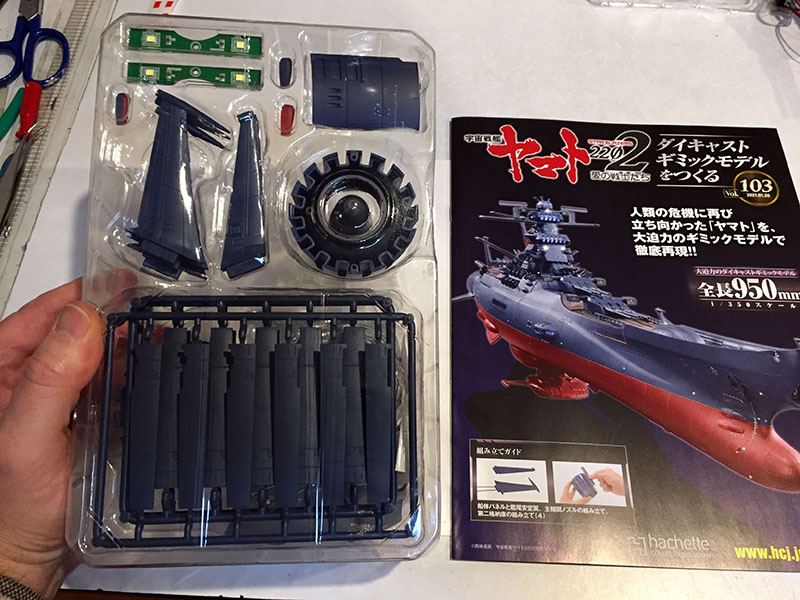
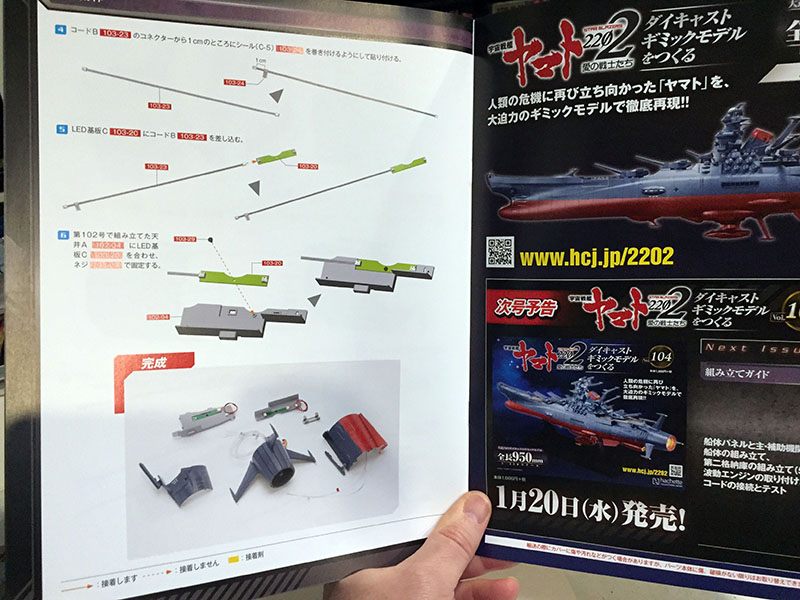
Volume 103 looks interesting.

And it’s JAM-PACKED with parts.
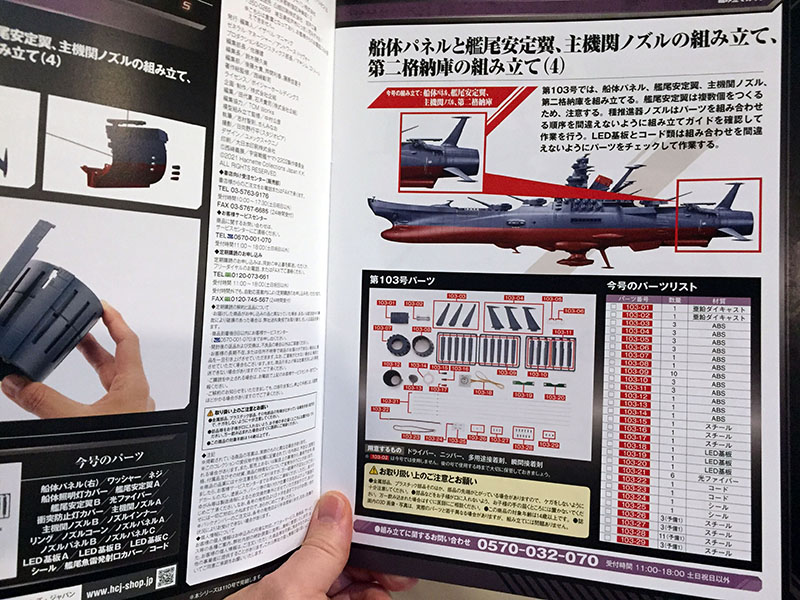
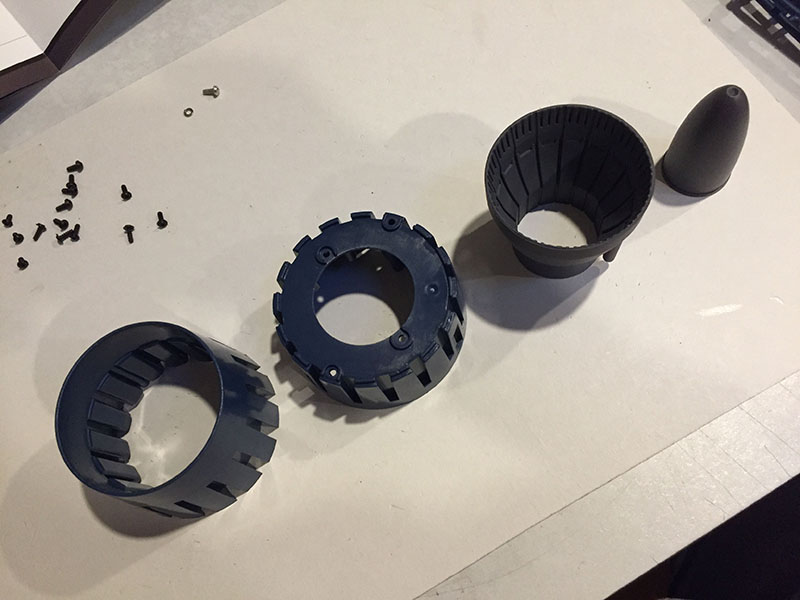
Yep, it’s all for the engine nozzle.
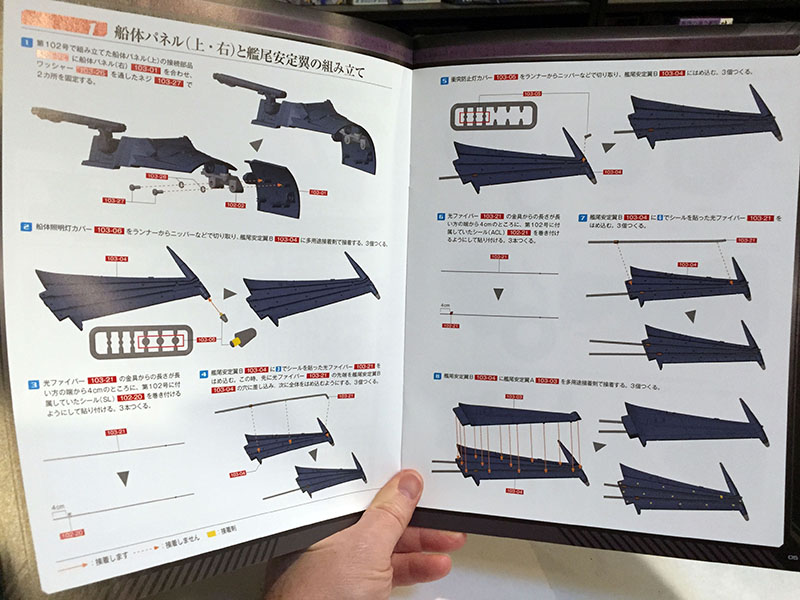
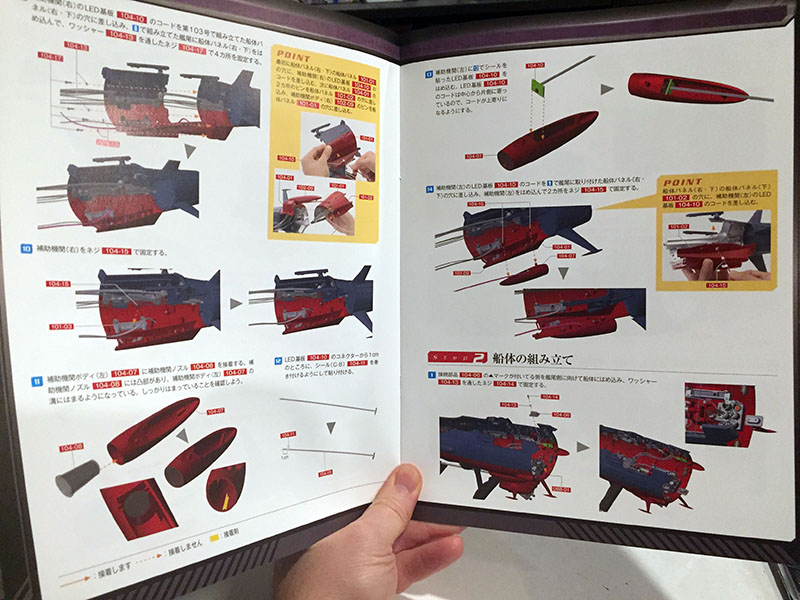
First up, install fiber optics in the three tail fins. Each has two lights. This will be tricky. After fibers have been rolled up for a year or more, they do NOT like to sit obediently in their channels. So they’ll have to be glued down.
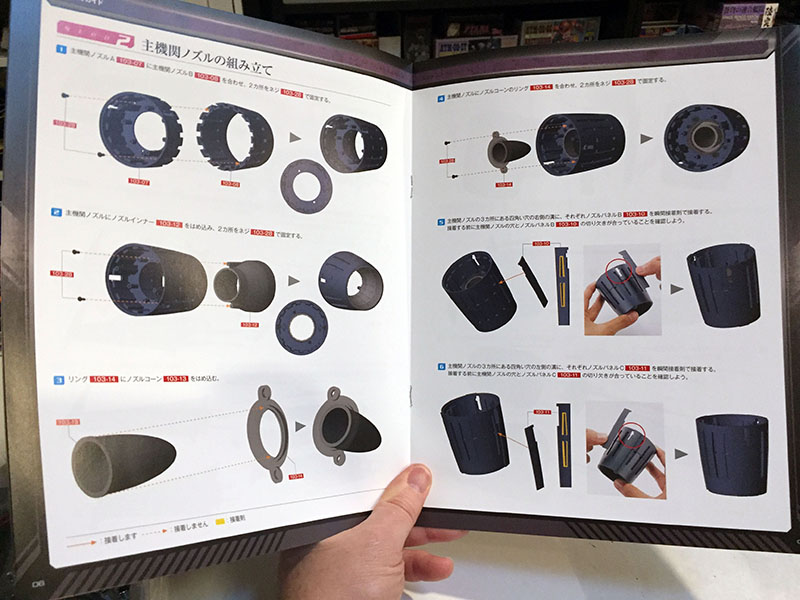
The nozzle has a surprising number of parts to it. In standard model kits, it’s usually just two or three.
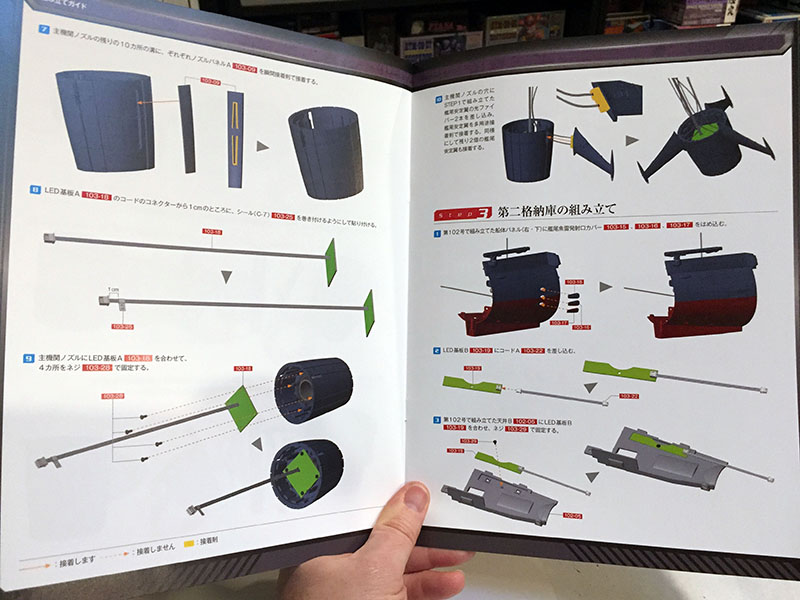
It will be covered with exterior plates, then we’ll install an LED panel. After that, we return to the interior compartments.
There will be two compartments, each with its own light.
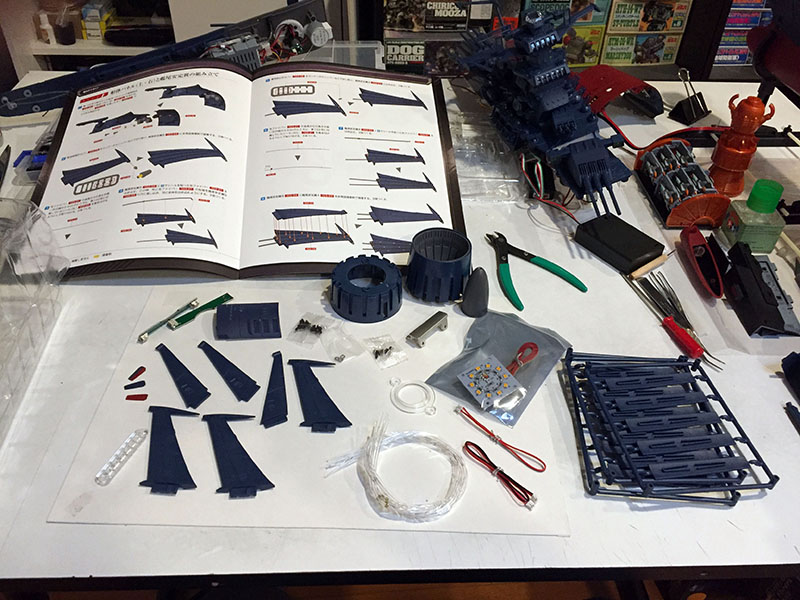
All the parts for 103 laid out.
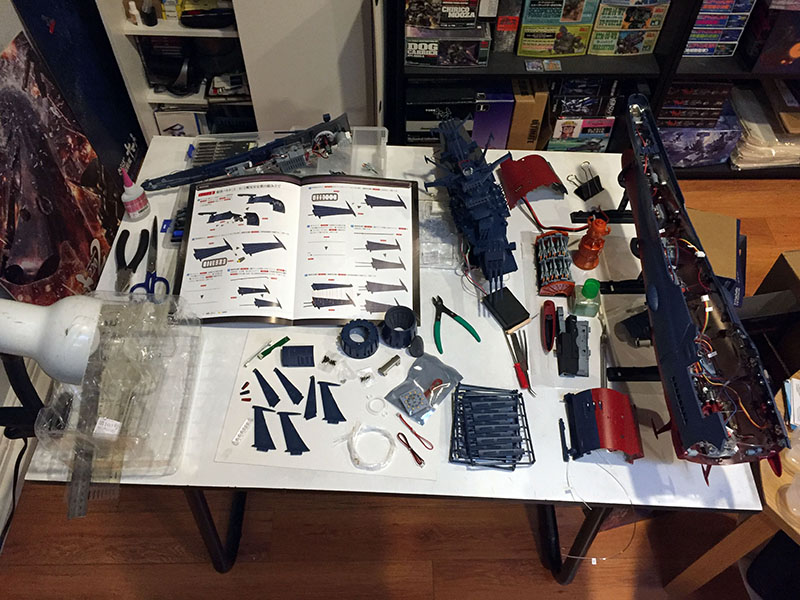
The workspace is getting pretty crowded. It’s like someone at Hachette suddenly realized there are only seven more volumes left.
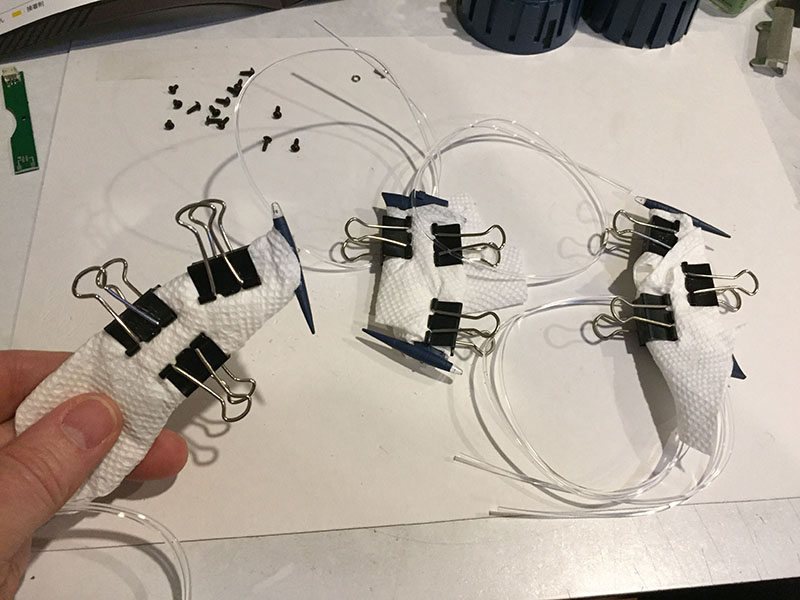
After some struggle, all three tail fins are glued together with two fibers in each one. Wrapping and clipping is a great alternative to squeezing them together by hand while the hours tick by.
The major parts for the engine nozzle.
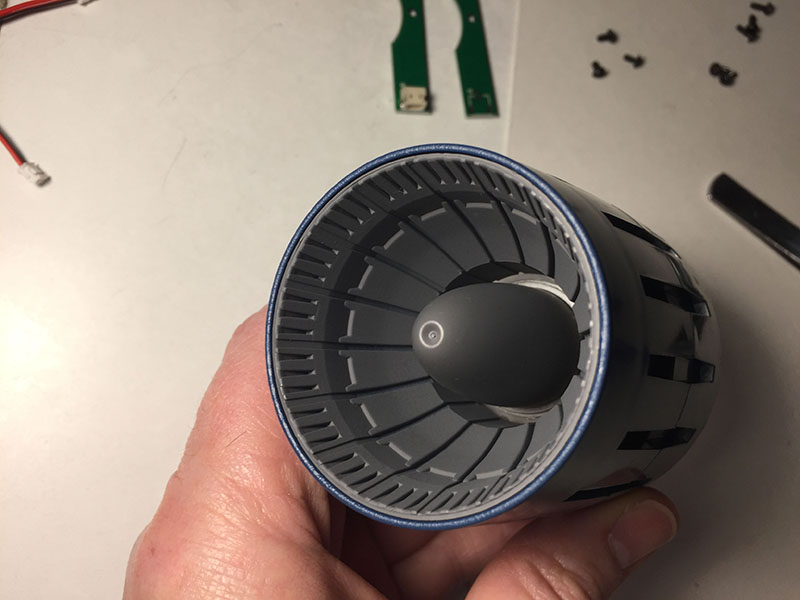
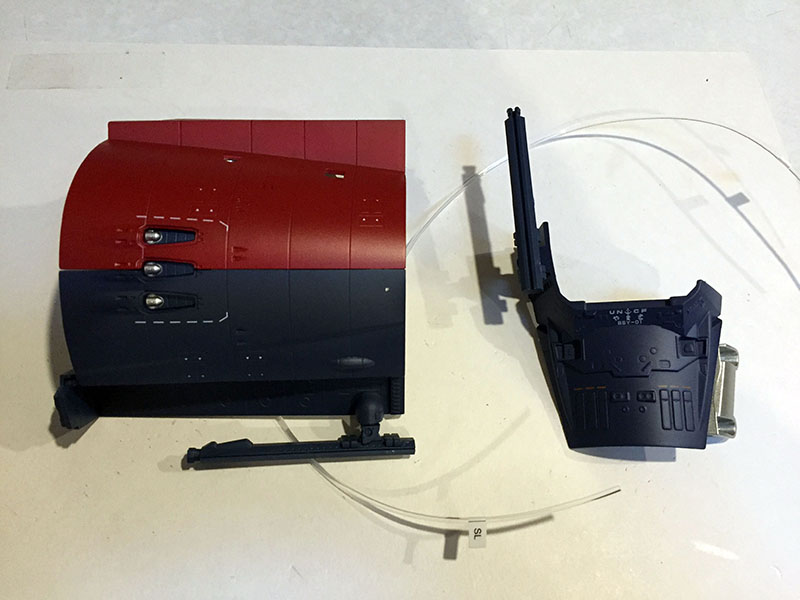
Interior looks great! Lighting will come from around the cone.
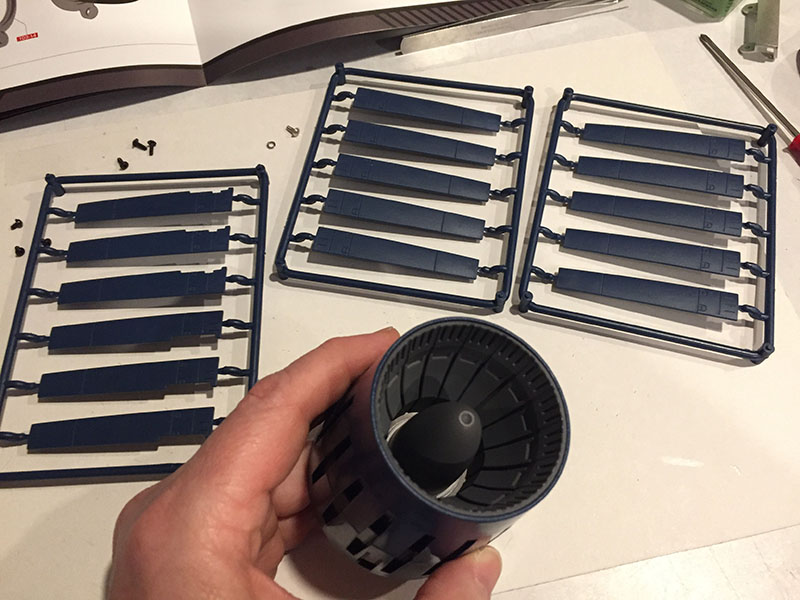
But now I have to trim out and glue on SIXTEEN plates all the way around it.
There. A shame about the trim marks. I don’t have paint to cover them.
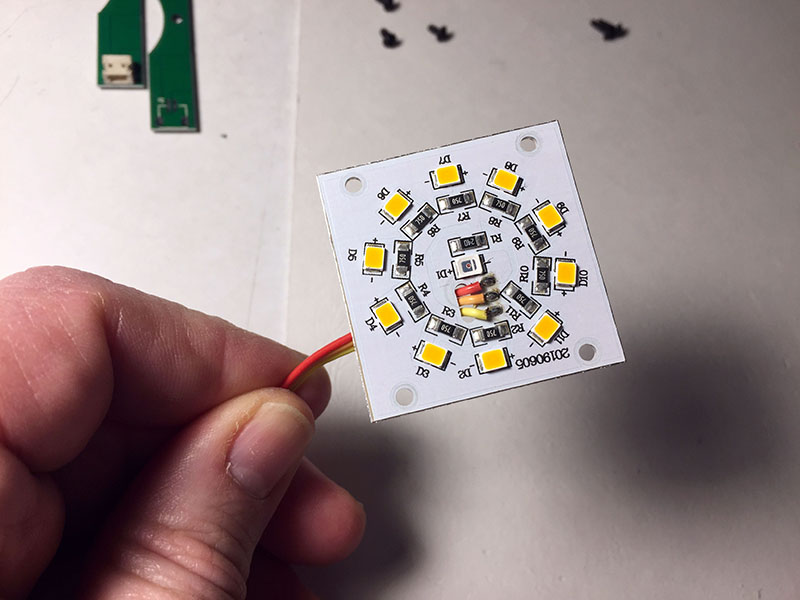
This is the LED panel that will light the main engine.
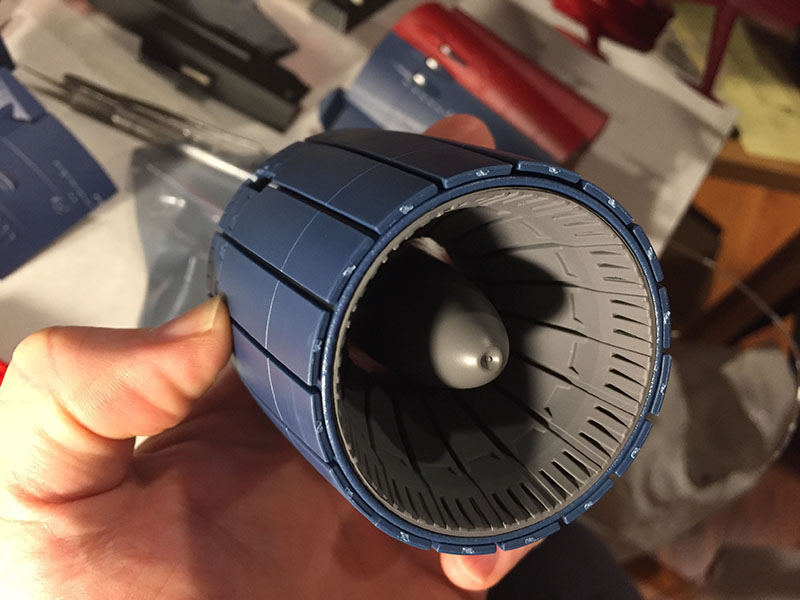
Okay, everything’s done on 103. That was a LOT. Putting the fins on the nozzle required more superglue. It did the job, but gave me the willies.
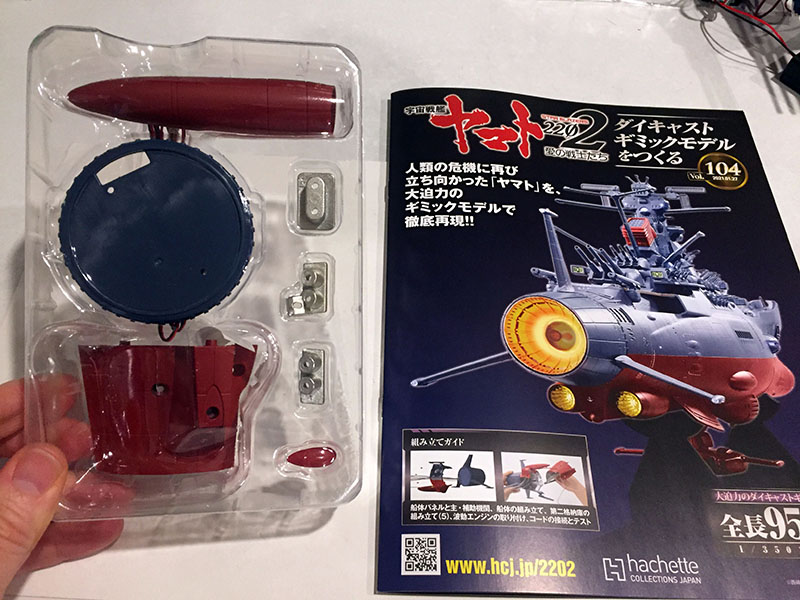
Ready for Volume 104.
Lots to do on the aft section.

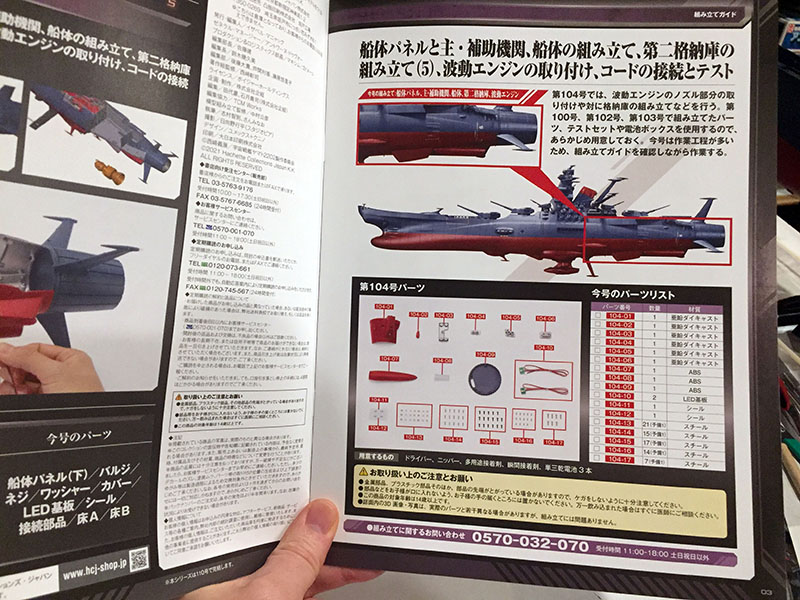
Hull panels, fiber optics, attaching the nozzle to the hull.
We’ll go pretty far this time, putting the entire aft starboard side together.
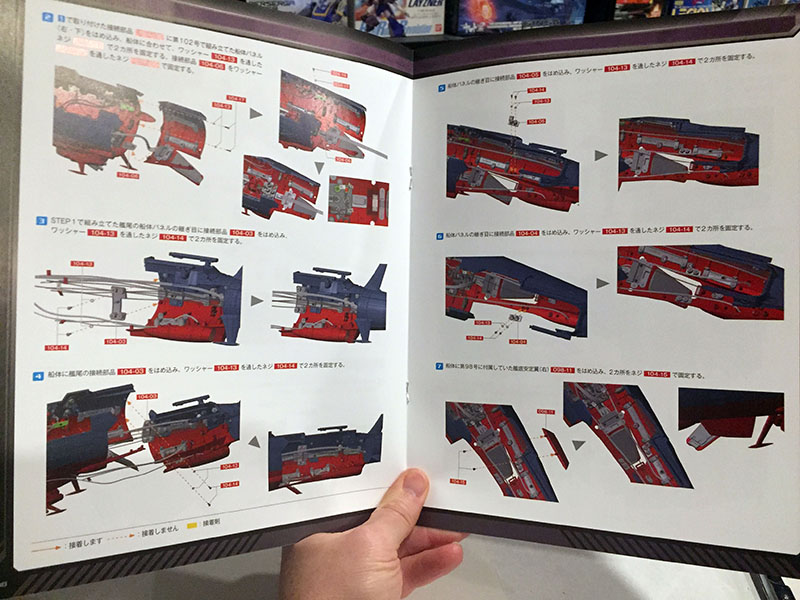
Whoah, we’re sticking the whole thing onto the hull, too! This is a big one!
Then we’ll install the entire interior block and plug in the engine. I’ve got a hinky feeling about this…
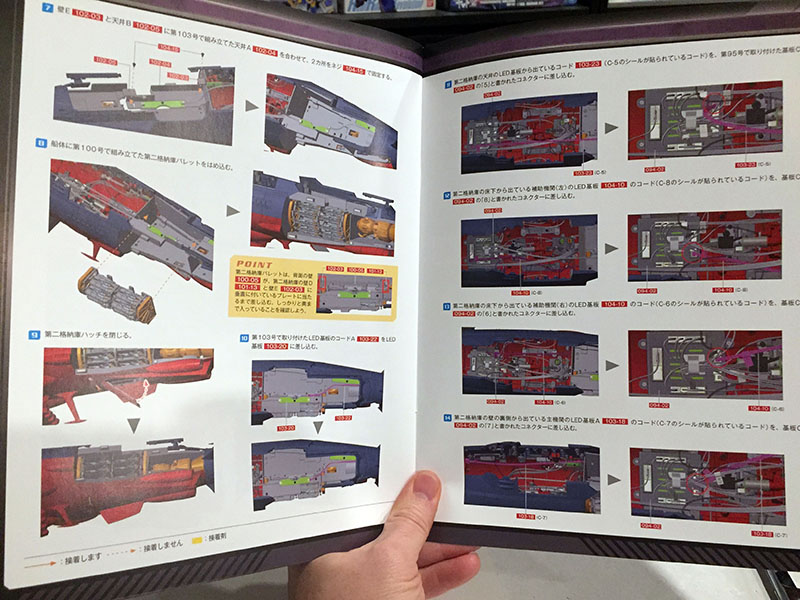
We’ll also be putting in the fighters and doing a WHOLE BUNCH of wire connecting. There are several wires ready for their sockets in the aft area.
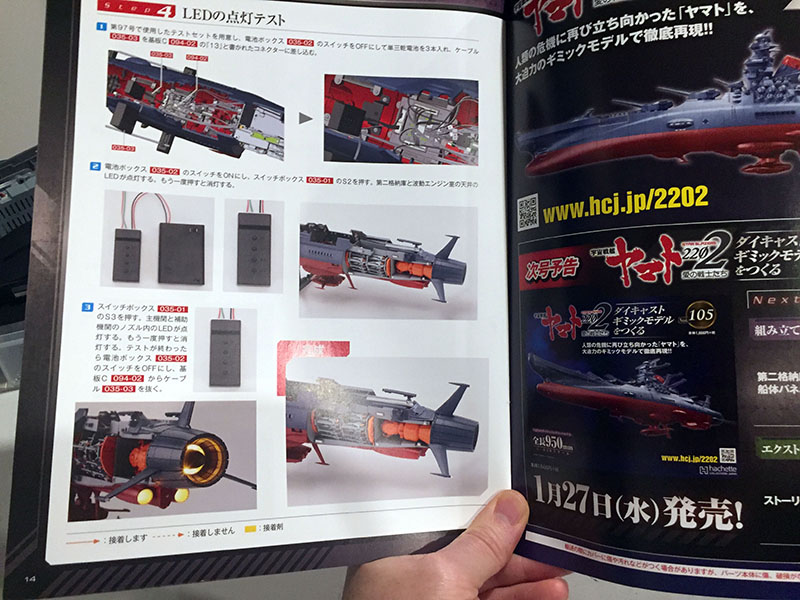
At the end of this, we’ll get out the battery pack again and do a lighting test. But there’s nothing here about capping and plugging the fibers in the aft section. Somehow, they will be jammed under and behind the interior block, then poke out the forward end where it’s already very thick with stuff. I can see trouble coming a mile away here.

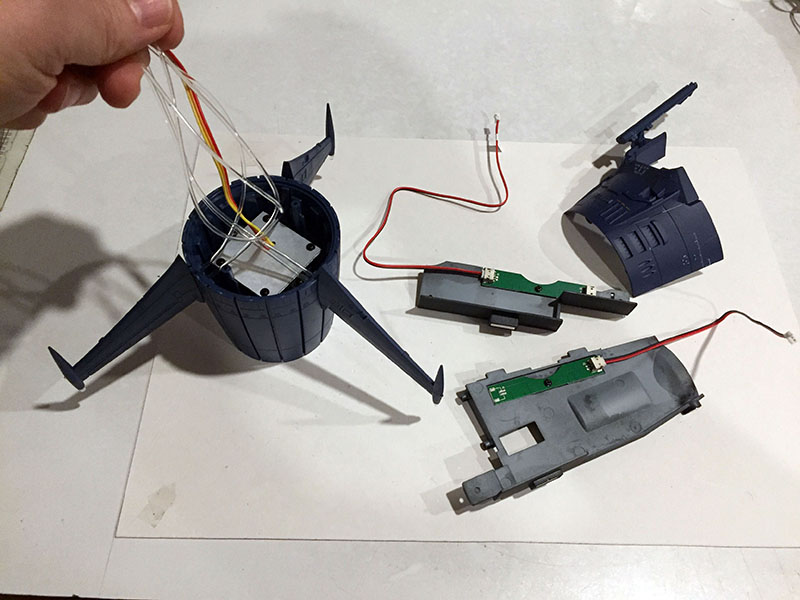
Well, let’s get started. Here’s a hull section subassembly…
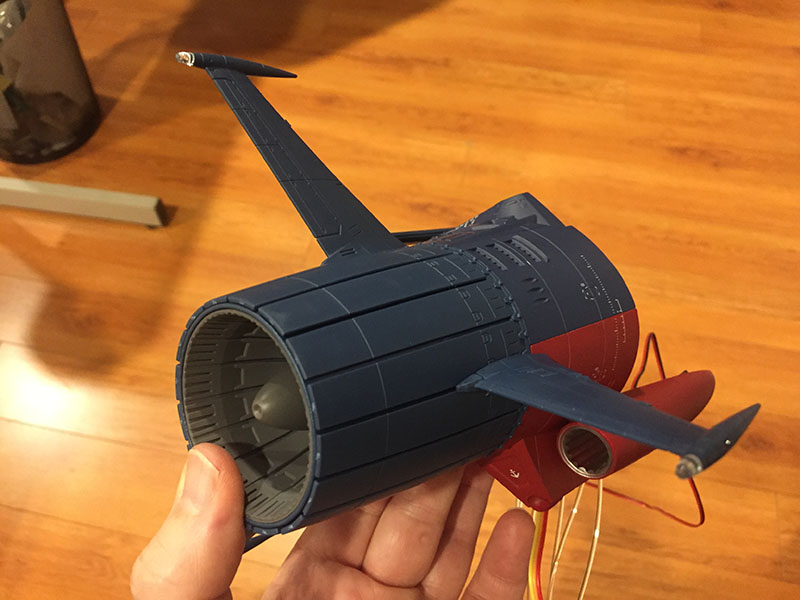
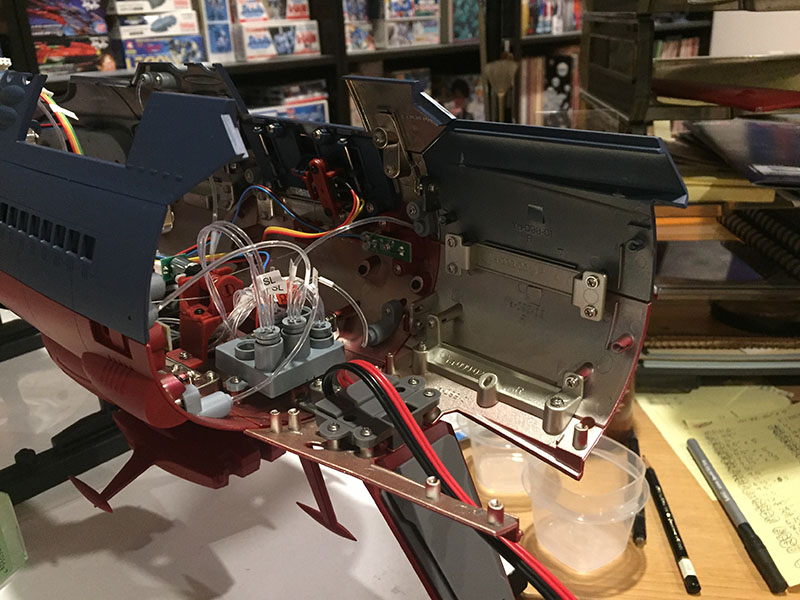
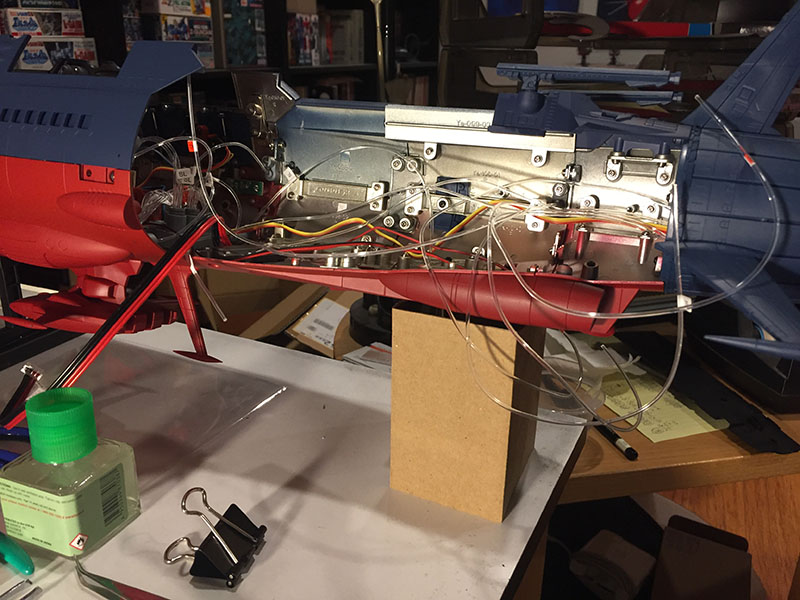
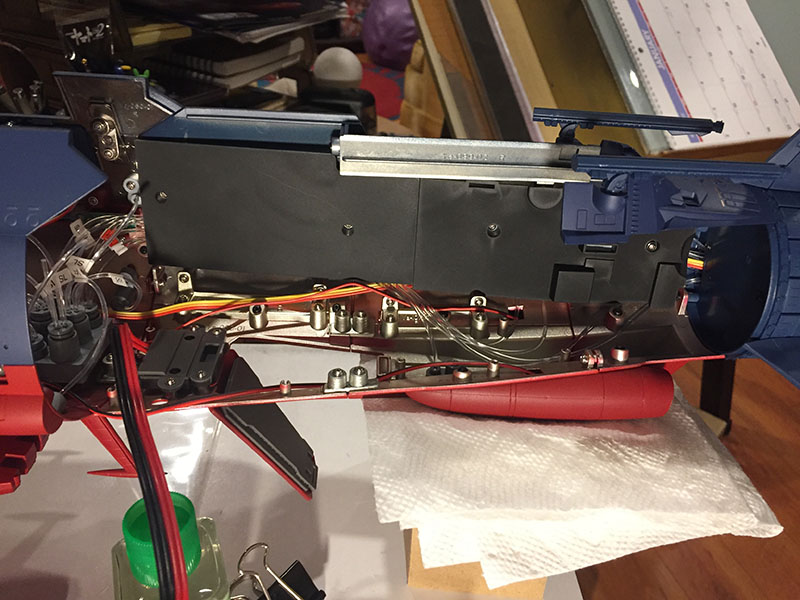
And there’s the main engine nozzle attached…
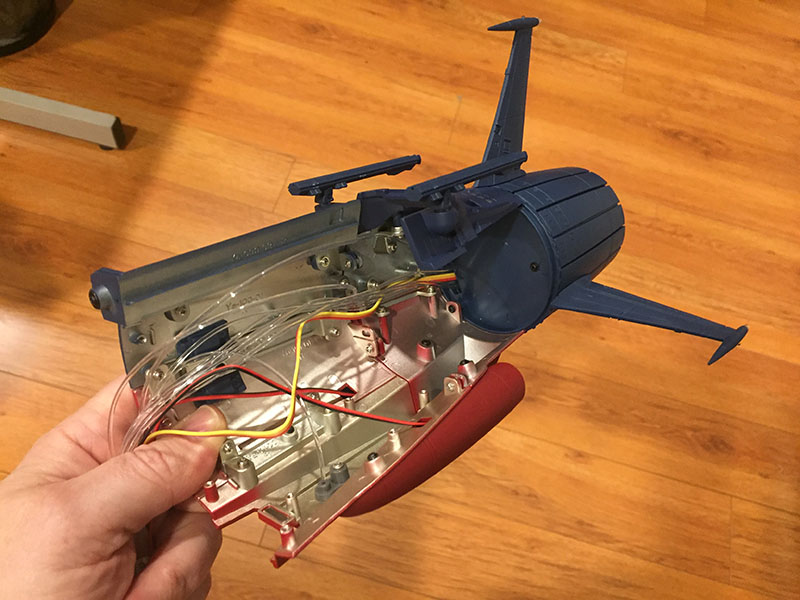
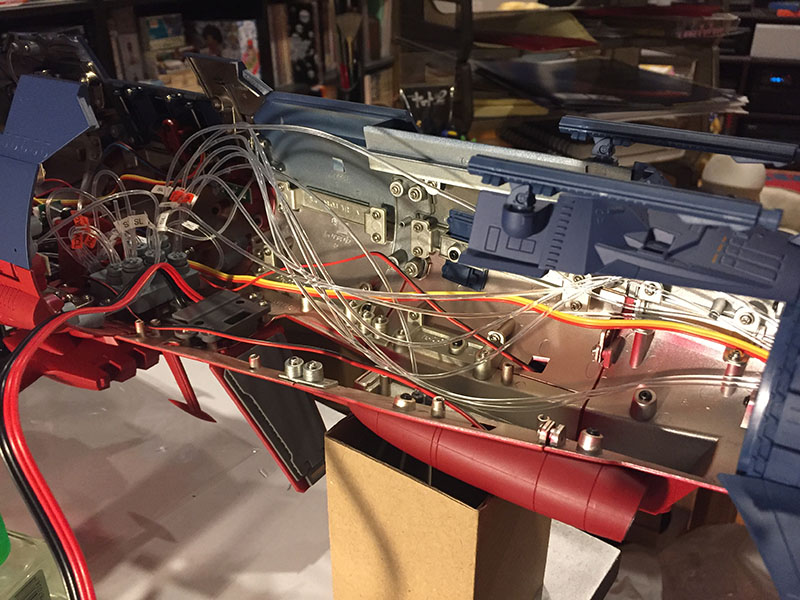
…and this is what it looks like from the inside. As you can see, there’s a lot of spaghetti to deal with.
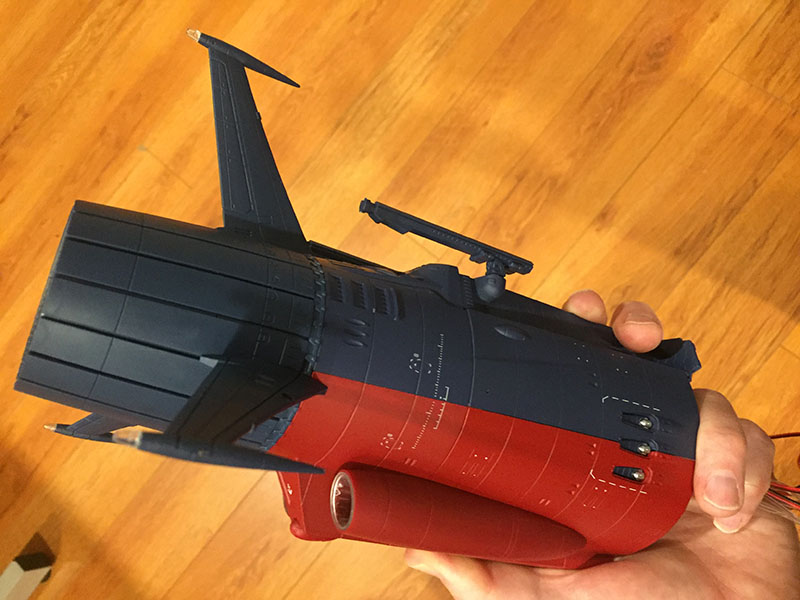
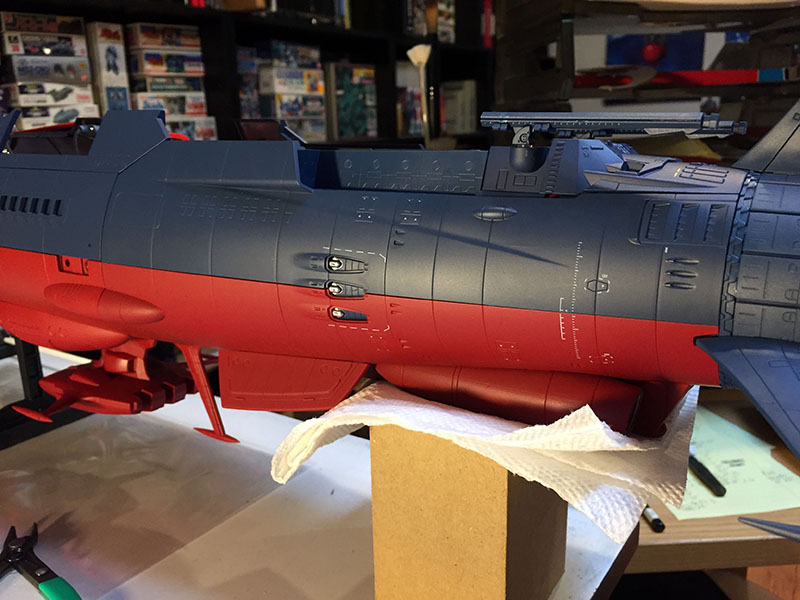
All right, the whole starboard aft hull is done.
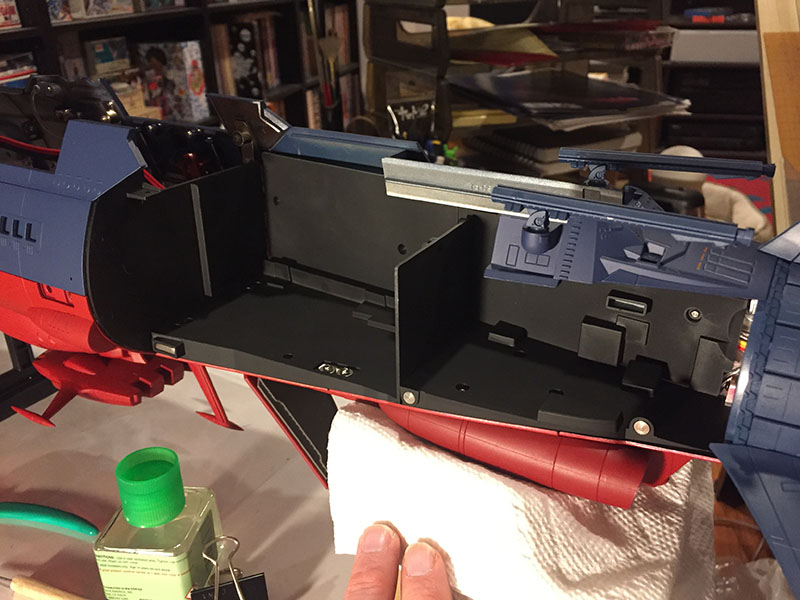
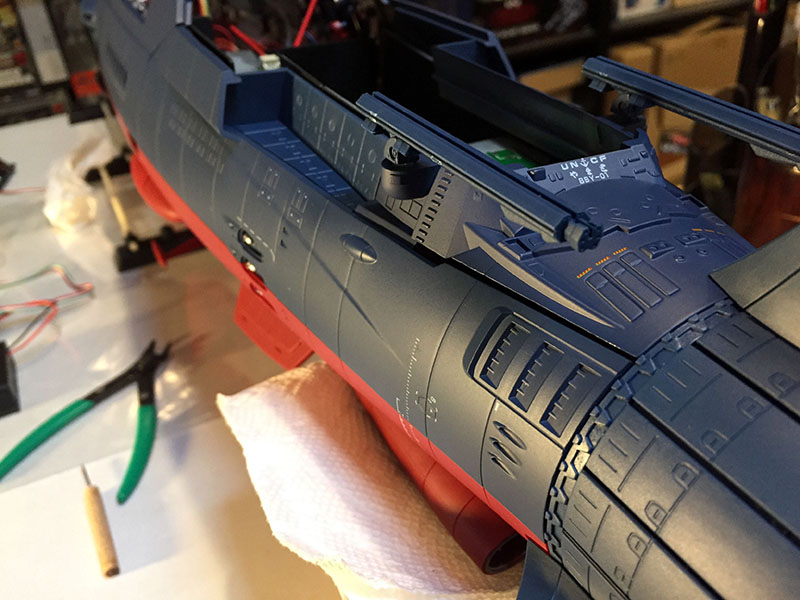
I’ve just added another chunk to the hull. This chunk contains the hangar door (open at the bottom).
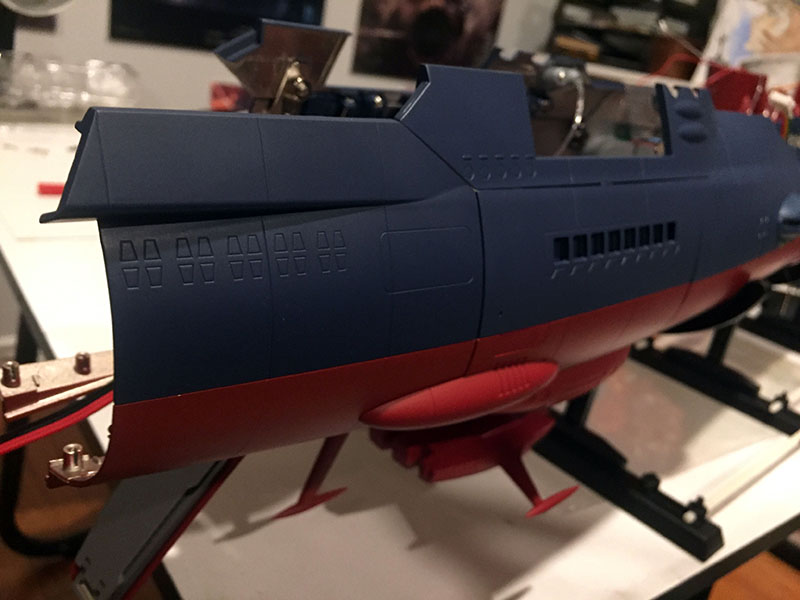
Here it is from the opposite side.
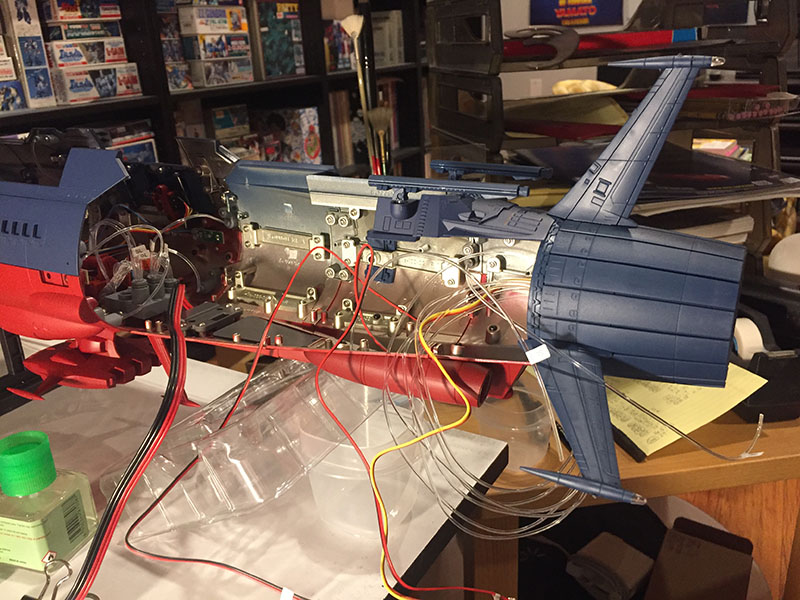
And now the rest of the aft hull is attached. As soon as I put it on, the weight shifted and the whole hull started tipping backward. The instructions said nothing about this. I had to grab a few things before I found a combo that would hold it all up. That was a bit scary.
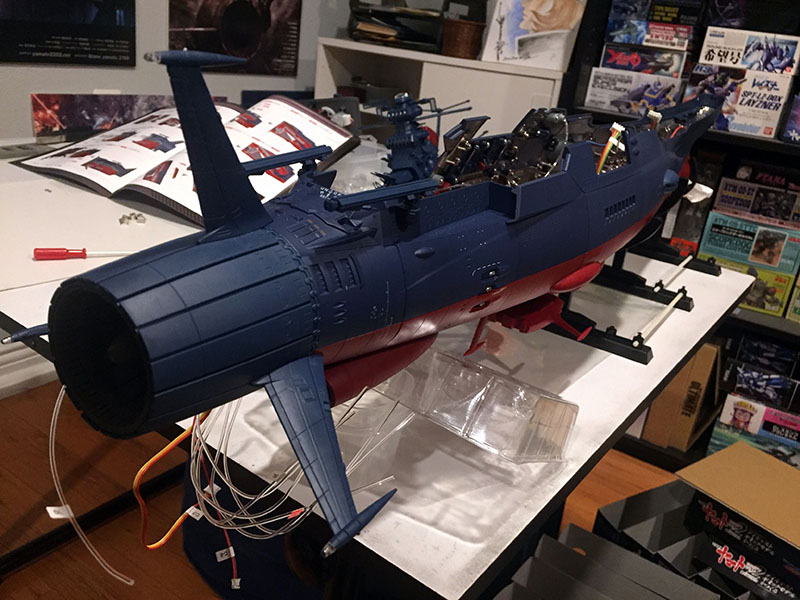
View from the opposite side. For the first time, I can see the entire hull from bow to stern, and it’s ENORMOUS. 37.25 inches long.
Lower fin added. And now I have to grapple with the interior. If I follow the instructions as is, I just KNOW I’m in for another nightmare when it comes time to cap and plug all those fibers. So screw it. I’m doing it NOW.
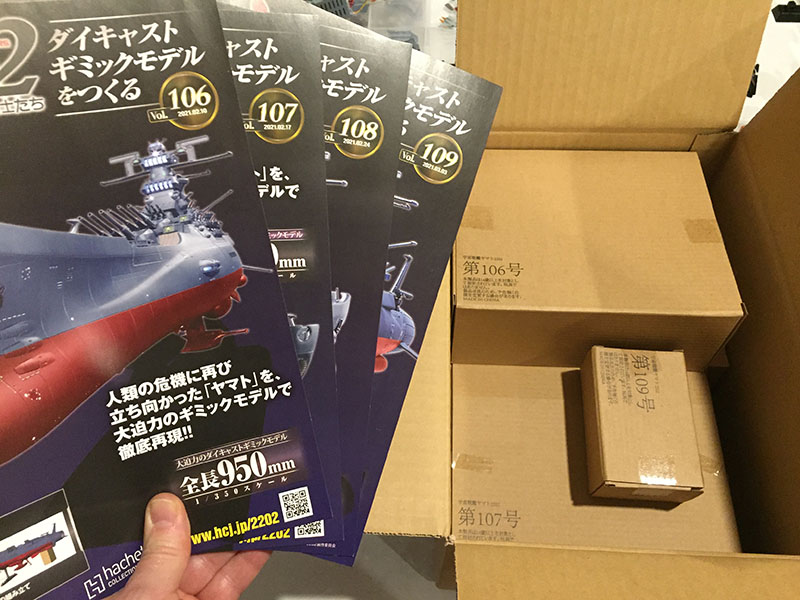
That means I have to open the next box and scan forward to see what goes where.
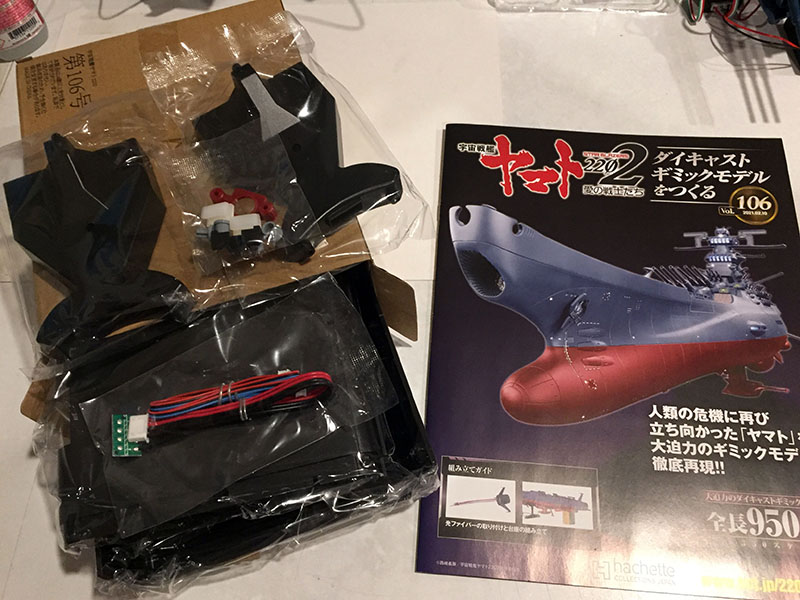
I opened up 106 in advance. It’s got parts for the stand and – ahoy there – caps for those fiber optics.
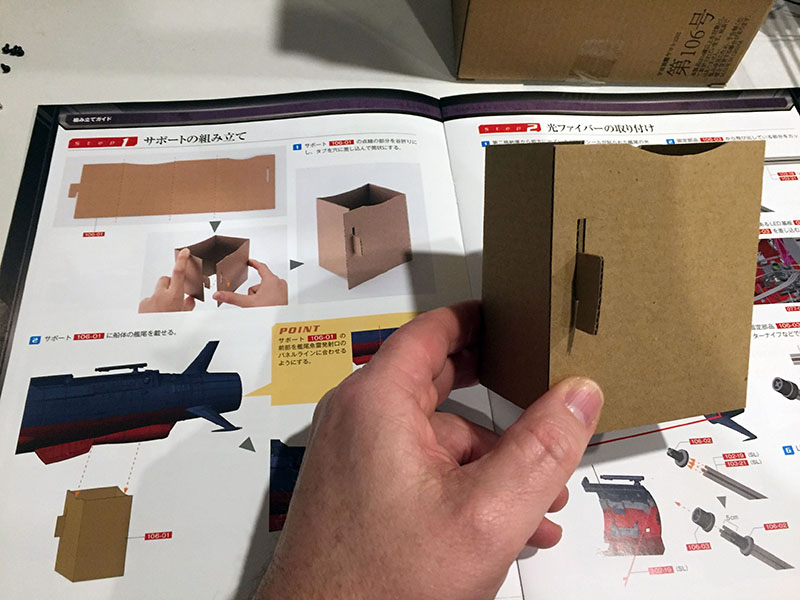
Oh, and look at this! A cardboard box to serve as a temporary stand for the stern section. Why the HELL did they wait until Vol. 106 to issue that??? I’m takin’ it now, thank you.
There. 100% improvement.
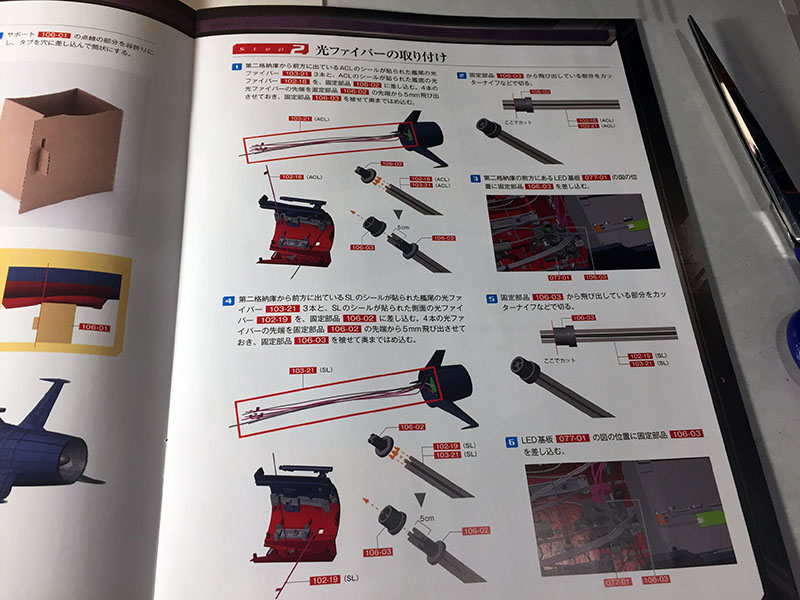
Fiber instructions in Vol. 106. This tells me how to group them and which LED bus they’ll plug into.
A while later (and a lot of struggle) I’ve got them capped and plugged. There’s more room to work with than in previous operations, but the jostling still knocked loose some previous fibers. It got pretty hairy.
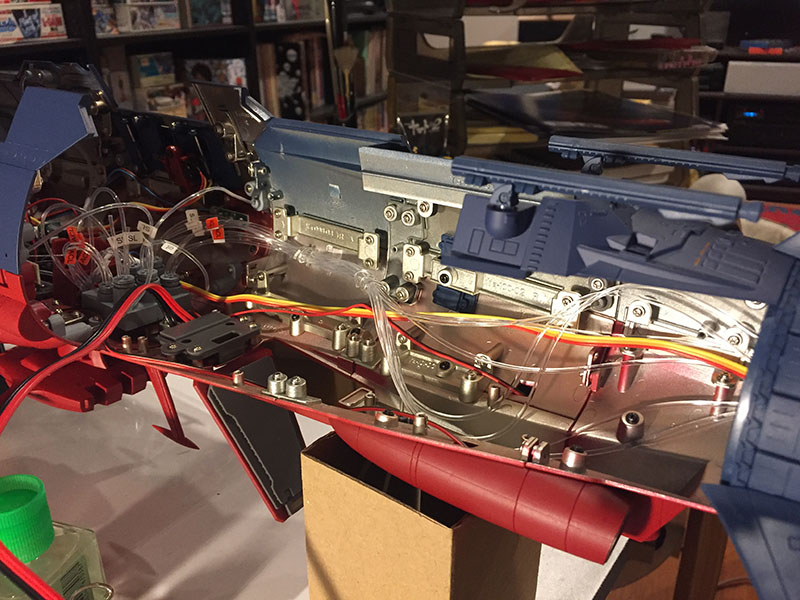
Next step is to put the first part of the interior bulkhead in place, which will cover up the spaghetti. I tried several times, ultimately deciding to lash them together. There was no other way to control where they went.
After MORE struggle, I got the bulkhead on. This, by far, was the hardest thing I’ve grappled with since the bridge tower. Better be worth it.
More interior panels in place. My decision to paint these black was definitely the right one.
After a LOT more fighting (which involved SHAVING OFF some plastic that wouldn’t fit where it was supposed to), everything is where it goes. The fighter palettes just slide in and out.
And now the punch line. Ready?
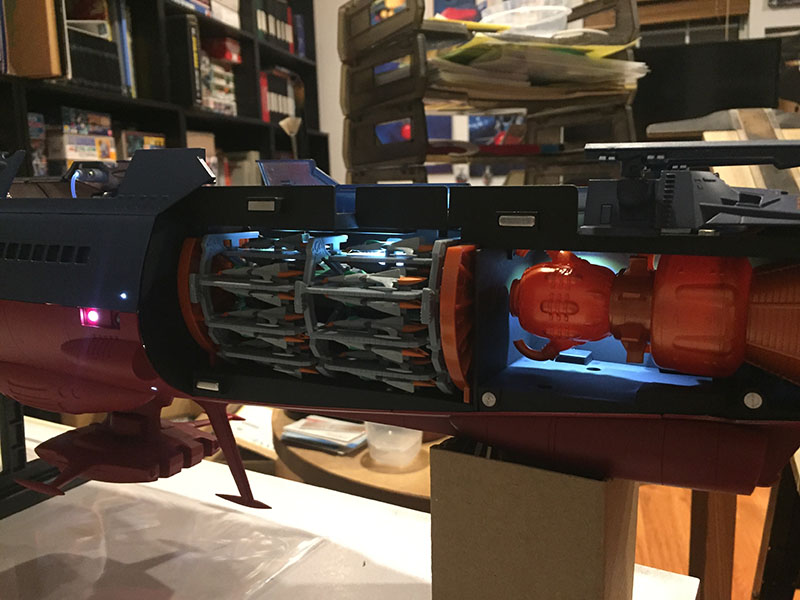
Here’s the view from above. See that big empty cavity? NOTHING GOES THERE. The wires and fibers could have VERY EASILY gone through there and still left plenty of room for mechanics that will dangle down from the upper deck. This discovery made me really, REALLY angry. This was just HORRIBLE planning. All that stress and struggle could have been SO easily avoided.
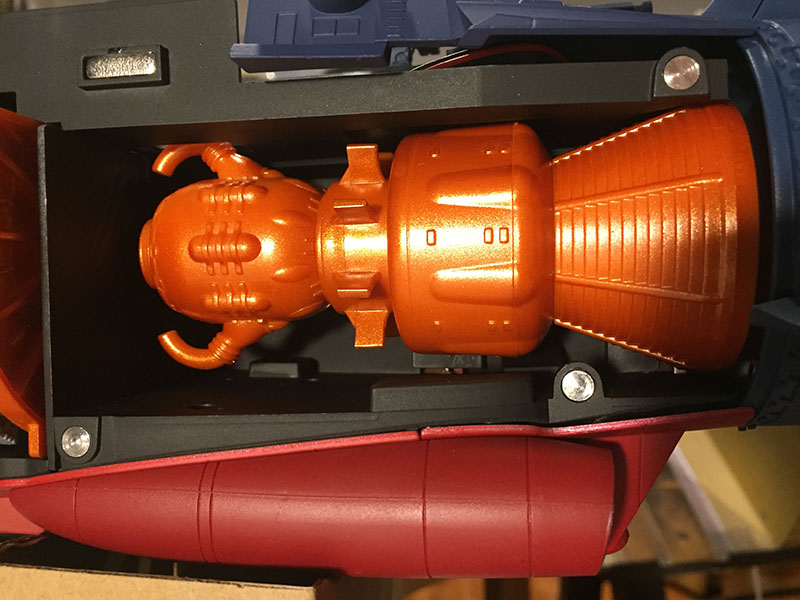
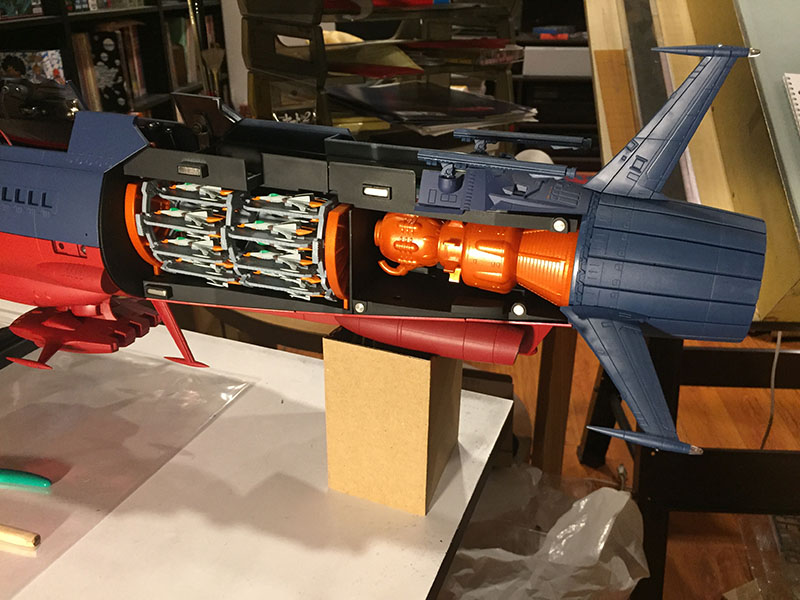
Anyway, there’s the engine. It looks better in a metallic orange than the dayglow orange plastic they gave me. But it still looks pretty cheap. Those two pipes are just hanging in midair. It feels like a part is missing at the front.
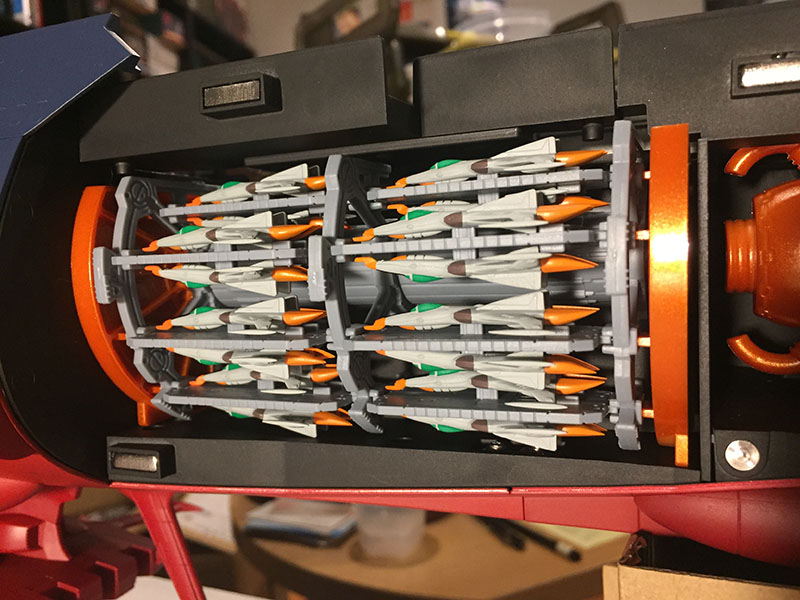
Fighter palettes look good. All they do is sit there, though. Oh, and see the metal bits above and below? Those are attachment points for magnets. It will all make sense soon. There’s a lighting test to do, then we can finish this wretched volume.
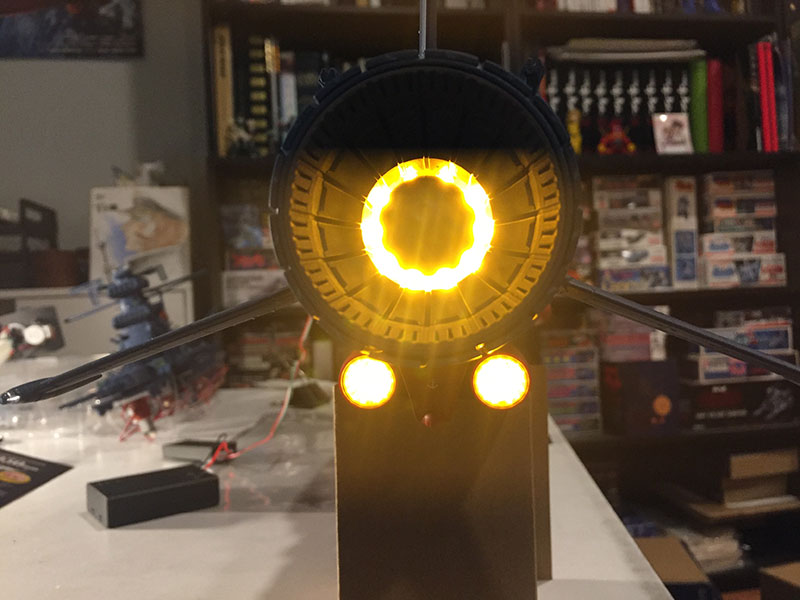
Engines look GREAT.
Interior compartments light up just fine. It’s 2am, and all the fight’s gone out of me. We’ll bring this whole thing to a finish tomorrow.
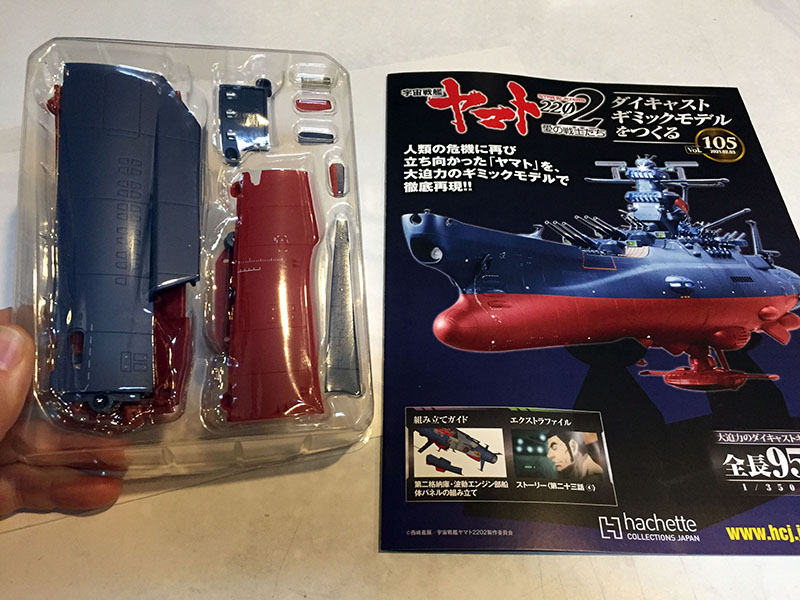
The morning of the final day of construction! Let’s get into Volume 105.
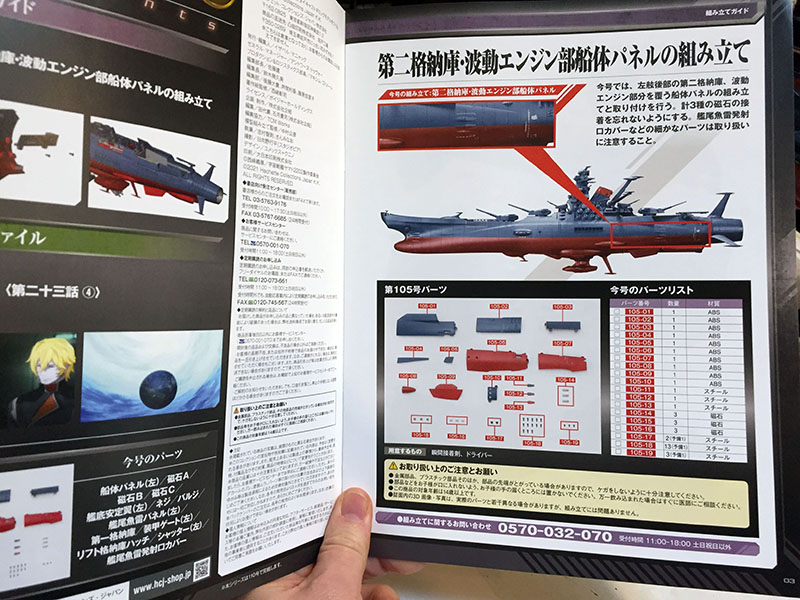
With this one, we’ll finish out the aft section.
All hull panels this time. With MAGNETS. A whole BUNCH of ’em.
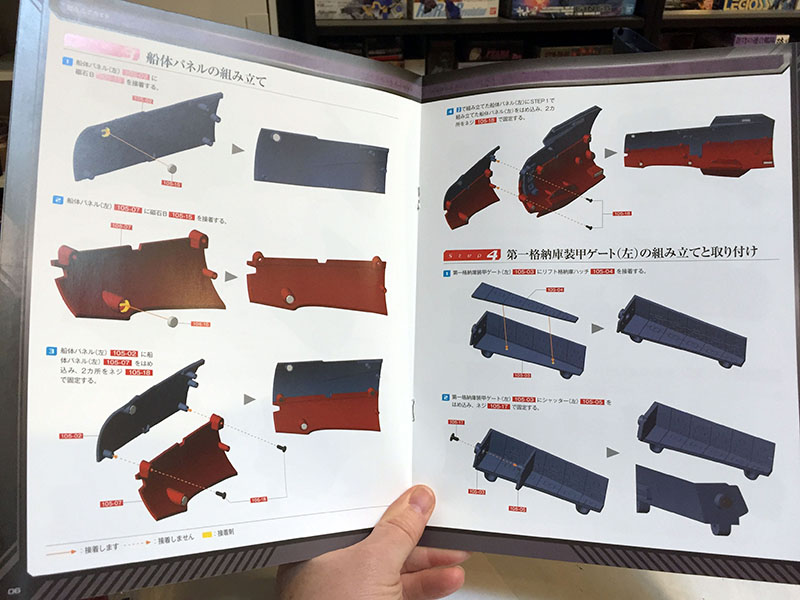
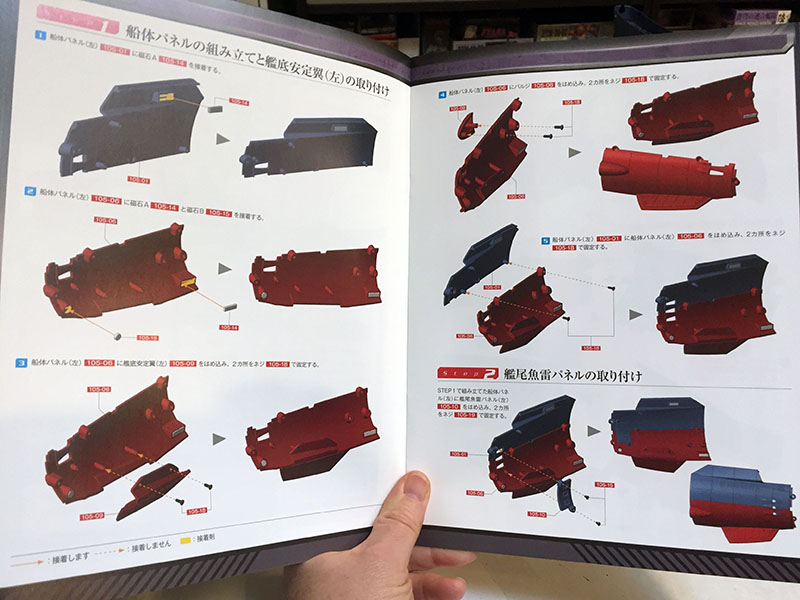
Several parts to this hull section.
When it’s done, it will completely cover the interior compartments.
MAGNETS! HOW do they WORK????
And now they’re all glued in. Superglue. No other option. That stuff is terrifying.
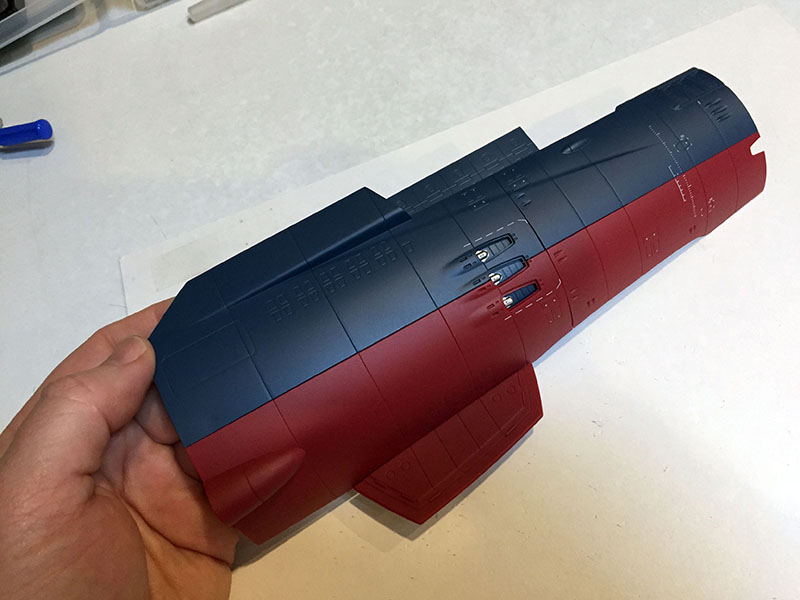
And DONE. That’s the quickest a section of this size ever came together. However, it’s all plastic where the rest of the hull is metal. Probably to keep the weight down. BTW, those three torpedo tubes each have a small magnet behind them.

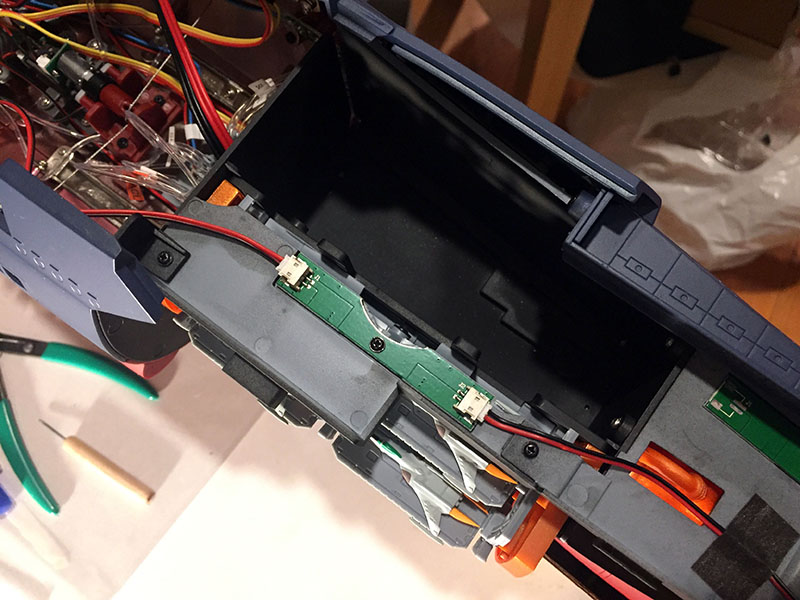
Here’s the inside. You can clearly see the three small magnets. The tube covers are metal, and will stick in place. (Just like at the bow.)
The whole thing snaps right on. Perfect.
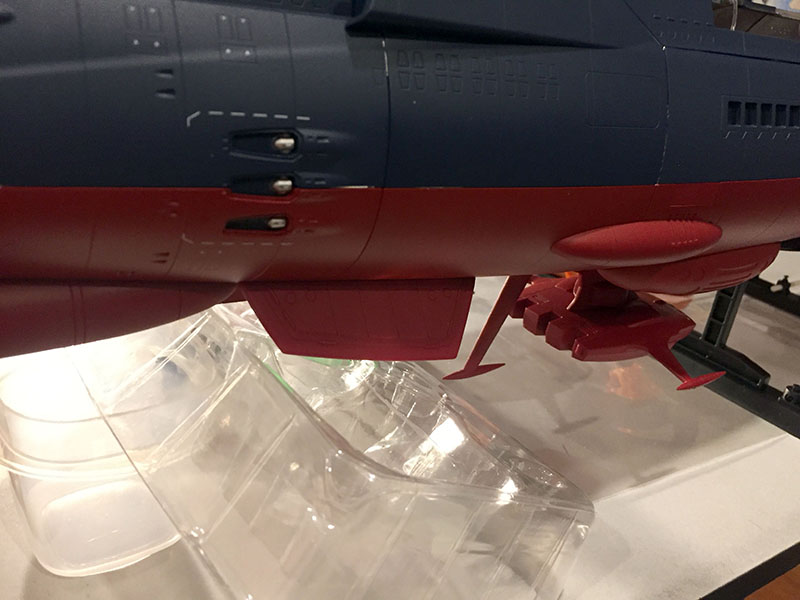
Except for that gap below the catapult, leading to the engine nozzle. Don’t like that. But can’t do anything about it. Moving on.