
by Luis Cotovio

(Japanese Name: 追憶の航海 / Tsuioku no Kōkai)
Director: Takao Kato
Production Supervision: Yutaka Izubuchi
Story Compilation: Shigeru Morita
Running time: 2h 10m 37s
Opening Theme: Uchuu Senkan Yamato by Isao Sasaki
Ending Theme: Blue by Nana Mizuki
A Voyage to Remember serves mostly as a primer for the upcoming Ark of the Stars, allowing those who haven’t actually seen Yamato 2199 to go into it with at least a notion of what happened before. Long time fans will see it mostly for the few alterations and additional material, though I find it doubtful that it provides a fully satisfying experience.
The extensive cuts take most of the soul out of Yamato 2199, making A Voyage to Remember little more than a clip show, highlighting some bigger action set pieces. A couple of choice story elements that are key to Yamato‘s quest are left in, but most of the rest is moved through by extensive use of narration.
This commentary will mainly focus on the edits in the film, changes to certain shots and the bits of added footage. I won’t delve too much into any of the story detail or comment on the reused elements, since all that has been extensively covered in the individual episode commentaries. Such comments only appear if relevant to alterations or if a particular scene might have different meaning in its new context. The “chapters” refer to the Blu-Ray chapter division, not story points. The titles given to each chapter are my own.
You might find certain character or place names spelled differently from what was established in the Yamato 2199 Episode Commentaries. That’s due to some substantial differences in subtitle spellings. For example, Garmillas is turned back to the original Gamilas, even though all official materials have embraced the new spelling. Another is Yurisha becoming Ulyssia. These new spellings have been maintained only in direct quotes from the movie as a way to show another aspect of this adaptation.
Let’s get this show on the road.
CHAPTER 1: Operation M2 – Second Battle of Pluto
“2199 A.D. – Outskirts of solar system – near Pluto”


The movie jumps right into the thick of the action, with the preparations for Operation M-2, as seen in Episode 5. The condensed version of the entire operation, spanning episodes 5 and 6, takes up the first 11 minutes. It ends with Yamato leaving Pluto after destroying the Garmillas base.
Worthy of note in this sequence is the total absence of any of the Garmillas characters. Shulz, Ganz and Yaretora are totally erased from the narrative with the sequence told from the Yamato crew’s point of view. The Garmillas become just a target to take down. Even the Reflex Gun becomes nothing more than an obstacle to overcome.
I can understand these choices. Condensing a full series into a two hour movie means sacrificing something. Since Shulz has no further influence on the events that were kept in the film, cutting him is a way to streamline the story and focus the narrative on the voyage of Yamato. This first sequence sets the tone for what to expect from A Voyage to Remember. Action pieces smashed together with choice clips of character moments used mostly for exposition purposes.

CHAPTER 2: Opening Credits
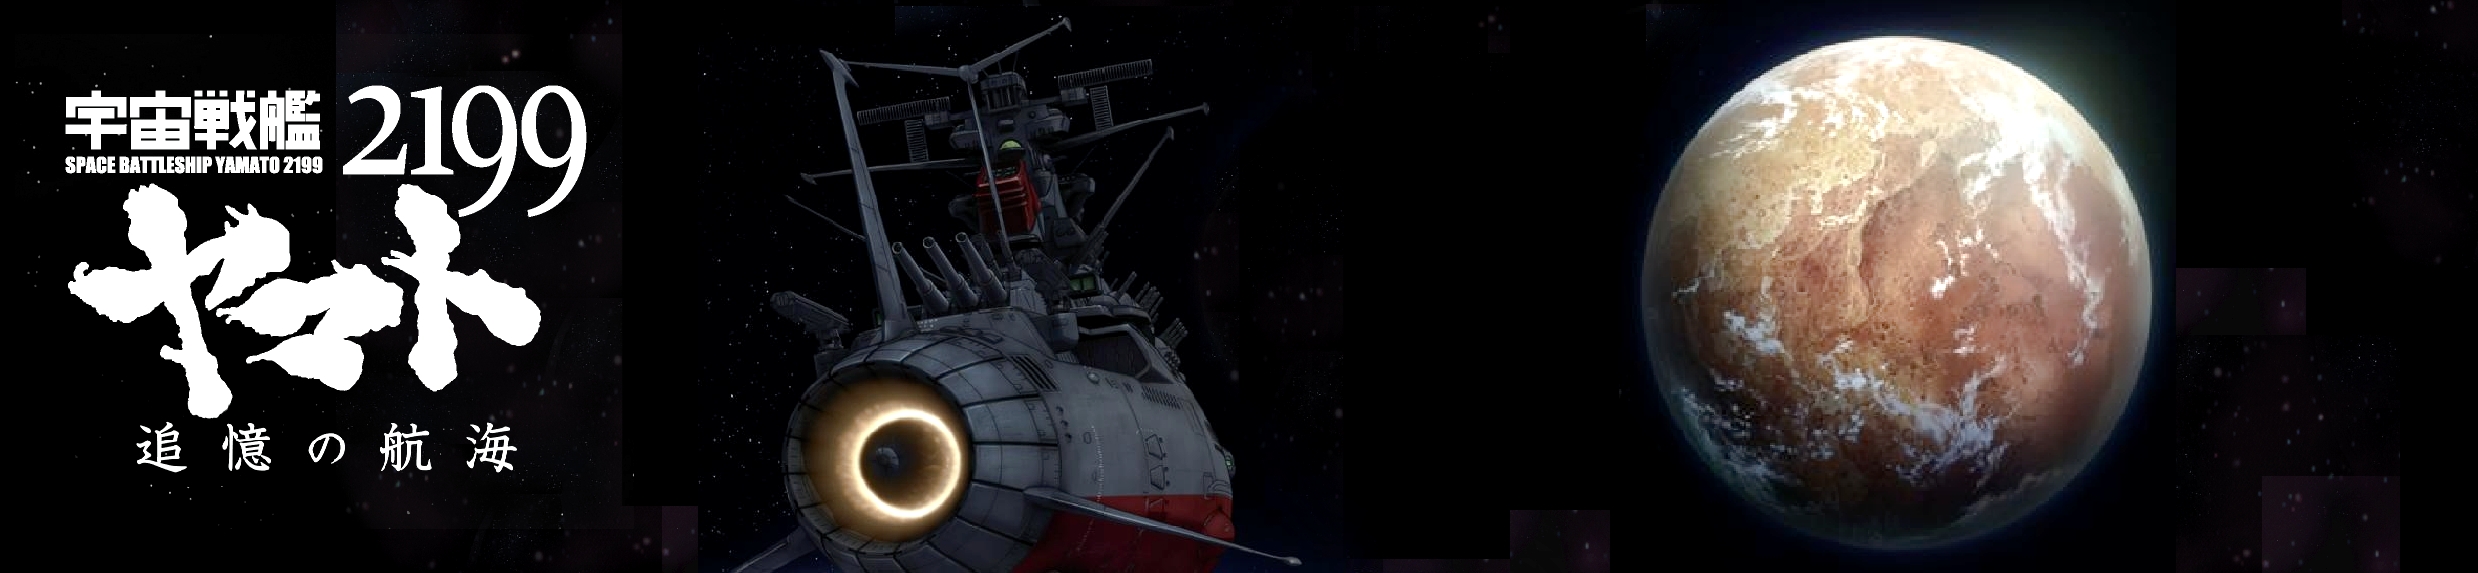
After this initial sequence, the standard opening credits are shown. They used the first version, seen in episodes 3-9 and 26, the only noticeable difference being the addition of the movie title to the series logo, which now reads SPACE BATTLESHIP YAMATO 2199 – A VOYAGE TO REMEMBER.
Though many sites used the title Voyage of Remembrance, A Voyage to Remember has been the chosen translation of this site, eventually confirmed and made official in certain sources, the main being the storyboard booklet that came as a bonus in the theater exclusive Blu-Ray release.
CHAPTER 3: In the Year 2199 / Yamato Launch Operations


The movie doubles back to Episode 1, showing the narration of act 2, with Yuki Mori describing the events of the war that led to the planet bombings and the current state of the Earth. Selected clips from Episode 14, showing a young Kodai watching a planet bomb strike, are mixed into the sequence. Some clips from Operation M are also included.
Narration by Yuki Mori:
“2191 AD. In that year, humanity was visited for the first time by intelligent extraterrestrial beings. However, they were not peaceful emissaries. Demanding humanity’s surrender, these aliens who called themselves Gamilans launched a merciless attack against us.
Humanity fought back against Gamilas with all its might. But Earth’s weapons were powerless against superior Gamilan science. Many fierce space battles were fought, but Earth suffered terrible losses each time, leaving the UN Cosmo Force on the brink of collapse.
Having established a front-line base on Pluto, the Gamilans commenced an indiscriminate bombing campaign using meteor bombs.”
![]()
Cut to the scene at the end of Episode 1, where Kodai and Shima encounter Yamato, accompanied by new narration from Kodai, describing the encounter.
Narration by Susumu Kodai:
“2199 AD: I’m Susumu Kodai. Daisuke Shima and I stumbled across the rusted wreck of an enormous battleship near Kyushu, Japan’s Cape Bonomisaki. We would soon learn that this scrap heap of a ship that jutted out from the cruelly parched seabed was mankind’s last hope.”


Next, we see the crew gathering at UNCF HQ from Episode 2, the boarding of the ship and edited events all the way to Yamato‘s departure, ending the chapter with the iconic image of Yamato against the massive mushroom cloud caused by the Interplanetary Ballistic Missile in the background.
The chapter ends with another piece of narration by Yuki Mori:
“Having successfully intercepted the Gamilan interplanetary ballistic missile, the Yamato set sail on her round-trip journey of 336,000 light years. This was a voyage she had to complete if Earth was to be revived. Every member of the crew was keenly aware of the importance of the mission they had been given.”
CHAPTER 4: Graveyard of the Universe / Melda Dietz


The chapter begins with a communication with HQ, seen at the start of Episode 7. As the message fails, the action jumps the entire remainder of the episode and the emotional goodbyes of crew members to their families, leading to a small sequence of scenes from episodes 8 (Yuki wishing upon the red star) and 9 (Yurisha’s consciousness traveling the ship’s computer network). Dessler’s attempt to destroy Yamato at Gliese 581 and Shultz’s death are cut, as is the entire affair involving Alter.
We then jump to Episode 10, with Yamato preparing for warp. Animation from the first warp, seen in Episode 3, was added to this warp sequence. The remainder of the chapter deals with the events inside the dimensional rift and subsequent contact with Melda Dietz.
As with the Pluto battle, all the Garmillan characters other than Melda are cut from the narrative. The honorable Zaltz captain Vars Lang makes an all-too-brief appearance before his ship is destroyed. Goer is also cut from the sequence.


Two shots were altered from their episode versions to fit this new “lighter” narrative. In the scene where Melda flies her custom Czvarke to Yamato, Yamamoto’s Zero has been removed from the shot (above left). Likewise, in a brief shot of the Meltoria‘s bridge as they confirm the opening of the dimensional breach, Paren Nerge was removed from the shot (above right). Understandable, since the side plot involving him is now gone.
Narration by Susumu Kodai:
“Our encounter with Melda Ditz dealt us a shocking blow. It was a startling revelation that the Gamilans, our hated enemy, were humanoids who were not all that physically different from Terrans. To escape from the dimensional rift, we worked together, albeit reluctantly. This also hinted at the possibility of mutual understanding between Terrans and Gamilans.”

With this new bit of narration, we jump to a heavily abridged version of Episode 11, starting with Doctor Sado’s examination of their “guest”. We see Kodai talking with Melda in her cell and jump to the staff meeting where Okita decides to let her go at a nearby Garmillas controlled system. The conflict between Yamamoto and Melda is cut.
The shot of “underwear Melda” was replaced by a slightly better drawn version of our favorite Garmillan pilot. Why they felt this particular shot needed that treatment is beyond me. The one used in the episode wasn’t appallingly bad, like a couple of others we’ll discuss further ahead. Maybe someone just really wanted to draw Melda in her underwear again… XD
Another important element removed from the plot is the one that leads to the discovery that the Murasame, commanded by Shima’s father, was responsible for the start of the war by firing the first shot. This plot point and most of Shima’s angst in the following episodes is now gone. The subject of Earth firing first is brought up by Melda but it’s quickly brushed aside without further exposition.
CHAPTER 5: The Policies of Garmillas / Domel’s First Attack


This chapter starts halfway through Episode 12, jumping the aforementioned drama involving Shima and straight to the part where the action moves to Great Garmillas, when Celestella and Gimleh enter Dessler’s chamber. Another curious edit is that the “hotline” call is cut and Dessler seems to realize Yamato‘s destination without probing Starsha.
Next we see an abridged version of the ceremonies dedicated to Domel, his conversation with Dietz and Talan, and his encounter at the cemetery with Eliza. Next we jump to Episode 15 and the destruction of Alteria 4. The encounter with Frakken and Mirenel’s telepathic attack, depicted in episodes 13 and 14 are left out.

The action moves to Yamato with a curious cut. The scene where Yuki is seen talking to the Iscandarian device, originally seen in Episode 2, is shown here. We jump back to Episode 15, where we see Niimi meeting with Ito to discuss Yuki’s records and their upcoming arrival at the Beemela system.
Moving Yuki’s scene to this point is fine, if not for a little detail. There’s no way that after the journey started the bridge would be as empty as it was in Episode 2.
A minor correction was made to Yuki’s personnel file seen on Niimi’s screen, where her admittance date is now the correct “September 9th, 2198”. In the episode, the date was “September 9th, 2199”, which is an obvious error.


We move to Balun where Domel is planning the attack on Yamato at Carrel 163. This is followed by the destruction of the Deusler I and news of Dessler’s assassination reaching the Garmillas high council. Next is an abridged version of the battle at Carrel 163, ending with Domel’s retreat and Yamato nearly defeated.
CHAPTER 6: Mutiny on Board / Unrest at Garmillas


This chapter starts with Enomoto spotting Okita unconscious in his cabin from Episode 16 with shots from Episode 13 showing us Okita’s worsening health and Doctor Sado’s diagnosis. The operation is left out. Again, Kodai’s narration is used to bridge the gap to the next segment, comprised of scenes from Episode 16, where Yamato lands on Planet Beemela 4.
Narration by Susumu Kodai:
“The Yamato made a stop at the fourth planet of the Beemela system under X0 Sanada, who had taken over for the gravely ill Captain Okita. This world seemed like the ideal place to resupply and make repairs. However, something would take us completely by surprise on Beemela IV.”
The segment is a slightly edited form of what we see in the episode, with scenes like the bug chase or Yamamoto’s rescue of the main staff left out. The main plot lines follow the same basic structure as before, alternating between the mutiny on board and Kodai’s team’s exploration of the surface and subsequent discovery of the Wave-Motion core.


After that segment is resolved we move to Episode 17 with Domel standing trial for Dessler’s assassination and Zoellick delighted to be rid of another obstacle. Most of Yamato‘s side of Episode 17 is left out, except for a scene with the bridge staff discussing the warp gate and Yuki in her quarters looking at Hijikata’s video message. The rest of the mission to the Garmillas control satellite is cut, jumping directly to Yuki accessing the Automatic Pilot room and the reveal of Yurisha inside the suspension capsule – and possession of Misaki – narrated by Yuki.
Narration by Yuki Mori:
“The rumor that an Iscandarian was secretly aboard the Yamato was true. Her name was Ulyssia Iscandar. Her body, which had been injured in an accident, had been incorporated into the auto-navigation system that was guiding the Yamato to Iscandar, but her consciousness had taken over Yuria Misaki’s body.”
CHAPTER 7: The Fall of Balun

This chapter begins on the Garmillas side of Episode 17, with the Zoellugut II leaving Baleras and Melda watching people being ferried to the prison transports. We move to Episode 18, as Zoellick arrives at Balun.
A curious detail is the way Balun is designated in the screen tag, which reads “Rogue Planet Balun,” something that never came up in the series.
Goer arrives and proceeds to do his usual ass-kissing shtick until Zoellick interrupts him to ham it up. Shinohara’s reconnaissance incursion into Balun space is cut and the story jumps directly to the command staff analyzing the Balun data, the origin of which is left unexplained. A shot of Misaki/Yurisha is probably meant to infer that she provided the intel.
We cut to Zoellick delivering his speech and the news of Dessler’s demise, promptly offering himself to lead in his stead. He’s interrupted by Yamato‘s incursion. From that point on and all the way to the end of Episode 18, the sequence is mostly unaltered, with only small edits.
CHAPTER 8: Battle of the Rainbow Star Cluster – Part 1
We move to the centerpiece of A Voyage to Remember, the battle of the Rainbow Star Cluster. This is where most of the added material can be found. Episode 19 is my personal favorite, a masterpiece of story telling. Unfortunately, most of that is lost. No more lingering moments of both commanders pondering on the upcoming battle, no more buildup, not even the momentous scene at the end of act one with Domel and his men breaking into song.


We go straight into the Matter Projection Device being fitted to the Domelaze‘s bridge. Talan and Domel discuss what he intends to do with it, along with the special projectile he asked for. We then see his makeshift fleet departing for the Rainbow Star Cluster.
Context on the scenes displayed is given through narration by Yuki Mori:
“With the loss of the Balun warp gate, the Gamilan military found the bulk of its fleet strength stranded far from the Gamilan homeworld. Dessler ordered Domel, found innocent of any involvement in Zoellick’s assassination plot, to intercept and destroy the Yamato, which was fast approaching the Salezar star system. Domel set out, leading what few military assets Gamilas still had. Lurking in his mind was a secret plan to destroy the Yamato.”


Yamato is seen warping into the Blue Sector and braving through the stormy nebula. They’re spotted by Frakken and Balgrey proceeds to launch Ghetto’s squadron of Debakkes.
Another plot element totally lost was the relationship between Domel and his four commanders, Haydern, Berger, Ghetto and Krayze. The expanded role and character development they were given in 2199 is gone, as are most of their scenes with the exception of a few glimpses. One would think that at least Berger would get some air time, given his role in the upcoming Ark of the Stars, but even his appearance is reduced to the bare minimum.
This has an immediate effect on how this battle is viewed, since no connection to any of the soldiers on the Garmillas side exists. So seeing Ghetto or Krayze being shot out of the skies no longer packs any emotional punch, except for those who’ve seen the series.
The magnificent ending of Episode 19 is cut, with the next scene jumping directly to Episode 20, showing us the Cosmo Falcons already deployed and initiating the dog fight with the enemy fighters.
The battle of the Rainbow Star Cluster is where the bulk of the new animation bits reside, with around 20 shots of new material either added to scenes or replacing previous shots. These are listed as closely as possible in the paragraphs below. (Interestingly, the original 1974 TV version of this battle underwent a similar upgrade for subsequent broadcasts. See a record of those changes here.

The first two added shots are here, in the sequence where the Falcon’s engage the Debakkes. First, the wide shot of the Falcons flying in the distance is replaced by a tighter shot of the lead group, zooming in closer to Kato’s fighter.


Then, as the Falcons engage the enemy, a 13-second long combat sequence is added. It might seem short, but it’s loaded with intense dogfights and plenty of casualties on both sides.


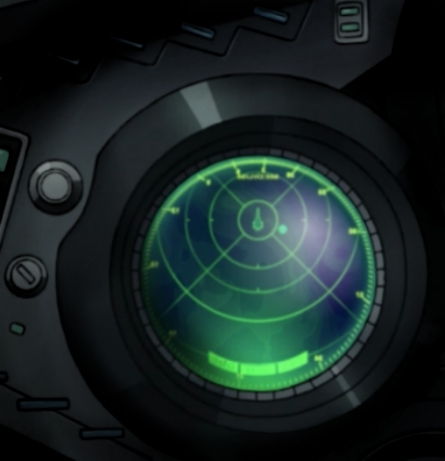
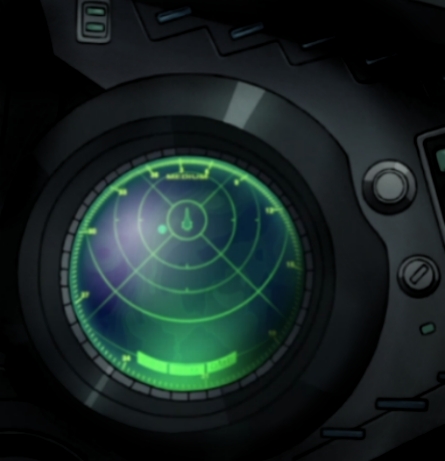
Domel uses the matter projection device to transport Berger’s squadron of Snukka precision bombers to Yamato‘s location. Caught by surprise, Yamato suffers damage, especially to its radar array.
Three more shots are added in these scenes. The first shows the matter projectors lighting up (Ep20 Shot 033, image above left). The next happens right after the Snukkas are warped out of the red sector (Ep20 Shot 039). In the episode, we see the bombers disappear from the projection area and immediately appear in the blue sector, with Berger spotting Yamato below them. Here, after they warp, there is an establishing shot of Yamato as it flies through the blue sector (image above center). The camera pans up into the clouds, at which point we see the shot from the episode showing the bombers warping out.
Aside from another added shot of Berger’s squadron flying off after their attack run (Ep20 Shot 069, image above right), the rest of the attack sequence is pretty much the same as in Episode 20, just edited for a faster pace, as will happen throughout the rest of the battle. Focus is on the combat action with most character moments reduced to the strictly necessary. Berger gets a couple of lines in, but maybe just because he’ll get to appear in Ark of the Stars.


Having done their part, the Snukkas move away but find themselves under fire from Yamamoto, who’s aching for some payback.
As the Snukkas move away, another small scene is added. In the episode, we see Yamamoto shouting at the enemy as she dives in to attack them, but the action cuts to the bridge, where a report of the damage is coming in. Now, after Yamamoto’s line, we see the Zero’s guns firing and the rear Snukka getting blown to bits.


They call the Falcons back to defend the ship, but they’re too busy fighting the Debakkes. Berger eventually retreats, leaving the damaged Yamato behind. UX-01 surfaces and deploys the FS Torpedo Boat it’s carrying to deliver the 442nd Special Platoon for their incursion. Meanwhile the Garlent is launched and succeeds in planting the drill missile in Yamato‘s Wave-Motion Gun. The Zaltzi platoon runs into Hoshina and Misaki, and Hoshina is shot. The shock leaves Misaki unconscious. As Yuki is captured by the enemy, Yurisha’s capsule opens.
Two more shots are added here. The first is added as the Snukkas begin their retreat (Ep20 Shot 100, image above left). The second is an establishing shot of the Garmillas fleet, with Garlent on the deck of Darold as it prepares to launch (Ep20 Shot 132, image above right).
Curiously, it’s only when the secondary plot gets into motion that the shift is made to more character-driven moments. The incursion by the 442nd Special Platoon is kept mostly intact as is the Garlent‘s raid on Yamato and subsequent attack with the drill missile. But this time the scene where the Garlent is shot by Yamamoto is cut. This simplifies things, as we’ll learn in Ark of the Stars that the Garlent survived and was eventually recovered by Lambea.
CHAPTER 9: Battle of the Rainbow Star Cluster – Part 2

We proceed to the second act of Episode 20, with Niimi and Analyzer inside the missile, followed by a trimmed version of the Falcon’s attack on Balgrey. The infiltration team is cornered by Kodai, Shinohara and a security team. Mortally injured, Lt. Bellger sacrifices himself, allowing Norran to escape with their quarry. Kodai gives chase in his Zero but is powerless to prevent the UX-01’s escape.
A small establishing shot of the FS Torpedo Boat docked to Yamato‘s port side is inserted before we move to the combat action in the corridor, where the 442nd Special Platoon has been cornered (image to the left).

Domel orders the Doljiras to launch and they’re projected to the target area. Though they manage to severely damage Yamato, the anger-fueled Kodai takes several of them out. Kato and his Falcons arrive to destroy the enemy bombers, forcing a dumbfounded Domel to advance and attack directly with his main fleet.
Much like his comrades, Krayze’s role is reduced to the bare minimum of the guy flying the lead bomber. At least he gets to die onscreen, whereas Ghetto didn’t even have that. One can understand this as a way to cut time but it has zero emotional impact on the viewer. Without the character development we witnessed during 2199, they are nothing more than just another Garmillan going boom.
Several scenes were added or altered during the Doljiras attack and its aftermath. They appear in the following order:
(Ep20 Shot 362) added, shows the lead group banking as it begins its attack run (images to the right).

(Ep20 Shot 366) replaces material. In the episode we see a rear shot of the Doljiras launching their torpedoes at Yamato, seen in the background. This was one of the shots I talked about in the episode commentary, where the drill missile was missing. The fix here replaced it with a shot showing the bombers launching their torpedoes from a different angle, with Yamato left out (image above left).
(Ep20 Shot 372) is a modified version of the overhead shot of Yamato being hit by torpedoes from both sides. The background has been improved and the impact blasts have been altered to look more like the ones seen in close-ups, more like water rather than fire (image above right). Despite all these modifications, they still forgot to add the drill missile to the ship’s bow. This was the least offending of the four “missing missile” shots and admittedly, at this distance the missile would look tony. But it would have been a nice touch… and a way to shut me up… XD.


(Ep20 Shot 376) is a newly animated shot of Yamato being hit by torpedoes. It replaces the one seen in the episode where the torpedoes slammed the side of the ship. It was also the third of the “missing missile” shots. Now, the scene shows the torpedoes’ POV as they approach the ship and hit the hull. And I’m glad to say the drill missile is where it should be (image above left).
(Ep20 Shot 384) a new shot of one of Kodai’s missiles hinting an enemy plane (image above right).

The next bit involves some clever editing and new animation (Ep20 Shot 390), resulting in a beautiful scene with the final “missing missile” shot being fixed (image to the left). In the episode we see the Cosmo Falcons returning, followed by a forward overhead shot of Yamato under attack (sans missile), followed by a shot of Kato inside his cockpit and finally the Falcons banking for attack. Here, the shot featuring Kato is moved up, following the initial shot of the Cosmo Falcons. The other two moments are now combined in a beautifully animated shot of Yamato, with the Falcons engaging the Doljiras. The resulting scene is quite reminiscent of one seen in the original series.


(Ep20 Shot 391) is a new shot of Krayze’s Doljira firing its guns at the approaching Cosmo Zero.
(Ep20 Shot 394) “corrects” Domel’s facial expression. Strangely enough, I think the expression of horror and surprise he had in the episode looked better. Now he has this strange grin, as if he’s actually enjoying Yamato putting up such a fight. In the movie’s narrative, this might fit. But for those who watched the series and know how much he cared and respected the men he just lost, shock and awe seem more appropriate.


(Ep20 Shots 403) shows Domelaze‘s engines lighting up (image above left). This is followed by a shot of Darold‘s engines lighting up, which is the same as in the episode. (Ep20 Shot 405) is a new animation scene where the fleet advances and we see Darold passing Domelaze and taking point (images above center and right).

The Cosmo Falcons are retrieved into Yamato‘s hangar, having lost half of their numbers. Okita prepares for Domel’s attack, which is soon a reality as the spotters report the approaching enemy fleet.
The retrieval process of Yamato‘s support craft didn’t receive the same level of attention as the launch sequences. The Type-100 and Cosmo Seagull were shown in both situations relatively early in the series, while the Cosmo Zero was only hinted at in this episode, as they retrieve it after the battle. Curiously enough, that scene showing the Zero‘s retrieval is left out of this sequence. But the Falcons got through the entire series without ever being shown returning to the hangar.
Knowing fans wanted to see this depicted, the decision was made to create this short sequence. Basically, Falcons fly in formation under the ship and approach the hangar door one by one. Two laser rails guide the craft in until a laser tether brings it safely down to the launch catapult. From that point on the process is the reverse of the launch sequence, with the catapult rising to its horizontal position and a Falcon being cradled to its pallet.
Although it looks nice and quite practical, this mechanical process does make for less compelling action sequences, like some shown in the original, where the fighters would just fly into the hangar. By its very nature, this process doesn’t allow for much urgency. Even if there’s a time factor, it’s impossible to rush the fighters in. This may be the primary reason it wasn’t shown in the series.


Darold opens fire. Niimi and Analyzer finally get the drill missile into reverse and Okita orders Nanbu to shoot it when it approaches the enemy fleet. Domel realizes what is about to happen but it’s already too late. The missile is hit right next to Darold. The ensuing fireball destroys it and Schderg.
(Ep20 Shot 421) is a new shot of Yamato being fired upon and eventually hit by Darold.
(Ep20 Shot 445) is a modified version of the final shot of Episode 19, which is a beautifully rendered Domel staring into the battlefield (#19 Cut 276). They took that and animated it further, into a look of realization. It’s only onscreen for a split second but it does improve the scene. The shot of Okita right before it (Ep20 Shot 444) comes from a scene from the episode that got cut, where Nanbu says “guns are his specialty”.


Domelaze and Lambea escape, but the carrier comes under fire from Yamato and sinks. Domel puts up a fight, but Domelaze is caught in an ion current. Realizing Okita lured him there and that his ship is lost, he ejects the bridge section and heads toward Yamato.
The scene where Schderg careens into the fireball and explodes while Domelaze and Lambea veer off and escape is replaced with (Ep20 Shot 450A), a camera pan showing the two ships being lit by the explosion (images above left and center). Schderg‘s demise is related to the viewer only through dialogue.
The last – or so I believed – new material in this behemoth of a battle is (Ep20 Shot 469), which shows a wide shot of Domelaze firing her cannons (image above right).


After attaching his ship to bridge three, Domel requests to speak to Okita. They have a heartfelt conversation but Domel cannot allow them to continue. He self-destructs his ship, nearly destroying Yamato in the process. If not for Sanada fixing the Wave-Motion Barrier, this would have been the end. The chapter ends with Yamato leaving the Rainbow Star Cluster and Yurisha revealing herself to Kodai.
The reason for my remark in my previous comment stems from my belief that it was the last modification done to this chapter. But as I reviewed both episode and movie side by side, I noticed that wasn’t so.
Although it isn’t listed in any of the information sources I have access to, the Domel seen on Yamato‘s screen has also suffered some minor tweaks. They’re so subtle I didn’t notice them before, but they do improve the character, especially in wide shots where his body always looked somewhat disproportionate. The very slight changes take that feeling away.
Another change done in this scene is Domel’s final line. In the episode he wished honor and blessing to both the Terrons and Garmillans. Now he does so only to Garmillas. The episode version shows us how much Domel had come to respect his adversaries aboard Yamato, something he didn’t really have the time to do in the movie.

CHAPTER 10:
Battle of Garmillas / Dessler’s Folly
We jump to the scene from Episode 21 where Yuki wakes up aboard the UX-01 and talks to Norran before their arrival at Leptapoda. Although their stop there is mentioned in dialogue, it’s not seen since the rest of Episode 21 is completely discarded.
Next we see the montage from the start of Episode 22, with narration by Susumu Kodai:
“The Yamato set down on a planet to make repairs. This was Leptapoda, where Gamilas held its political prisoners. There, we found ourselves caught up in an uprising led by a dissident faction and were informed of a startling fact. Gamilas, and the Yamato‘s destination of Iscandar, were a binary planet that shared the same orbit, and the two worlds had shared a deep bond since time immemorial.


We tried to open talks with Admiral Ditz of the Gamilan military, who had been held prisoner on Leptapoda. Captain Okita, who had hoped to avoid any combat that was not conducive to our reaching Iscandar, broached the possibility of a partnership with the dissidents to Admiral Ditz, but the proposal was rebuffed.
Nevertheless, we obtained several previously-unknown pieces of valuable information regarding our Gamilan foe. The name of their supreme leader was Abelt Dessler. He was a dictator who ruled his vast, interstellar empire through fear.
Admiral Ditz left Leptapoda. However, he left his granddaughter, Melda Ditz, aboard the Yamato to act as a liaison. A cloud of deep-seated animosity hangs over Earth and Gamilas. It is not something that can easily be lifted. Even so, as long as we do not lose the willingness to open our hearts and make an effort to understand one another, there is still hope. Yes. There is always hope.”
Some of the character shots in this flashback sequence were improved. You’ll recall Episode 22 had some occasionally hideous animation. Although not every shot used here was improved, those that were are vastly better. The images above left and center are two examples.
For some reason, the subtitles refer to Melda as Admiral Dietz’s granddaughter. Unless the whole series was wrong, she is his daughter. Strange thing to get wrong.
Another curious detail is that, despite his near absence from the movie’s narrative, they decided to leave the shot of Yabu among the freed Leptapoda prisoners in. For all the stuff they cut to avoid unnecessary questions, this is an odd one to keep.


Yuki is already on Great Garmillas and is presented to Dessler and his officers. Velte Talan reports on the progress of Baleras II and voices his concerns in using it to engage Yamato, with Yuki relieved to learn her ship is still in one piece. Dessler is elated to welcome the Terron vessel, bent on starting a war.
Two more shots were modified during these scenes. One is Dessler’s “afro hair” I mentioned in Episode 22’s commentary (#22 Cut 020). Curiously, they went to the trouble of correcting the Leader’s hair style but left the rest of the characters untouched. And there are some hideously-drawn faces there… XD The second change is a better-drawn face on Yuki when she’s on the Deusler II’s bridge (#22 Cut 287). Again, they wasted time fixing something that hardly needed fixing. It could have been used to fix those poor Garmillan commanders faces instead.


We proceed to the final moments of Episode 22, with Yamato‘s final warp to the Salezar System and the welcoming salvo from the Dessler Cannon.
Episode 23 remains almost intact, with only about 5 minutes of footage removed. In this chapter the action makes it all the way to Kodai leaving Garmillas in the Cosmo Zero with Yurisha in tow, in a bid to rescue Yuki.
CHAPTER 11: The Fall of Baleras II


Yuki and Norran arrive to the power generator room in Baleras II, where Yuki reveals her plan to overload the system and blow the whole thing up. Meanwhile, Yamato fires the Wave-Motion Gun in order to destroy the plummeting Industrial Sector 633 and save the civilian population of Baleras. Dessler prepares to fire the Dessler Cannon to destroy Yamato and Baleras. Yuki is betrayed by Norran and pushed into an airlock, realizing he intends to blow the complex himself and save her life by jettisoning her into space. Baleras II and the Imperial Guard’s fleet are destroyed and Kodai eventually finds Yuki among the debris. Before them is Iscandar.
CHAPTER 12: Iscandar ~ Sadness and Revelations


The final chapter begins with the start of Episode 24, with Yamato finally arriving on Iscandar and the meeting with Starsha. She shows reservations about giving them the Cosmo Reverse System, due to their use of Wave-Motion technology as a weapon.
A large chunk of the episode is cut, jumping to the scene where Kodai and Sanada are talking on the rear deck, just as Starsha arrives to deliver the device, having decided to trust them. Both the conversation with Okita and the stroll to the Iscandarian cemetery with Kodai are left intact, but Mamoru’s heartfelt message is left out.
In 2199, Starsha holds her decision for almost half of the episode, creating a great deal of drama and tension due to her disappointment with the Earthlings’ actions. This was something new to the story and quite a good point to make. Here, the decision to give them the Cosmo Reverser is done from one scene to the next. All the drama and tension from the episode are gone. Another understandable decision, but it sort of cheapens the plot.


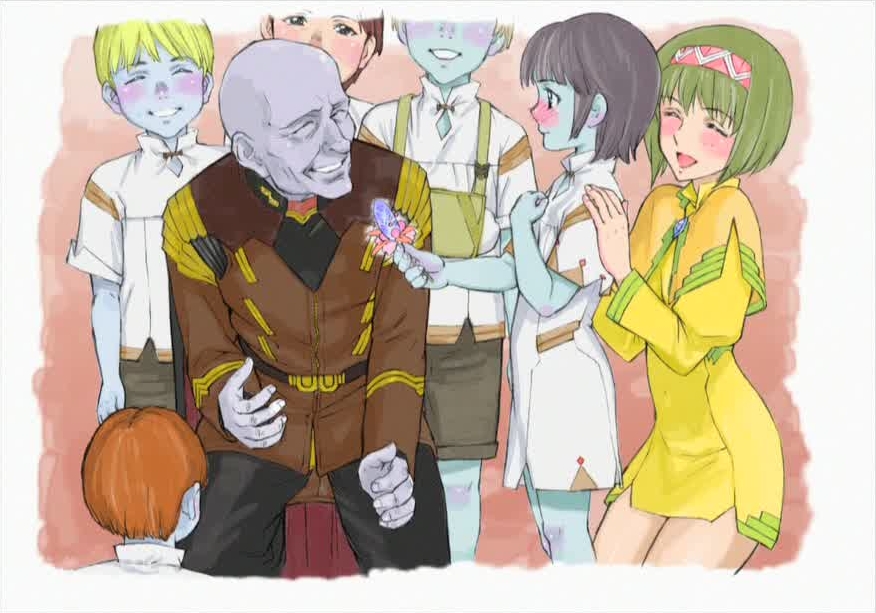
Melda and Yurisha say goodbye to Kodai, Yuki and Yamamoto, and Okita orders the ship to launch. Yamato leaves Iscandar and starts her long journey back to Earth. Yurisha, Melda and Starsha watch from afar.
Another modified shot is in the scene where they shake Melda’s hand (#24 Cut 253). In the episode Kodai’s handshake is seen in a wide shot, then we see Yamamoto eventually stepping forward and her handshake is seen in a close up. In the movie, the close up is altered by replacing Yamamoto’s hand with Kodai’s. Since the side story involving Yamamoto and Melda’s rivalry was left out of the movie, this change makes sense.
The last modification in the movie is another very subtle but important change in relation to 2199. In her final shot in the episode, we see Starsha’s hand over her womb, the meaning of which is well known to long time fans of the Yamato saga. Short as his stay on Iscandar was, Mamoru still managed to make little Sasha. XD Here, they edited part of the camera pan so the shot starts higher than before. Her arm has also been changed and is now straight. Given Mamoru’s quasi-non-existence in the movie, hinting the conception of his child would be a moot point.
CHAPTER 13: End Credits Sequence


The ending credits are initially illustrated with 9 art pieces made by Michio Murakawa, the artist responsible for the manga adaptation of Yamato 2199. These pieces show us candid moments of the journey home to give some closure to the story without delving too deeply into what happens in episodes 25 and 26. Remember, one of the objectives of this movie is to serve as a primer for Ark of the Stars, which takes place chronologically before those two episodes.


To close the movie, they do show us a couple of clips from the final moments of Episode 26, slightly altered to fit the movie’s broad narrative. We see Yamato finally arriving on Earth and the crew watching from several observation decks.
The final alterations made to the animation were already discussed in our Episode 26 commentary. Since episodes 25 and 26 were mostly left out, Yuki never gets shot, so having her in a dress on the bridge would bring up unnecessary questions to newcomers. So the dress is replaced by her uniform (ep26 Cuts 311 and 312). Click the image for a side-by-side comparison. (Fittingly, the exact same change was made for the 1977 Yamato compilation for the same reason.)


Okita takes one final look at Earth before succumbing to his illness, and the Cosmo Reverser harvests his consciousness to be used as template to revive the Earth. Yamato descends and we’re treated to the final shot of the recovered Earth which closed the series.
This is the final modification made for this film. Not the animation, but the order in which the scene is presented.
In the episode, Okita’s death preceded the previous scenes. Now it’s moved right to the end, segueing to the CRS charging and then the final pan of the restored Earth. The continuity of these three events is thus brought front and center.
The one problem I have here is that, while in the episode Starsha at least gave them a charged CRS, the deletion of Mamoru’s role in the whole thing means that, within this movie’s narrative, she gave it to them without the very thing it needs to work. (And as far as we know, no hint of how to get it.) Sure, this scene is meant to give some closure to the film and end on the note that Yamato‘s journey was successful. But from a logical standpoint, the more you think about it, the sillier it is.
You may say those who saw the series know the full story and what happened before, which is true. But since this was primarily aimed at newcomers, it seems to go against all that the movie strived to achieve. The most bang with the least fuss. Hopefully, if it does raise any questions, it might have the positive effect of getting them to watch the full thing.
There you have it. I hope you enjoyed this commentary, even if it is slightly different from what we accustomed you to. I think I caught all the modifications, but I might have missed some. I’ve seen this many times, but I found a few while writing this commentary. I guess that, much like the wonderful series that gave rise to it, A Voyage to Remember will still surprise me every now and then. It’s far from a masterpiece, but given the nature of the beast, it’s as close as they could get to one.

RELATED LINKS:
Official website of Yamato 2199
Yamato Crew website
A Voyage to Remember 30s Promo
A Voyage to Remember 15s Promo
A Voyage to Remember Blu-Ray/DVD Zoellick Promo
If you asked me,I think they should have kept Mamoru’s Heartfelt message in this one and have the animation pro team re-do the scene of Mamoru composing his final message to his brother and to the whole crew without Queen Starsha in the backgroung behind him,because they should have him making his recording while he was still onboard the Gamillas Destroya Class Battlecruiser that was taking him to the Gamillas home planet before it crashed-landed on Iscandar,and created an alternate version of events that caused his death when he came to Iscandar.They should have came up with the idea to do that as a special ed version of Episode 24,just like Gainax Studios did for an alternate ver of an episode for Gurren Laggan.Would you like to hear more about it?
Yuki not “dying” and being in her uniform instead of her dress in the end is like the original season 1 recap movie, kinda like that