
Fierce Battle Near Planet 11!
By Arthur Painter (with notes from Tim Eldred)
Watch this episode now at these sources: Star Blazers on Hulu | Star Blazers on YouTube | Original version subtitled

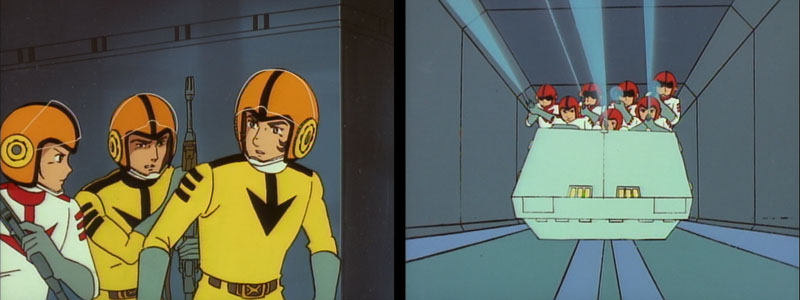
Production note: After the jump in animation quality seen in Episode 5, this one is a disappointing step backward. It has all the hallmarks of a rushed production: off-model cels, painting errors, jerky movement, etc. It’s also one solid battle sequence from start to finish, which traditionally wreaked havoc on Yamato‘s production schedule. The first red flag flies high in the opening scene (above left), which was intended to be another of those notoriously difficult double-exposures of the ship getting larger in the frame as the background recedes.
This time, it’s the ship that recedes (along with Planet Earth) as the stars “behind” it fly toward the camera. By the time it was discovered, there was probably no time to fix it. But part of what made Space Battleship Yamato so beloved was its handmade quality, and this sort of thing was an inevitable side effect. (Note: this scene was cut from Star Blazers along with the rest of the opening.)

Yamato III opens with a recap: the Galman Empire’s 18th attack force has launched a strike on both the Yamato [Argo] and the Berth Defense flagship Legendra near Planet 11 [Brumis]. In a scene exclusive to Yamato III, an Earth Defense Force aide [General Stone] updates Commander Todo [Singleton] about the battle’s progress. The Commander regrets that Yamato has been swept up in this battle, but sees this as a clear case of Galman aggression.

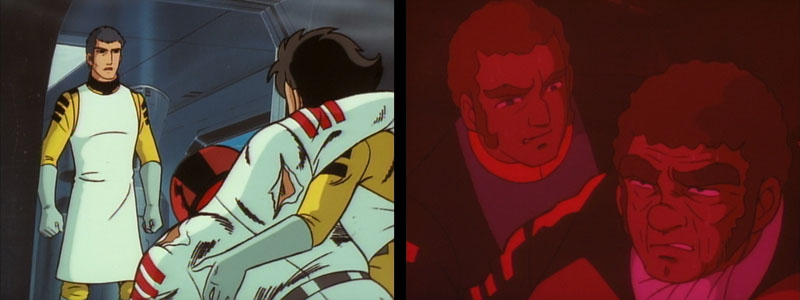
Star Blazers joins the episode with the 18th’s commander, General Dagon, anticipating Legendra‘s destruction. This will finally grant him a long-awaited victory over planet Berth. Legendra, already trailing heavy smoke, takes several more hits from the Galman ships pursuing her. Nearby, the Argo is struck by a barrage of energy beams. The hits to the outer hull are echoed inside–hatchways burst and crewmen scramble to safety behind partition walls. I’ve always liked these scenes, portraying the danger faced by rank-and-file crew during these great space battles. (On first viewing, I had no idea that many such clips existed in the first two Yamato series, but were often removed from Star Blazers.)

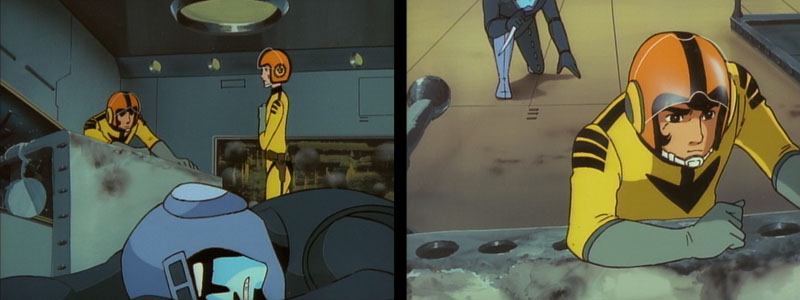
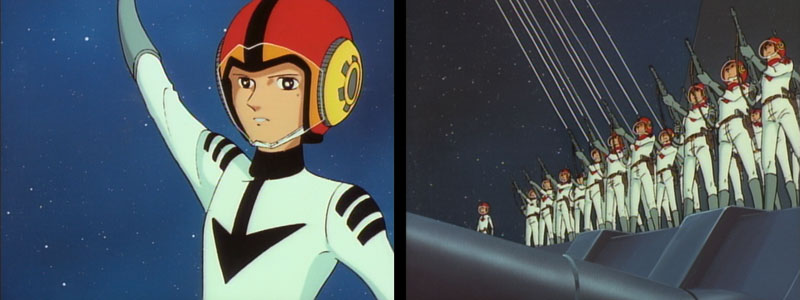
Rookie technician “Beaver” Bando arrives at the scene of a fire. He’s wearing an all-purpose EVA suit that doubles as fire-fighting gear. Beaver isn’t called by name here, nor has he been assigned a specific American voice yet. In this scene, he sounds like he’s from the Bronx.
Just outside the galley, a crewman helps an injured teammate down the hall when the ship shudders and they both fall. Jason Jetter rushes to their aid. Jason’s chief, Hardy, yells at him to leave them for the medics. After the two men continue on their way, Hardy explains that they must stick to their defined duties, even in the midst of a crisis.
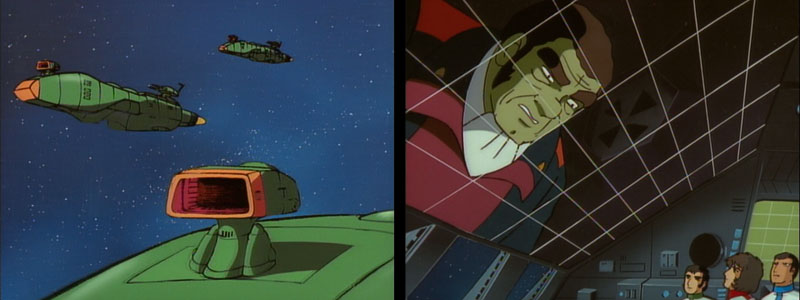
A hit on Legendra‘s superstructure results in internal explosions on the bridge, knocking Captain Ram to the floor. His aide attends to him and suggests that the ship may be able to warp to safety. Captain Ram refuses. The Argo is fighting to protect them. To abandon the Star Force to the enemy would be an affront to his honor.
This scene reminds me of the very first episode of Yamato when the flagship was damaged and Captain Okita was injured. Part of it is the lighting–in both scenes the ship interior was awash in red from the emergency lights. This scene serves as a kind of mirror image to that opening episode, where Okita retreated against the wishes of his subordinate. Here Captain Ram is the one determined to stay.

With escape no longer an option, Legendra continues to fight on, firing a beam from a deck cannon. The Berth ship’s cannon resembles an engine nacelle, but it packs quite a punch, destroying a Galman ship with one clustered shot.
This five minute sequence translates to about 30 minutes for the characters. General Dagon must have gotten used to easy victories, because he retired to his quarters in the midst of battle. His executive officer (XO), the broad-faced Captain Boche, requests that he return to the bridge. The Earth ship is giving them considerable trouble and the situation is deteriorating. Dagon is tempted to call in a super-space carrier from his reserve forces, but instead he decides to authorize the use of “proton cannons” (aka “saturation guns”), which are retractable weapons installed on the front of several Galman ships. Although it is touted as some kind of super-weapon, it looks more like a hood ornament.
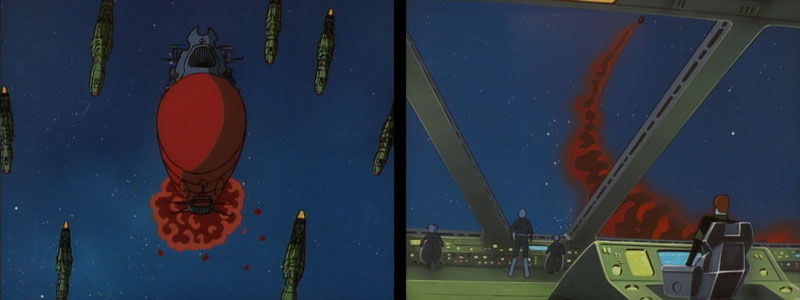
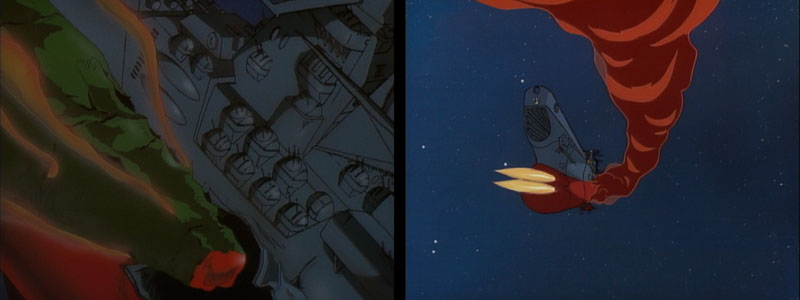
Captain Ram contacts the Star Force. Legendra is going down. He regrets that he will leave the Argo alone against his enemy, and begs their forgiveness. Wildstar accepts with either a compliment of respect (Yamato III), or an urge to hold on because they are about to launch a counter-offensive (Star Blazers). After a touching final goodbye, Legendra‘s crew props up their dying captain and salutes as their bridge erupts into flame. In a beautiful and detailed rendering, Legendra explodes.

The Star Force gears up for its counter-attack. It begins by suddenly accelerating and launching straight up (from the combatant’s perspective, that is). Several ships start to follow, but then the Argo turns 180 degrees and dives straight back “down,” rolling as it unleashes shock cannon blasts, bow torpedoes, and smokestack missiles (aka “multiple-head star-blasters”). This attack circumvents the use of the Galman’s proton/saturation cannon, so we never get to see what it can do.
These are the types of maneuvers that should be more commonplace in a 3-D battlefield, but the Argo/Yamato is an old naval battleship, and thus the battles tend to be portrayed as naval battles. Ships face off on the same plane and orientation, as if there were an actual sea under them, and fighters and bombers soar “overhead” to bomb and strafe. The Argo‘s power-dive is one of the few times 3-D space is used. (Although, the way the Argo‘s turn into the power-dive was portrayed, it almost looked like gravity was pulling it down.)
Additional note from superfan Andrea Controzzi: This kind of more realistic 3-D battle was made possible in the Yamato Playstation games. There you have weapons covering all arcs of fire, like torpedoes for the bottom half-sphere and all the missiles reach that area. If you need the main guns, you can easily spin the ship on her long axis to fire “down”. The anime doesn’t care much about laws of physics, but spinning on the long axis is actually quite easy, compared to changing vector (direction), because the linear momentum of a 64,000 ton ship is quite huge compared to angular momentum to rotate her. A dive is much more stressful than a spin. The maneuver seen in this episode is extremely energy-intensive (and potentially very harmful to the crew, provided there is no inertia compensator) and unrealistic for a space battle, though it is more spectacular compared to combat in the game.

Production note: The animators did the best they could to pull off a very demanding scene on a TV schedule and budget. In fact, this move was originally conceived for Be Forever. It was touted as a highlight of the film that, for the first time, Yamato would make full use of 3-D maneuvers by rolling and diving and blasting in a complex ballet of destruction. It would have been something special on a big screen, but for one reason or another they didn’t get it. At least it wasn’t forgotten.
The Argo‘s counter-attack wipes out a large portion of Dagon’s forces. Dumbfounded, Dagon orders a retreat. Boche repeats the order, only for Dagon to modify it: only groups 1 and 3 will retreat with the flagship, and the rest will remain to cover them. Captain Boche questions the wisdom of sacrificing all these forces, but Dagon is firm and adds a warning for Boche to remember his place.

Dagon and his group warp away and the Argo is left with only a fragment of the enemy fleet left to fight. They make quick work of them, but the last remaining ship sets itself on a kamikaze run. Despite Venture’s attempts to avoid it, the ship rams into the port aft section of the Argo and its nose smashes through several bulkheads.

Given the drama of the episode, Star Blazers scripter Peter Fernandez must have wanted to lighten the mood. This would account for some of the script oddities. Immediately upon impact, a Galman officer falls to the floor. It’s not quite clear, but I swear a voice from off screen says “Ouch! I just stubbed my toe!” While I’m a bit uncertain of that, there’s another bit of attempted levity that’s less ambivalent: an engine room worker tumbles on top of Orion with a giggle.
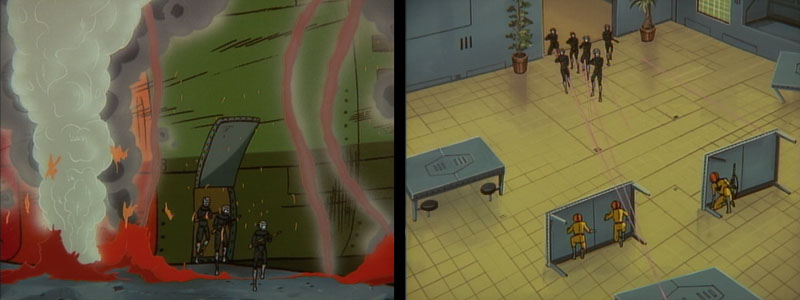
Galman intruders begin flooding into the ship. The various crews spring into action: Sandor’s teams rush over to the damaged areas in full EVA suits, Nova’s team is put on standby to help the wounded, and Wildstar prepares to lead Sakimaki and the combat groups to repel the enemy.
Production note: Despite numerous attempts to definitively lay out the interior of the ship, story demands often made a hash of continuity. In this case, the Galman ship crashes into the ship’s port side in the central rear and the first area to be invaded is the mess hall. This was done for story reasons, since the script calls for Jason Jetter to be forced into combat. But design materials for Be Forever Yamato indicated that the mess hall was in the forward part of the ship, beneath the second shock cannon turret. So, once again, we must resort to an internal restructuring to explain it logically. Here goes: wave-motion cartridges now have to be stored beneath all the gun turrets, so maybe the mess hall was moved to the area above the fighter hangar. Good enough?
Additional note from superfan Andrea Controzzi: This explanation is quite logical. Every WW2 era battleship had the shell magazines inside the barbettes immediately below the gun turret.

In the mess hall, Jason, Hardy, and the KP crew are forced to defend themselves using overturned tables for cover. Hardy provides covering fire while Jetter scoops up some nearby rifles. Jetter makes it back safely, but Hardy gets shot in the shoulder. Visibly weakening, Hardy offers Jason some advice about combat. Following his mentor’s instructions, Jason takes a deep breath then yells as he fires his rifle. Star Blazers is actually a bit more intense than the Japanese version. In Yamato III Domon [Jetter] says a brief curse, then stands there silently with his mouth open as he fires at the enemy.
Wildstar (painted incorrectly in a Life Services uniform) and several of his men reach the outside of the mess hall where Galman soldiers are bunched together. Wildstar’s team performs a makeshift cavalry rescue, riding not galloping steeds, but a kitchen cart. Yamato III contains a few extra clips of the enemy soldiers being cut down by laser fire.
Production note: In previous Yamato productions, all the helmets were red, but now a new scheme color-codes them to match everyone’s uniform. This is fine as far as it goes, but it created yet another opportunity for painting errors.

In the infirmary, Dr. Sane is taking care of a roomful of wounded when IQ-9 rolls in with two more. In Star Blazers, this scene provides more levity. IQ diagnoses the two new arrivals with “scratches.” “More scratches?” the doctor asks, “Doesn’t anybody get seriously hurt?” This comment serves to mitigate the violence, but an honest look at the situation tells another story. IQ’s two “scratched” patients are unconscious, and another patient is on the table with a large bandage over his head and shoulder. (Actually, the patient’s bandages change dramatically between camera angles. In one scene, he just has his shoulder bandaged; in the next he’s wrapped up like a mummy!)
In Yamato III, Dr. Sado sends Yuki out with a warning to be careful, while in Star Blazers, Dr. Sane tells her to bring him back some candy. While most fans will probably balk at that comment, I find it rather appropriate for the quirky Dr. Sane.
Nova arrives in the mess hall–her helmet disappearing for a scene and then reappearing–after the battle (evidently looking for Dr. Sane’s “candy”). She is just in time to warn an exhausted Jetter of an enemy soldier about to knife him from behind. Finding a second wind, Jason whirls around and fires, putting a round through his would-be assassin at point blank range. The Galman trooper is killed in mid-lunge and collapses on top of Jason.
As the scene was originally written, Rysuke Domon [Jason Jetter] expresses grief and remorse over the fact that he just killed someone. Yuki [Nova] offers words of comfort. But even with the greater scriptwriting latitude Star Blazers had in the mid-80s, this situation was too heavy for U.S. TV. Thus, in the American version, Jason’s dialog reveals that the enemy soldiers were robots. Nova tells him to be thankful, because next time it could be a person.
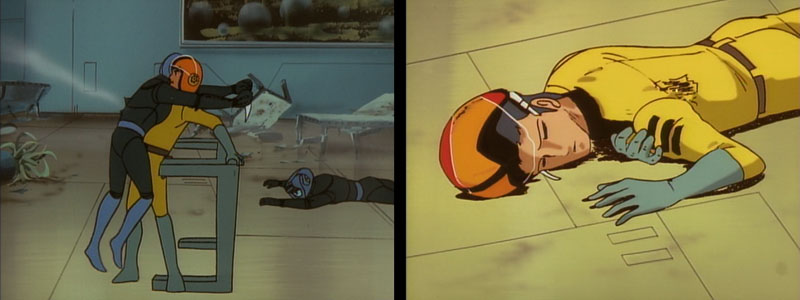
There are actually two American versions of this scene, one for TV/VHS and one that appears in the Remastered DVD. In the original TV version, Jason kneels down next to Hardy’s lifeless body while he prattles on about the horrible things war might make him do. He never acknowledges the death of his mentor.
In the Remastered DVD version, after Jason sees Hardy’s body, the vocal soundtrack reverts to Japanese. “Senpai!” Jason exclaims. The rest of Jason’s comments are gone, since there were no more in the original. Instead, we hear only Jason’s quiet sobs as he mourns over Hardy. This is a lot more effective than the original Star Blazers script.
Personal note: Guilty as charged. I spearheaded the remastering of Series 3 for DVD, since the masters for the original broadcast version were made with substandard resources. There was nothing Voyager Entertainment could do about it, since those masters were inherited from the now-defunct Westchester Films. The remedy was to combine the US-made soundtrack with a fresh picture source from Japan–in this case, commercial laserdiscs. When we reached this sequence, I had to make a decision: either preserve one of the worst script changes of the entire saga, or revert to Japanese audio and consign it to the dustbin of history. So far, no one has objected to my decision, for which I am grateful.
“Senpai” is a Japanese term that roughly translates to “mentor.” The reciprocal term is “kohai,” or “protege.” It is also a common form of address in schools, where younger students often refer to senior classmates as senpai. (For Macross fans, Hikaru Ichijo often referred to Roy Fokker as “senpai.” When Macross was rewritten for Robotech, senpai was transliterated to “big brother.”)
The name “Hardy” may have been bestowed upon the character for its similarity to his Japanese name, Hirata. This character has no relationship with the long-haired Black Tiger pilot of the same name. For anyone out there compiling a complete list of names, his full name is Alan Hardy/Hajime Hirata. As we learned back in Episode 4, he was a survivor of previous missions–we just never met him until this one.

The Galman ship slides away from the Argo‘s hull and a funeral ceremony follows in which the Star Force’s casualties are set adrift in coffins. This scene also suffered under the American script. It’s claimed that there were some living soldiers among the Galman invaders, and this funeral service is held out of respect for them. Contrary to the dialogue, Hardy is clearly seen in one of the coffins.
The remastered DVD version once more improves the original American edit. The mournful series 1 ending theme, The Scarlet Scarf, is heard in the background with Isao Sasaki’s vocals.
Production note: Another color error appears here that has evokes an odd callback to Series 1. In Episode 4 of that series, the ship successfully warps to Mars and the crew walks out to inspect it. Captain Avatar is seen for the one and only time in a standard Star Force uniform colored black-on-white. We see that unique color combo again here on a skinny individual who gives the signal for a 21-gun salute. It inadvertently makes the individual stand out as unique, but it’s actually gunnery chief Sakimaki; his uniform should have been red-on-white.

The notion of a “burial at sea” has a long history and is a common practice in many navies the world over, including the Imperial Japanese Navy of World War II. Fortunately for the space battleship, they didn’t encounter the same problem as the IJN Shokaku. After the Battle of the Coral Sea, the aircraft carrier’s 107 dead were put into weighted coffins and set into the water. The crew were aghast when the coffins broke open and the corpses bobbed up to the surface in the ship’s wake.
This is a powerful episode and maintains a nice pace throughout. Captain Ram received an admirable death scene, and Jason’s swift, impulsive shooting of an enemy soldier was appropriately intense and dramatically staged, in spite of the “robot soldier” explanation that followed in Star Blazers. The death of Hardy was barely noticeable in the original Star Blazers cut, but is given more weight in the remastered DVD version.

The one thing remastering can’t fix, however, is the quality of the animation. But no need to go into that again.
Story note: It is estimated that the Star Force leaves the solar system on October 28 with 325 days left for Earth.
“When we reached this sequence, I had to make a decision: either preserve one of the worst script changes of the entire saga, or revert to Japanese audio and consign it to the dustbin of history. So far, no one has objected to my decision, for which I am grateful.”
I object to the decision! Starblazers is Starblazers, warts and all, and changing the American dialogue to the Japanese audio for that moment is not only clunky and awkward, but changing it in a remaster of Starblazers just because you didn’t like that particular dialogue just feels like a real sour note.
There’s lots of great work that went into that remaster, but that change really stuck out when I watched the DVDs and reading about the reasoning for it honestly made it worse.
That goes for the changes in the funeral scene as well, which I forgot to mention before but was referring to the changes in this episode in general. The dialogue might have originally been bad, but it was what was aired originally, and should have been preserved as best as possible as it was originally intended (for Star Blazers).