
Argo, Fight to the Last!
By Arthur Painter (with notes from Tim Eldred)
Production note: Of the last five episodes in Series 2, Yasuhiko Yoshikazu was responsible for the storyboard on four of them (all but #25). The moments of greatest emotional weight can all be found in this final stretch and, as we’ve seen before, no one captures depth and nuance quite like “Yas.”
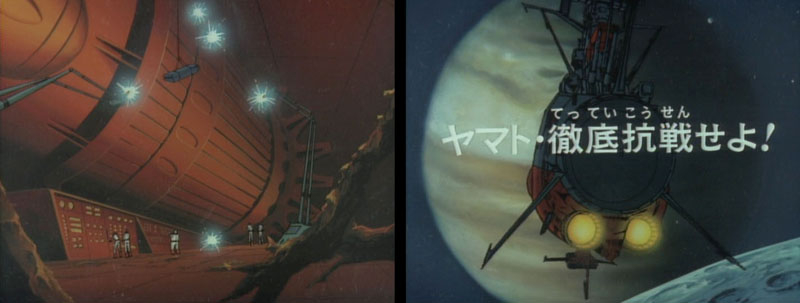
As a result of last episode’s events, Wildstar is incapacitated and the ship is undergoing repairs. Chief Mechanical Engineer Sandor is in command. Under his overall supervision, Orion is overseeing the replacement of the engine’s conduction pipe. The restoration of the guns and communications systems is supervised by Dash and Homer respectively. The ship is taken down to the EDF base on Jupiter’s moon Ganymede to expedite the repair work.
Story note: It is now approximately three days since the battle of Saturn. Ganymede is the third satellite of Jupiter. When Yamato 2 was made, plotting software wasn’t available for planetary orbits (like this one from fourmilab) or the writing staff would have known that in February 2202, the distance from Jupiter to Saturn will be about the same as Jupiter to the sun. Thus, some space warping would be necessary to get the ship to Ganymede. But we’ll move on.
In the infirmary, Dr. Sane, Nova, and IQ-9 watch over Wildstar as he regains consciousness. Quickly coming to his senses, he asks about their current status. Nova and Dr. Sane are evasive, so he turns to IQ-9 for answers. With his characteristic lack of subtlety, the robot reports that the EDF fleet was wiped out, the Comet Empire fortress is intact, and the Argo‘s extensive repair work is progressing slowly. Appropriately, this blunt delivery of bad news earns IQ dirty looks from both Sane and Nova.
Production note: the music heard during this sequence is a variation on the love theme that hasn’t been heard since the Telezart episodes. It works equally well here.
Wildstar tries to get up, only to find his right leg bandaged from foot to thigh. Dr. Sane tells him it’s not serious. He gets out of bed only to crash to the floor the moment he puts weight on the “not-too-seriously-hurt” leg. Nova orders IQ-9 to put Derek back in bed. Derek’s injuries must not be too severe given the way IQ manhandles him, literally tossing him back onto the mattress. Sergeant Knox walks in and Dr. Sane assigns him the task of making sure Wildstar stays put.
Dr. Sane is never revealed to hold a specific rank, but as a member of the Star Force he’s assumed to be part of the military. In many militaries, officers are divided into Line Officers and Staff Corp Officers. Line Officers are trained for positions of military command, while Staff Corp Officers are members of a profession, like lawyers or doctors. While Dr. Sane, a Staff Corp officer, may not technically outrank Wildstar (a Line Officer) his position as chief medical officer allows him the right to declare his C.O. unfit for duty and relieve him of command. Fortunately, the situation doesn’t quite escalate to that point.
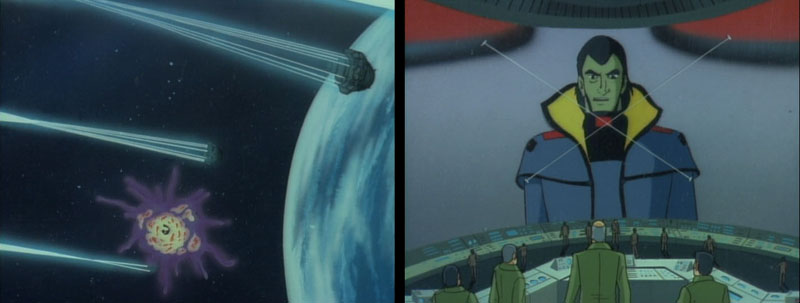
At EDF HQ, everyone watches as the Comet Empire continues on its path to Earth. Commander Singleton receives a call from the Earth President. The Commander confirms reports of the Earth fleet’s devastating loss. He suggests keeping news of the defeat under wraps. He’s horrified to learn that it’s already been announced.
Throughout the Comet Empire saga, Singleton has wanted to keep a tight lid on information. Viewing the Battle at Saturn as an analogue to the Battle of Midway, it’s interesting to examine the aftermath in the same light. After Midway, the Japanese government told an outright lie, announcing it to the public as a great victory. Even the Japanese Army was unaware of how devastating the loss at Midway was to the Imperial Navy. Only a select few, including Emperor Hirohito, were given a complete picture of the battle. Here, however, the truth of the “Space Midway” is made public.
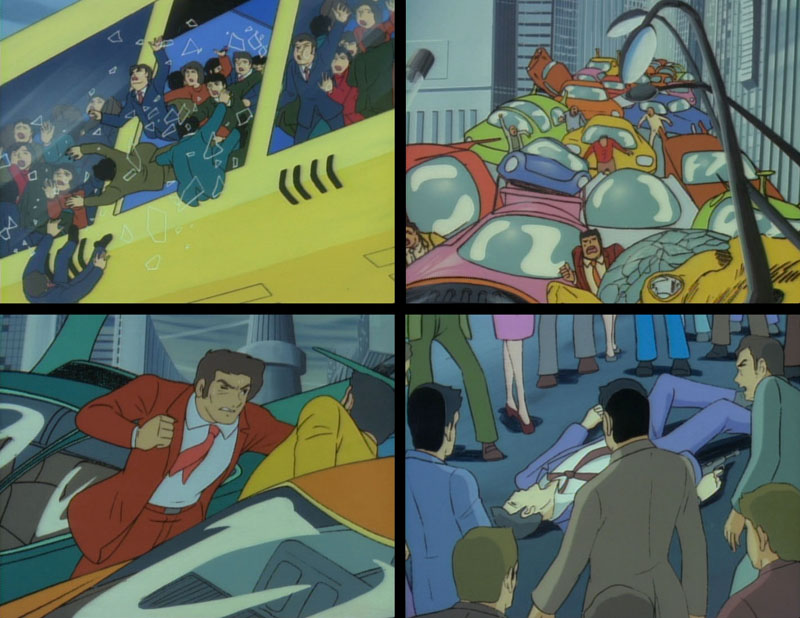
You might think the population of Earth in the early 2200s would be hardened against the threat of invasion. Not so. The reaction is all-out hysteria. It starts out reasonably enough, with calls for the government to resign. Then rocks are thrown through windows. Then people rush to the streets and onto the mono-tube trains, packing their way into the train cars until they literally burst from overcrowding. When the train leaves, the crowd at the station continues to surge forward, causing dozens to fall onto the track. Fist-fights are started. The mob only experiences a moment of pause when one man shoots himself. Vehicles crash and explode. Of course, the more disturbing scenes were left out of Star Blazers.
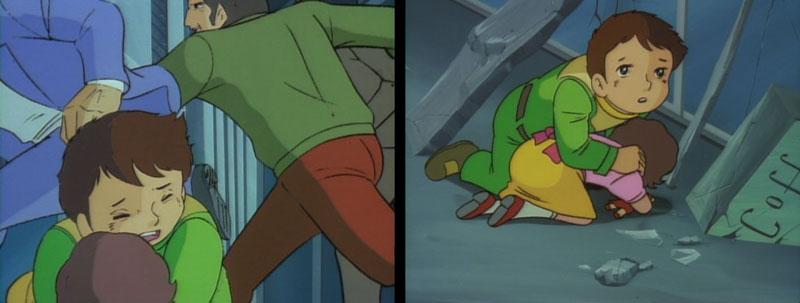
Even in the midst of this anarchy, there is still a place for heroes. Little Jirou Shima [Jordy Venture] performs an heroic act in Yamato 2. He pulls a young girl named Emi from the path of an onrushing mob and safely returns her to her mother. In this way, he’s risen above the huddled masses with his heroism. The next scene literally elevates him above the crowd; he sits on the balcony of a nearby building far above the riot, which is where Star Blazers rejoins the scene. He looks up at the sky, wondering when his hero brother will come back.
Jordy has such an endearing faith in his big brother. He reminds me a bit of Linus from the Charlie Brown Halloween special, waiting in the pumpkin patch for the Great Pumpkin. A boy with such a clear head is certainly EDF material, as we’ll learn a few movies down the road.
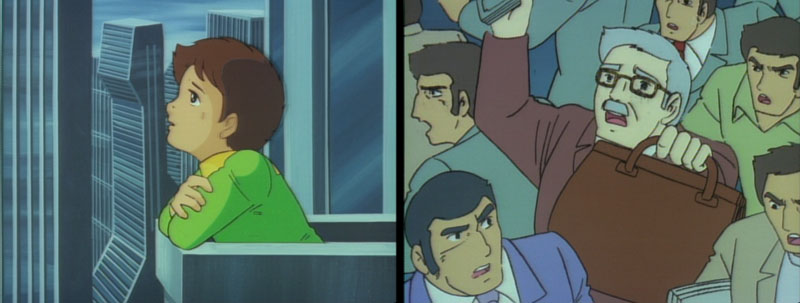
The panic continues at the spaceport. Some of it plays very effectively with music and echoing voices, which chillingly amplifies the futility of human actions. Star Blazers shows a man (who looks a bit like Professor Skyler from episode 10) getting pushed around by the crowds. He drops his bag and money spills out, which is trampled by the uncaring mob. In Yamato 2, this man had a few lines of dialogue where he tried in vain to offer cash to anyone who’d let him through.
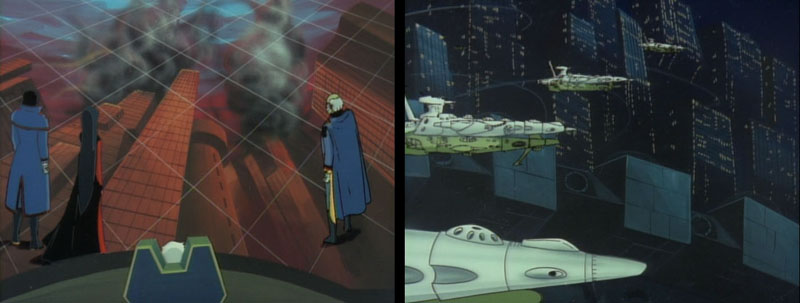
The Comet Empire bigwigs, Zordar, Invidia, Dyar, and Gorce, gloat over the panic their approach is causing. Zordar has decided that Earth is to be enslaved rather than destroyed. Dyar will send out a force to demand an unconditional surrender. A group of battleships and destroyers depart for Earth, revealing that the Empire still has ships at its disposal despite the recent loss of two large fleets. It’s possible these are the last remnants of the Comet Empire forces, since they won’t be seen again in the series.
EDF Battle Satellites are deployed to fend off the invaders. The Battle Satellites seemed very much a threat to the Argo in Episode 4. One fired a beam that looked nearly as wide as a Wave-Motion Gun’s. Maybe the Argo destroyed the largest and best Battle Satellite, because the ones seen here present no threat to the Comet Empire force. Out of dozens of beams fired (none of which seem bigger than a single shock cannon blast), only one strikes a ship and does absolutely no damage. The fleet’s return fire quickly destroys the Terran defenses. Gorce contacts the EDF war room. In the name of Zordar the “supreme commander of the universe,” he demands total and unconditional surrender. Should Earth “refuse the protection of the Comet Empire,” it is promised that nothing will be left alive.
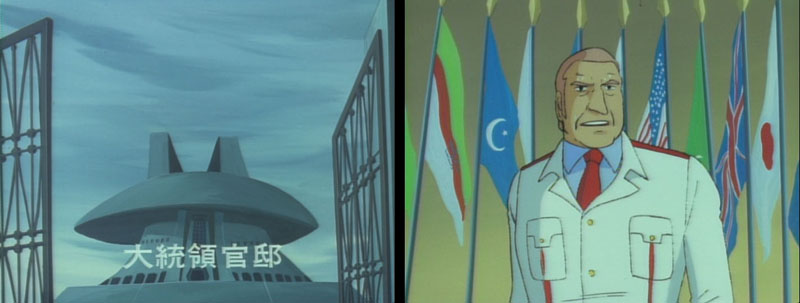
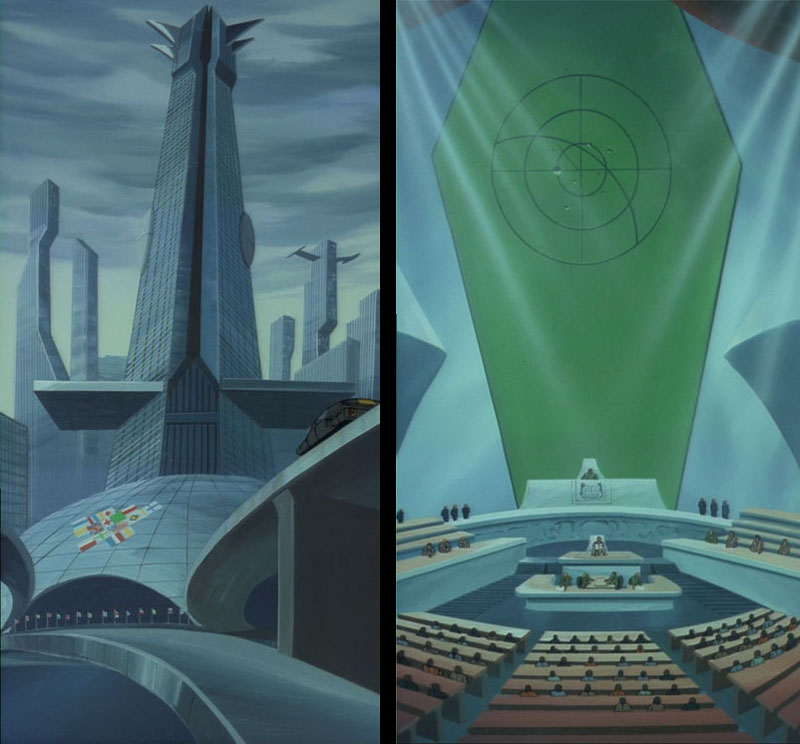
Commander Singleton confers with the Earth President in the Presidential Residence (location captioned in Yamato 2). Since the Comet Empire did not specify a time limit for an answer, the President plans to ask for a meeting to “negotiate an honorable peace.”
In this room are dozens of flags indicating which nations are still going strong in the 23rd century. We can see the US, Japan, Great Britain, and Turkey among the survivors.
Story note: In Series 1 (of both Star Blazers and Space Battleship Yamato) many nations no longer had their original names, an indicator that they were losing their identities after being driven underground by Gamilas Planet Bombs. The restoration of Earth seems also to have restored nationalism.
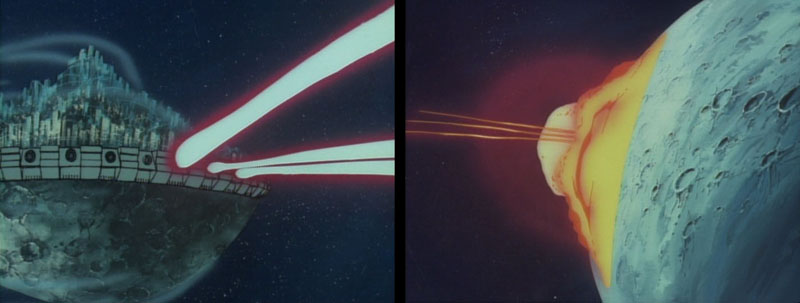
Zordar’s response to the overture of peace negotiations is laughter. He decides to show the Earthers the folly of testing his patience by making an example out of the moon. The Comet Empire “disco theme” spools up as the equatorial belt begins rotating. It fires powerful blasts of energy that strike the lunar surface with devastating effect. Moon bases crumble under the onslaught, and the satellite itself cracks like an eggshell as lunar rock is liquified into lava. Within a seemingly short time, the entire moon is a fiery orange mass. In the wake of this “demonstration,” Zordar gives Earth 24 hours to surrender.
The destruction of the moon itself is a great scene, but it’s even more chilling in the aftermath as denizens of Earth witness a minor sun in the night sky. The burning moon casts an orange glow down on the city. The buildings below it look like gravestones and the hollow-eyed people look like phantoms.
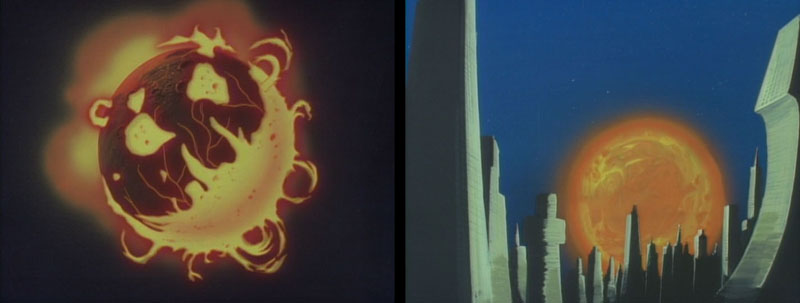
While it may appear that the moon is completely destroyed, we see later that this is not the case. The Comet Empire cracked it and turned part of it to molten rock, but most of its mass remains intact. If it were completely destroyed, we surely would have seen moon debris plummeting to Earth. It also takes a tremendous amount of power to destroy something as massive as the moon. While the Comet Empire has such power at its disposal–witness Torbuk’s destruction of the “dino planet” in Episode 9–such a feat would damage the Earth. At this point, Zordar desires the planet intact.
The agonizing decision to surrender unconditionally must have resonated with Japanese viewers where strong feelings about the end of World War II still lingered in 1979. The destruction of the moon can perhaps be likened to the atomic bombings of Hiroshima and Nagasaki; wanton destruction, merciless overkill, a crushing blow to an all-but-defeated enemy. An act designed not to kill the ability to fight, but the very thought of fighting.

The sequence of events in this episode roughly match those of history. As American forces prepared to invade Japan in the waning days of World War II, Japan turned to the Soviet Union, a neutral party, to negotiate an “honorable” surrender (not knowing that the Soviets were planning to renege on their neutrality, due to a deal they had recently made with the Allies). Before the talks could lead anywhere, two major Japanese cities were leveled by atomic bombs and the Soviets declared war against them. Japan had little choice but to surrender or face annihilation, echoing the choice faced by Earth here.
The President of Earth declares that they will surrender for the sake of future generations. Watching the President’s surrender address, Commander Singleton [Todo] thinks that if only the Star Force [Yamato] had survived they might have had a chance. The original battleship Yamato had great symbolic significance, and its sinking in 1945 was demoralizing to the nation. Todo’s thoughts–also voiced by other EDF personnel–put the space battleship on a similar iconic level.
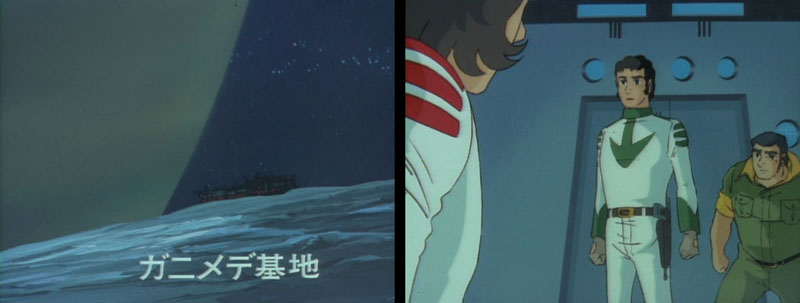
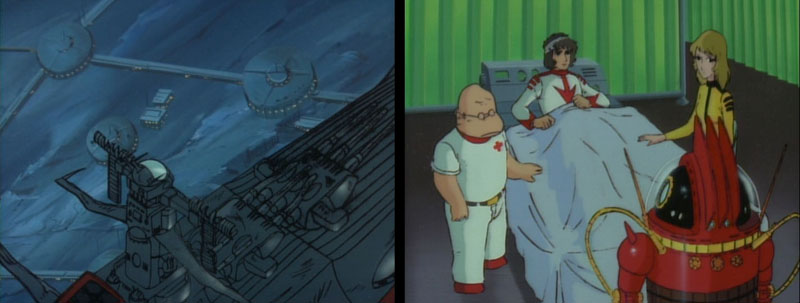
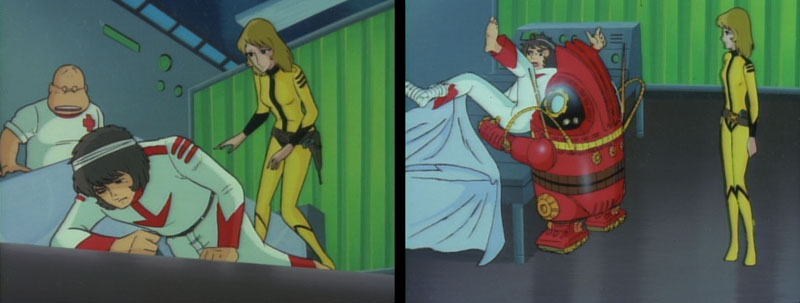
At the Ganymede base (appearing with a labeled establishing shot not seen in Star Blazers), the repair work continues on the Argo. Knox dutifully plays the part of a sleeping guard dog at the medical room’s door, suddenly stirred awake when Venture walks in. Just by his pose and the look on his face, it is apparent something serious has happened.
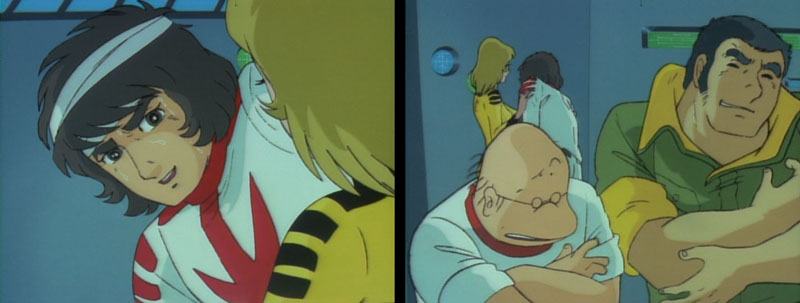
He breaks the news of Earth’s surrender. Derek’s response is to get out of bed. Knox goes to help him up just as Dr. Sane and Nova enter the room. Upon hearing news of the surrender, Dr. Sane offers to get a wheelchair, but Wildstar intends to stand on his own two feet. However, he doesn’t even get one step before he collapses. Nova is quick enough to catch him, and offers her support to him any time. In Yamato 2, this stirs comments of jealousy from Dr. Sado [Sane] and Saito [Knox]. (Good decision, leaving it out of Star Blazers. It seems inappropriate to the mood of the scene.)
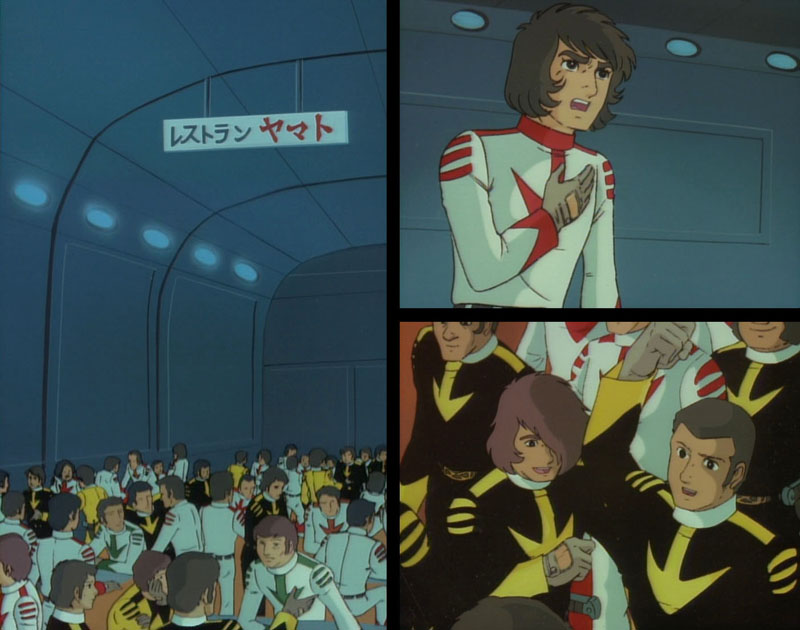
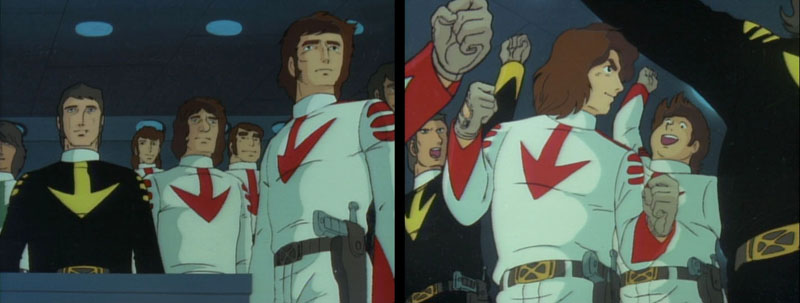
In the Argo‘s mess hall (called “Restaurant Yamato” in Yamato 2), the entire complement of Star Force crew and Space Marines gathers for a meeting. Wildstar delivers a brief address. While Earth has surrendered, the Star Force will continue fighting. He looks to Gideon and Trelaina as examples of those who fought to the bitter end. The entire crew, Marines included, rally around the Captain as they prepare to take off.
Kodai’s speech is longer by a few lines in Yamato 2, where he passes along the final words from Captain Hijikata [Gideon]. Kato [Conroy] and Yamamoto [Hardy] both cheer their approval.
Production note: crowd scenes in many anime programs feature specific character designs that rise above the usual generic faces and hairstyles that commonly populate sequences such as the panic on Earth. In some cases, they are so specific that they call attention to themselves. When that happens, you are most likely looking at a caricature of someone on the production staff.
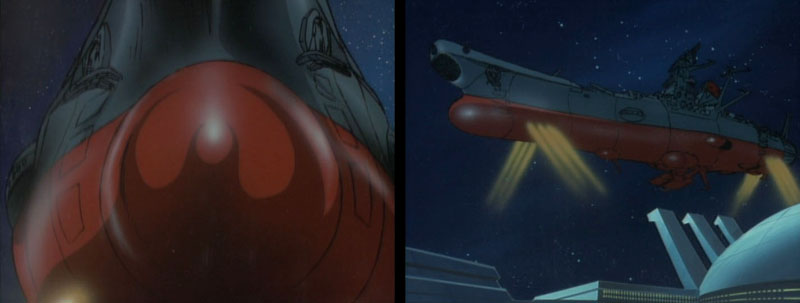
The repairs are completed and the Argo blasts out of its docking cradle.
Production note: an unusual artistic choice here lead to a bow shadow in the approximate shape of Batman’s bat symbol. Good luck trying to ignore it now!
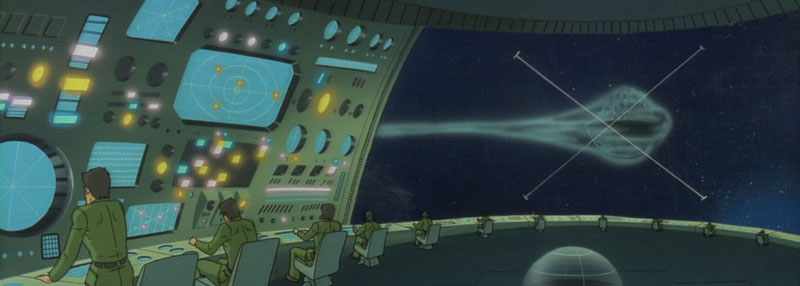
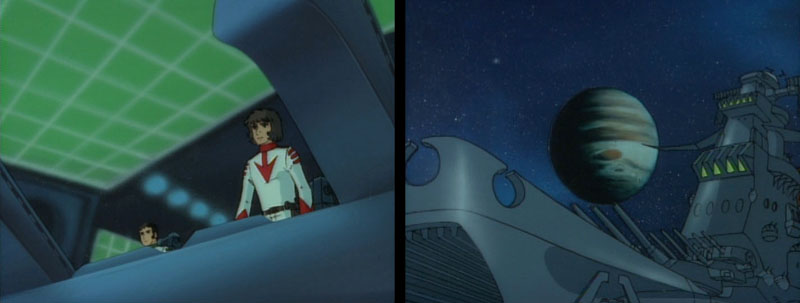
Nova punches up an image of the Comet Empire, hovering between the moon and Earth. Sandor reminds Wildstar that they should attack it from underneath, something they seem to forget and remind themselves of two episodes from now. Homer announces that the radio can transmit again, but Wildstar wishes to maintain silence for now. (Which is as good an explanation as any for why they didn’t just use the Ganymede base’s equipment to call home.)
This is a relatively quiet episode, with the destruction of the moon and the rioting serving as the only action scenes. With the Earth Fleet destroyed, it all comes down to the Star Force. The casual ease with which the Comet Empire attacks the moon raises the stakes even more. From here on, the drama only gets more dramatic.
Story note: The Star Force leaves Ganymede base in late February, 2202.
When the moon is destroyed and the president considers surrender, behind Singleton there is (I think?) a map of the world with incredibly distorted looking continents. I wonder if the planet bombs have permanently changed the appearance of the Earth. Although there’s other maps in this same episode that were drawn more accurately, so maybe not.