
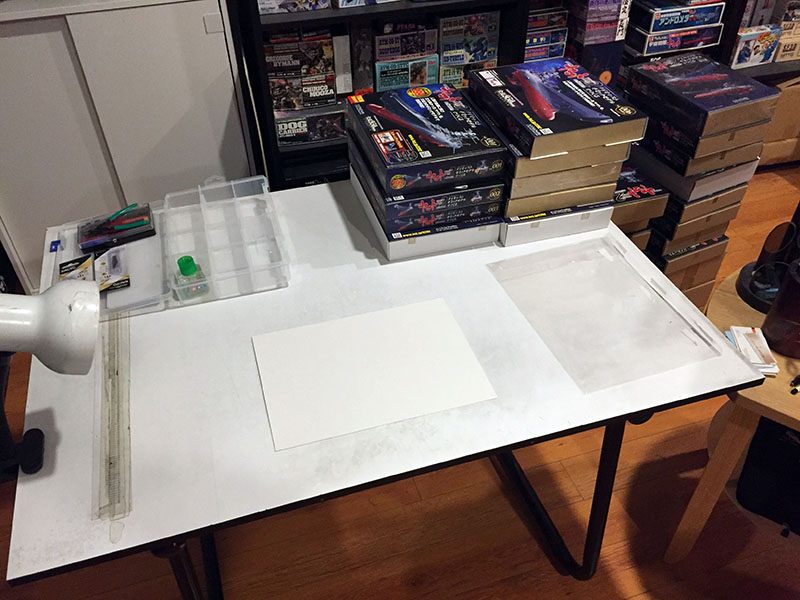
The work area: a drawing table with mini-lamp for closeup work.
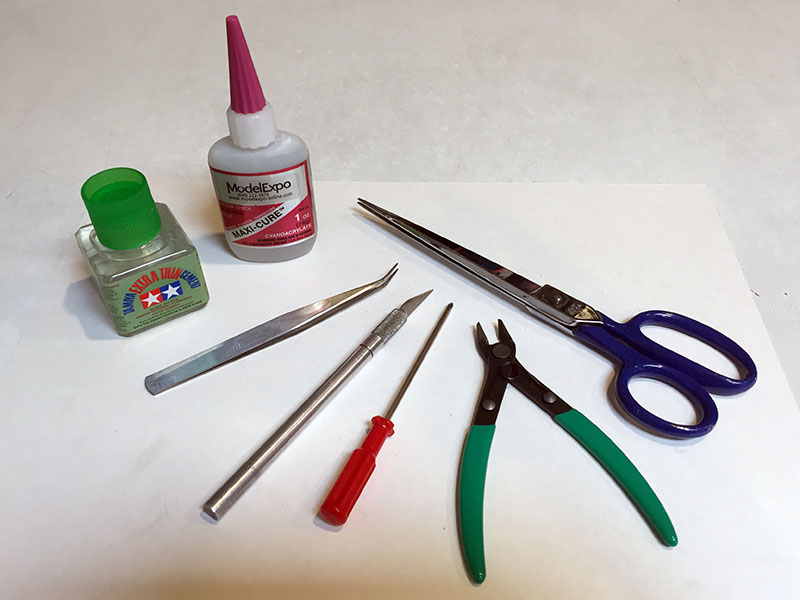
The tools. Important: the plastic parts are made of ABS, which requires a specific type of glue. My local hobby shop recommended “Tamiya Extra Thin Cement” and it worked like a charm. You will occasionally have to glue metal to metal, so I resorted to super glue for that. Not shown: a 5-gallon jug of patience. Some Pym Particles would have been REALLY helpful.
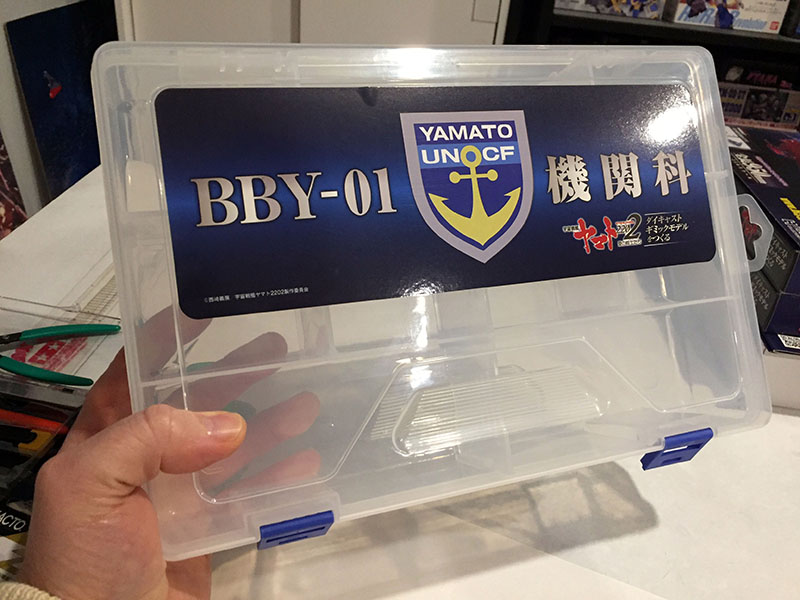
Subscribers got this parts box to store bits in between building sessions. For some reason, Hachette screwed up and sent me two. Okay, if you insist…
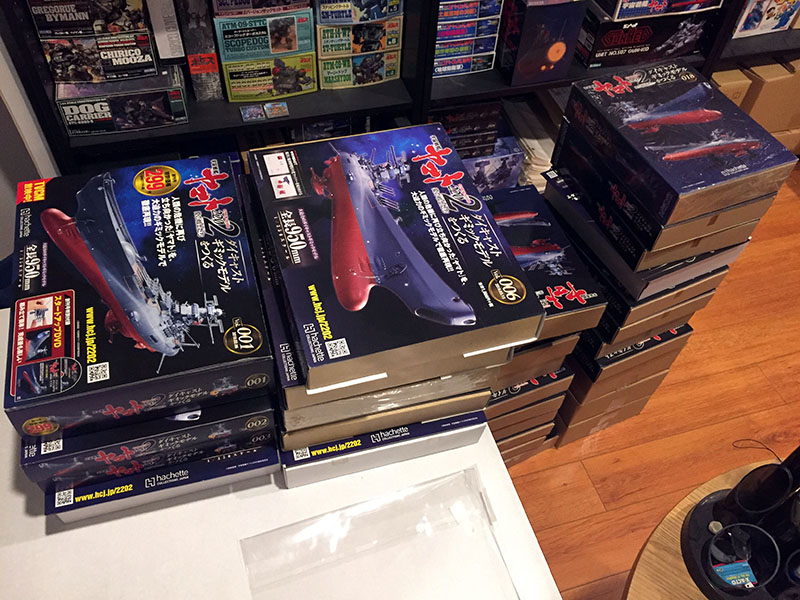
And let’s not leave out 110 volumes of parts that have been sitting patiently for my attention since the last one arrived in March 2021. (The subsequent Andromeda volumes are stacked up just off-camera.)
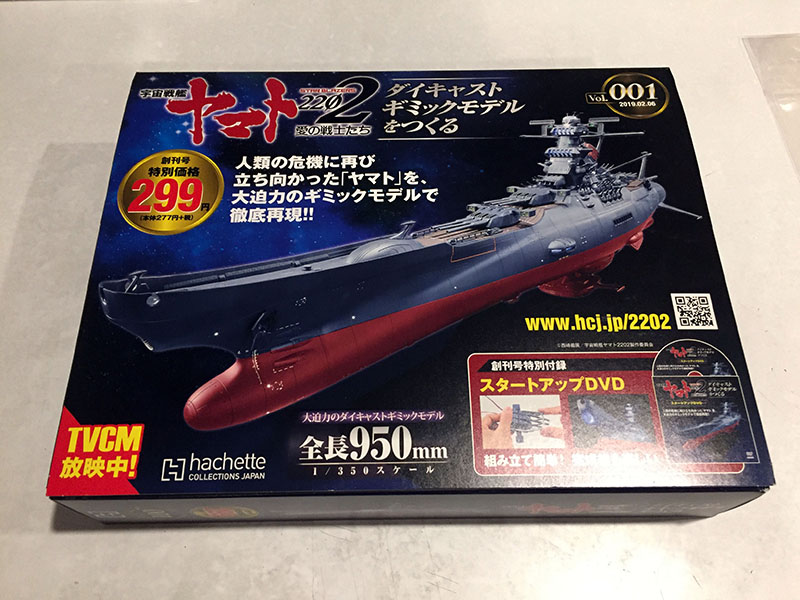
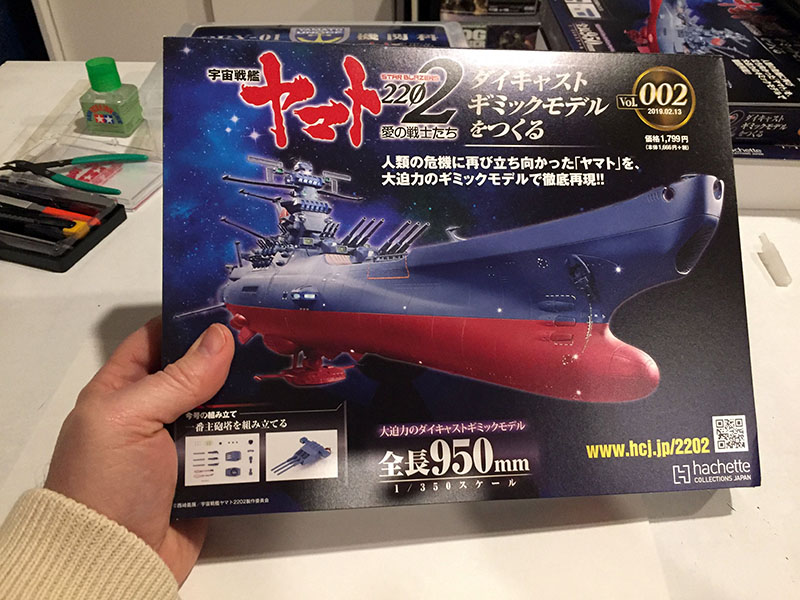
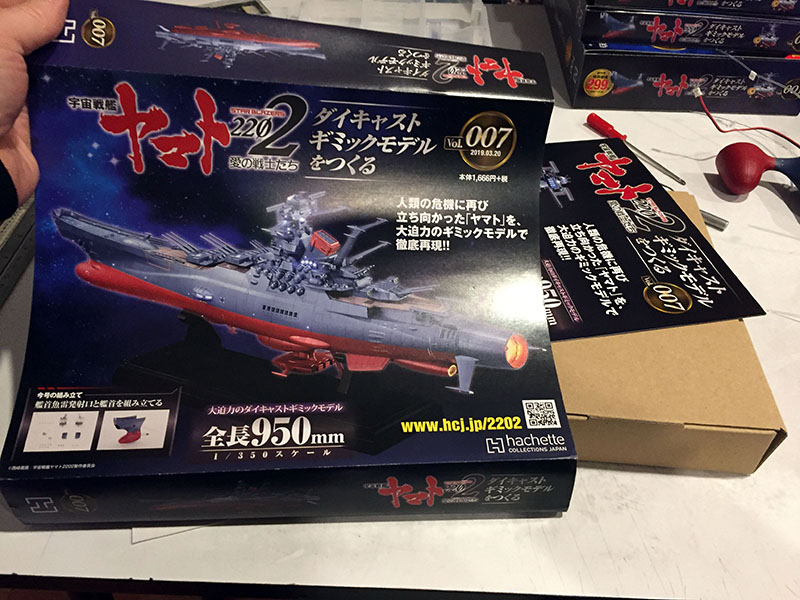
Let’s get started. Volume 1 debuted in January 2019 for the lure-you-in price of only 299yen (under three bucks). All volumes after this were 1800yen each, released every Wednesday for over two years straight.
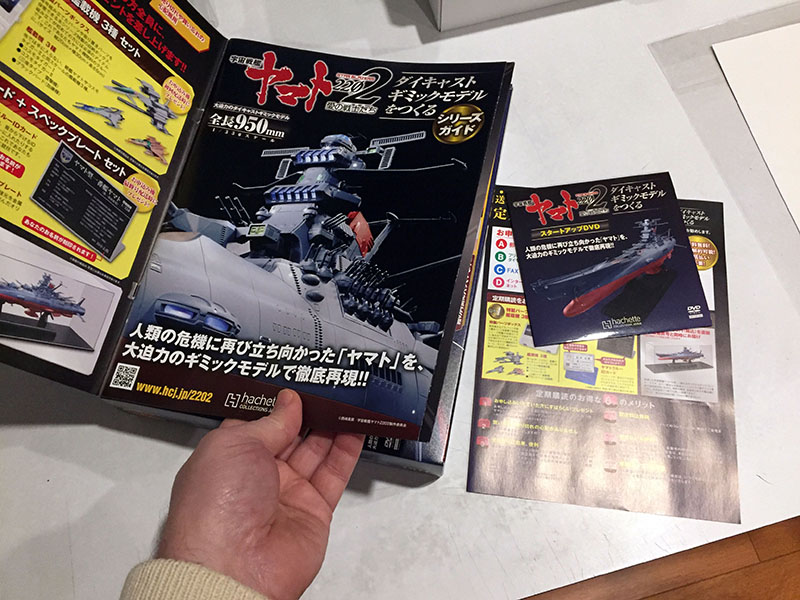
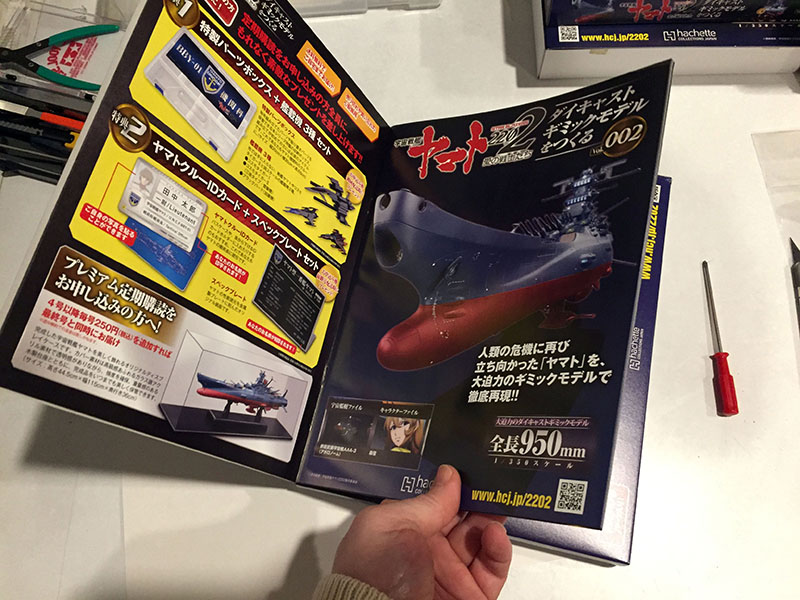
The first volume had a promo DVD and a bound-in magazine, which had to be removed for use.
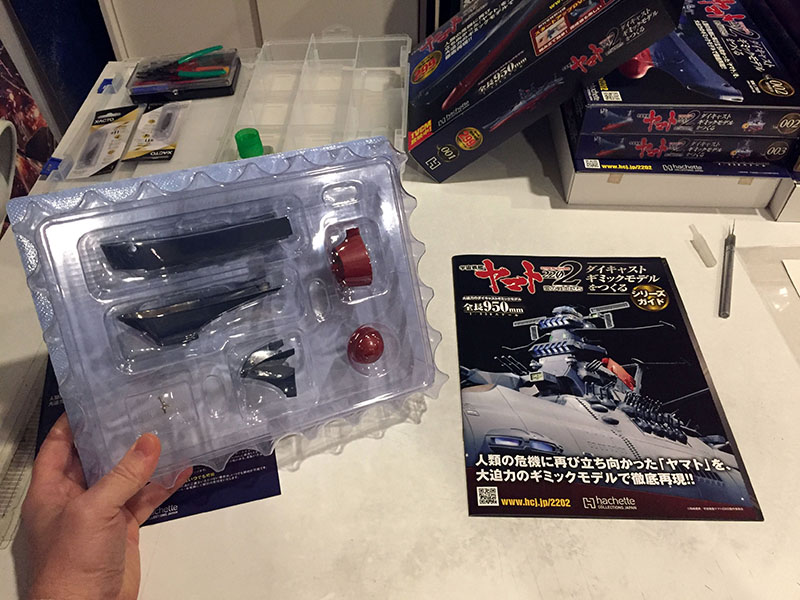
This was one of the biggest part sets, providing the business end of the bow.
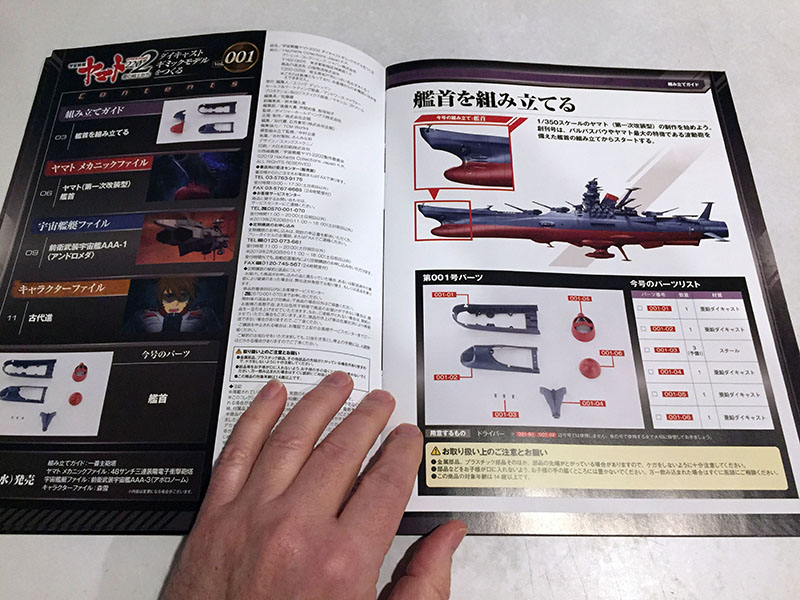
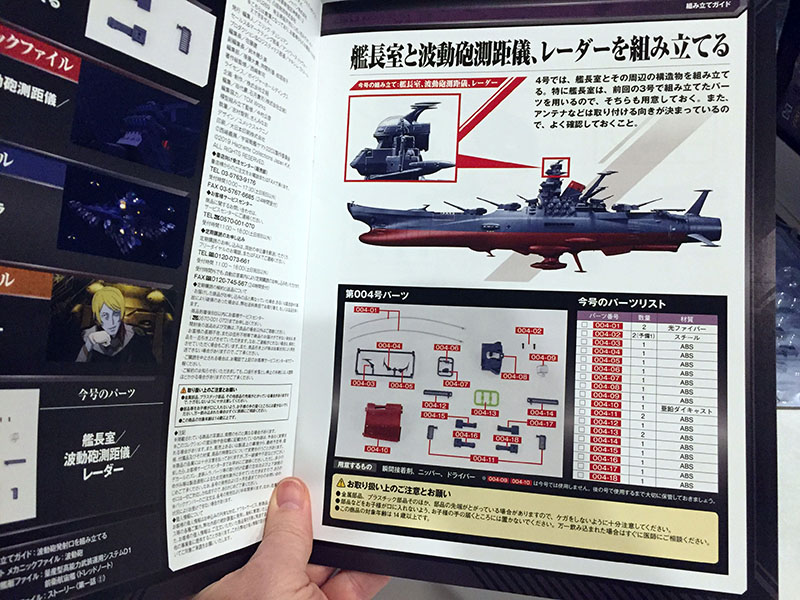
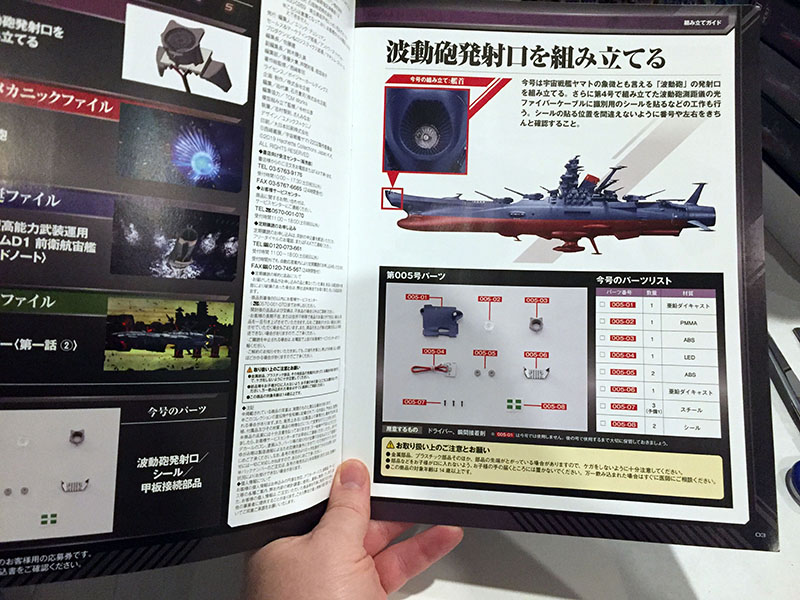
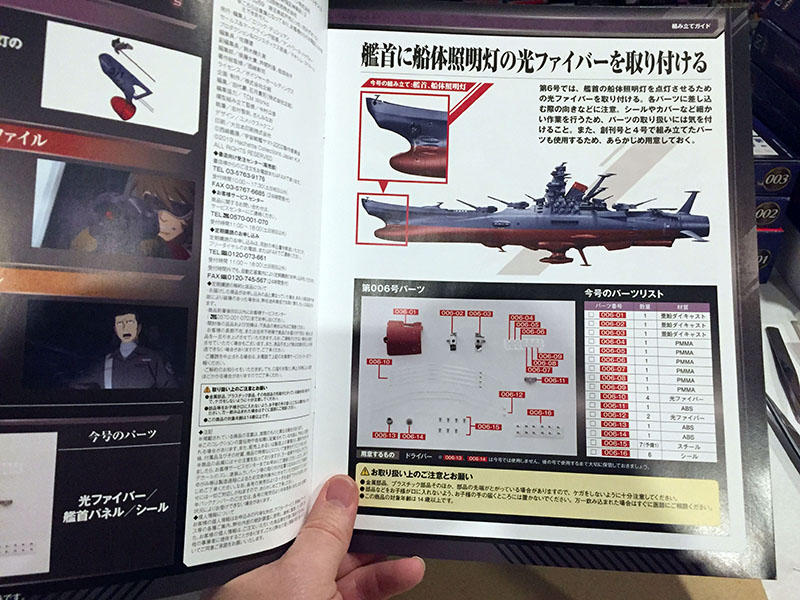
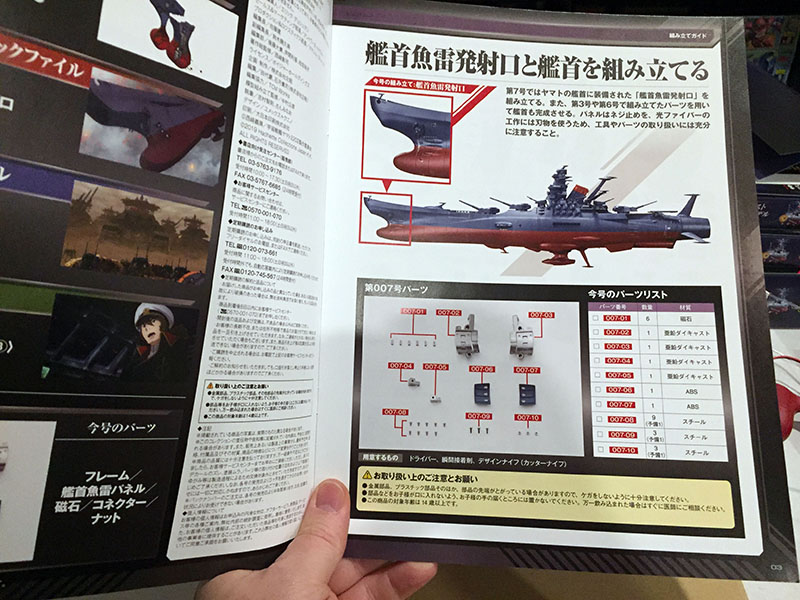
A magazine comes with every volume, containing instructions and large-format coverage of Yamato 2202. It’s what we got instead of a Roman Album. The opening page shows which part of the ship you’ll be working on and what the parts look like.
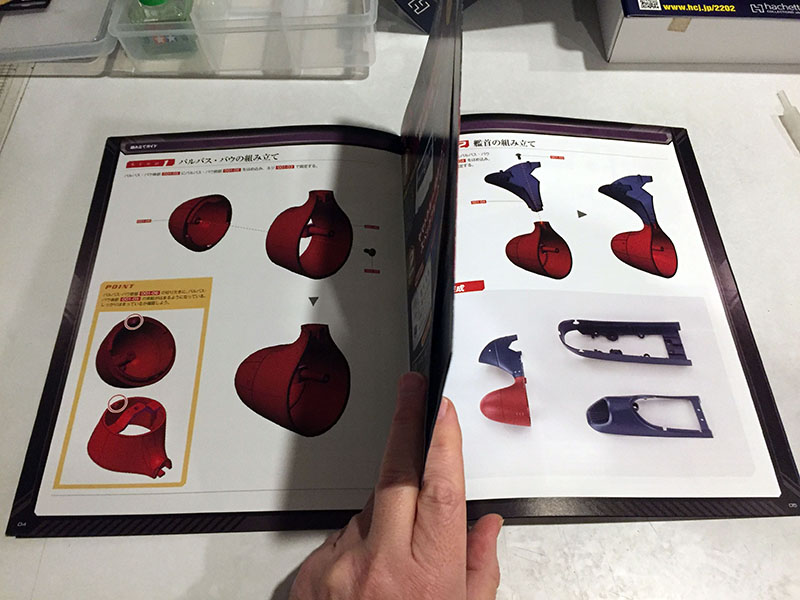
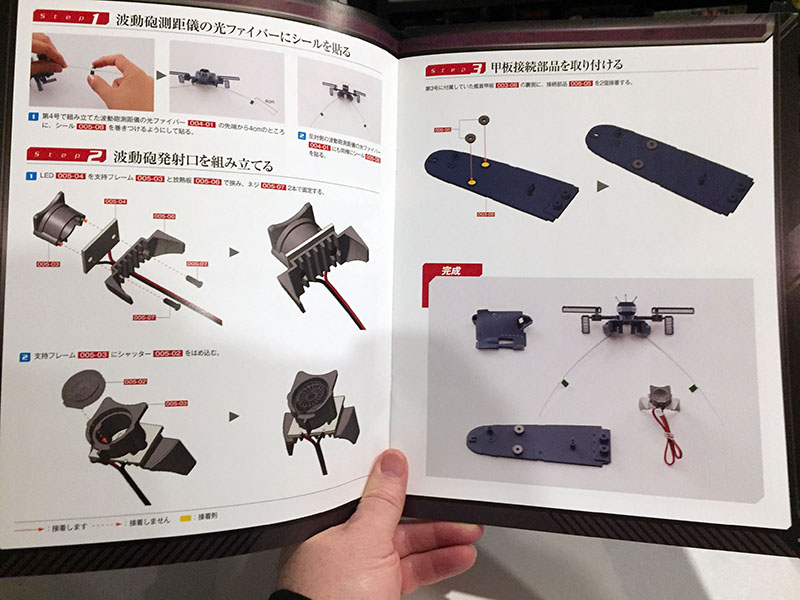
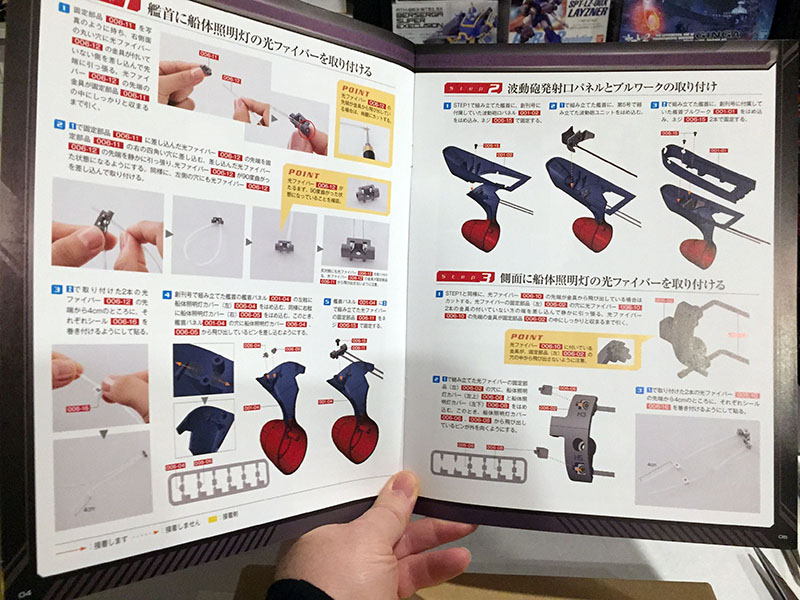
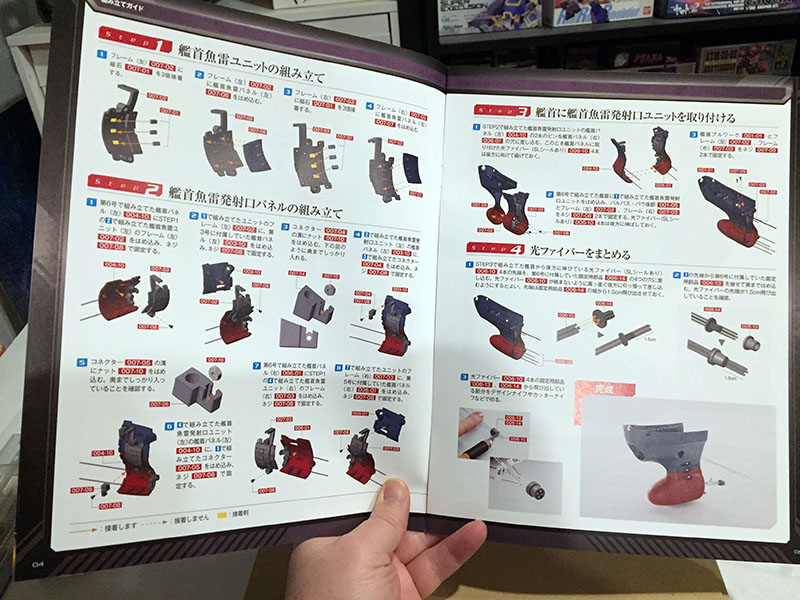
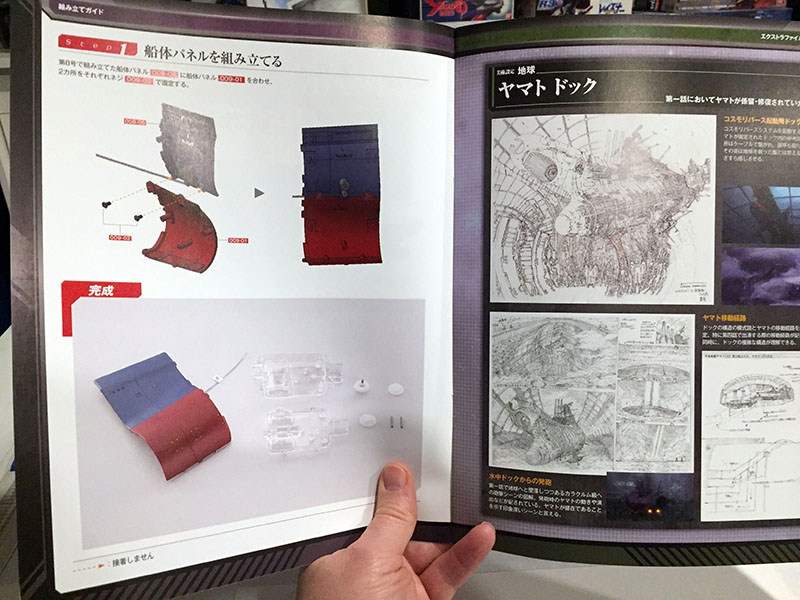
The instructions show a CG model being put together. As with every Japanese kit I’ve ever built, you almost never need to read the text. Hachette went overboard in this series to make the pictures do the talking. At bottom right is a “completion photo” to signal that you’re done.

The toughest part was cutting through all that plastic. If this was a theft-prevention move, it almost worked on me even after buying it. Good thing they’re not all like this.
The muzzle of the Wave-Motion Gun was the first part of the model I made physical contact with.
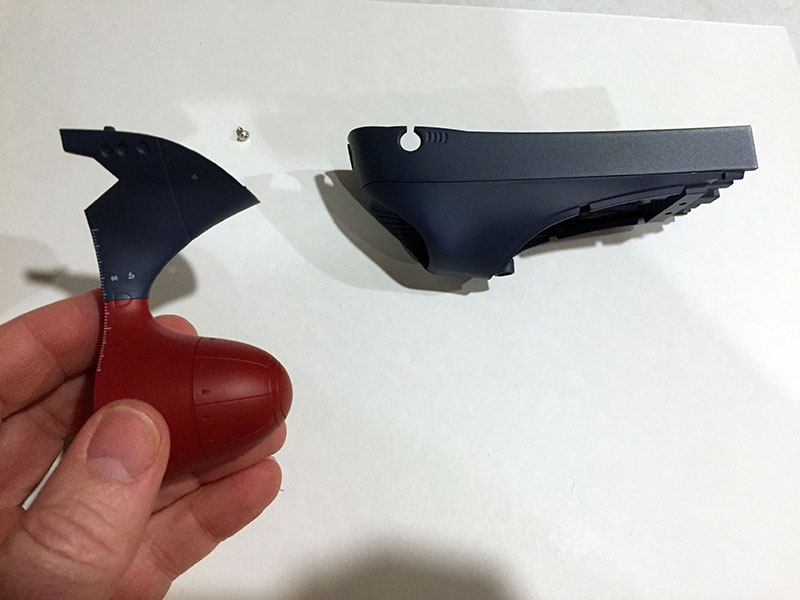
And…done. The only assembly was screwing together the parts in my hand. The bow faring isn’t actually connected yet. One nice thing: whenever they include screws, there is ALWAYS one extra of each in case you lose one.
On to Volume 2.
Another case where the magazine was bound in and had to be knifed out.
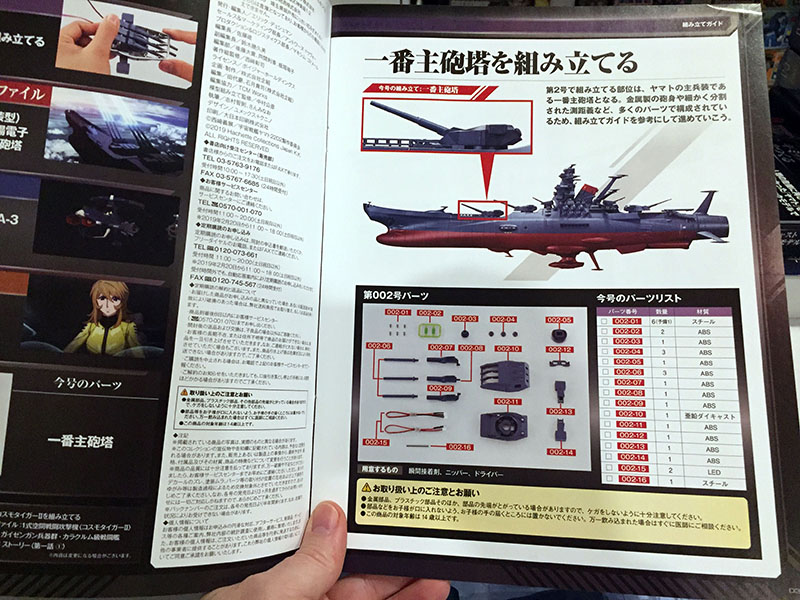
We’re jumping from the bow to the first main gun turret. This wasn’t for any practical reason, Hachette just wanted something cool to bring customers back for week 2.
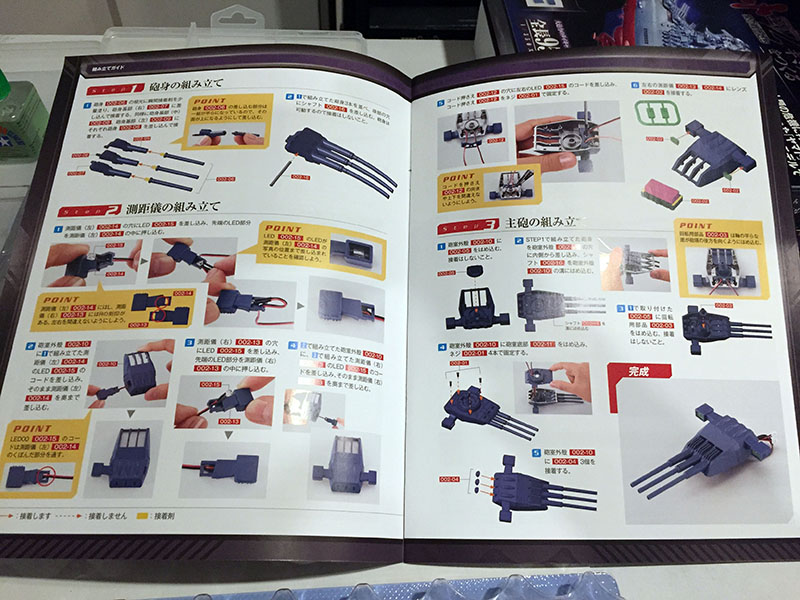
Quite a few steps, and the first ones involving lighting. In this case, there’s a LED behind each of the two green range finders.
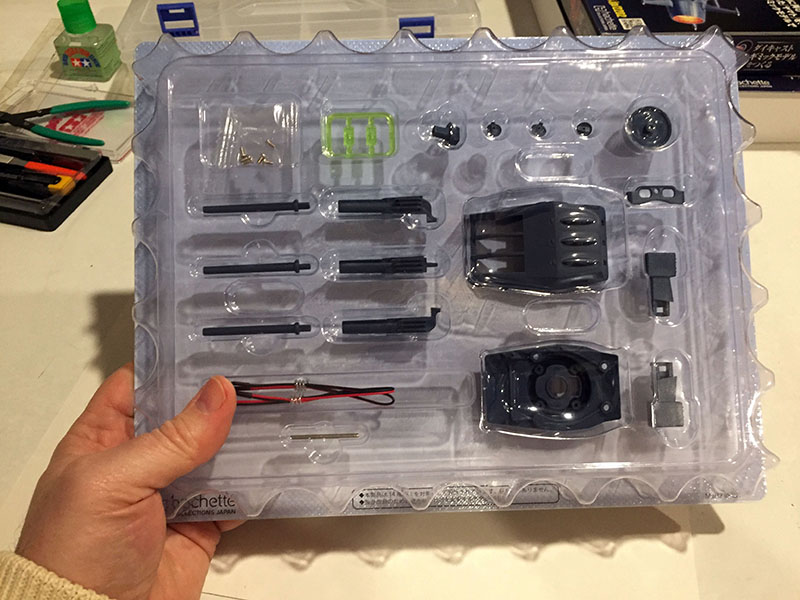
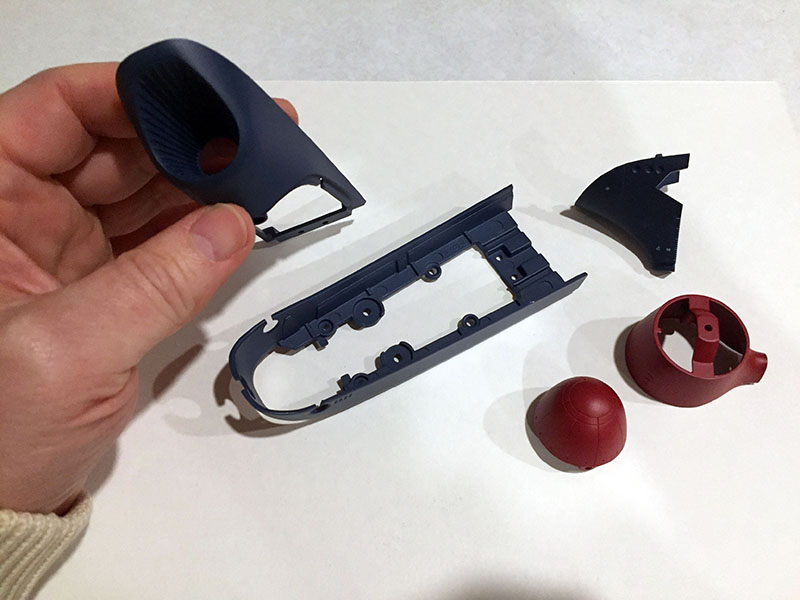
All the parts, again sealed up in the toughest plastic shell ever conceived by man.
The finished turret is already larger than some of the smallest Yamatos you can buy.
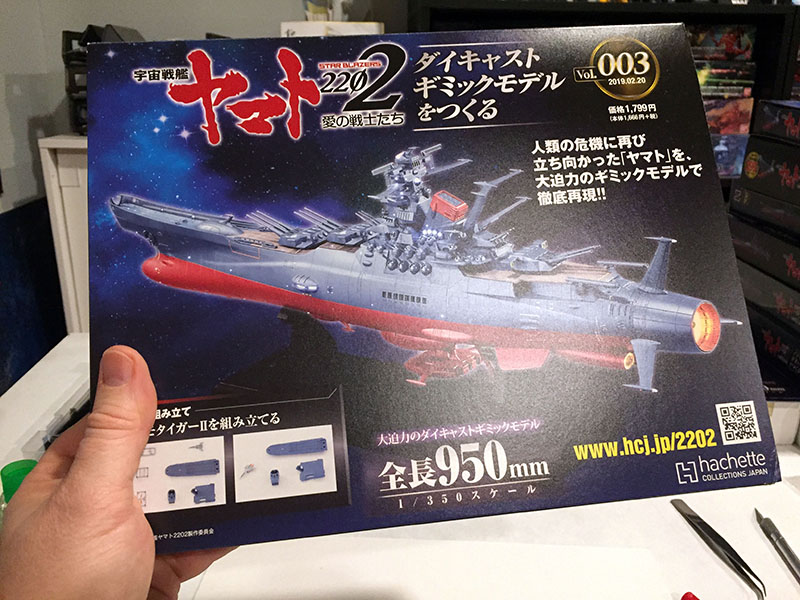
Here’s volume 3.
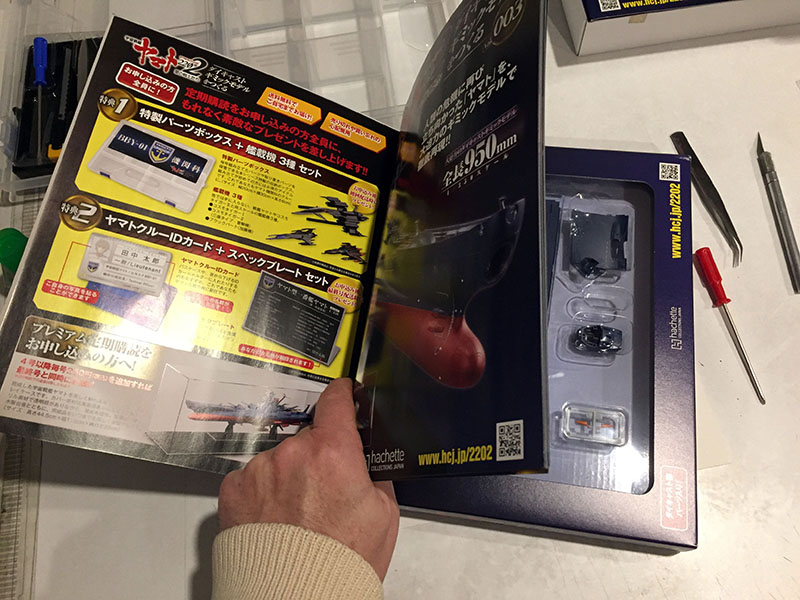
This is the last one in deluxe packaging with a bound-in magazine.
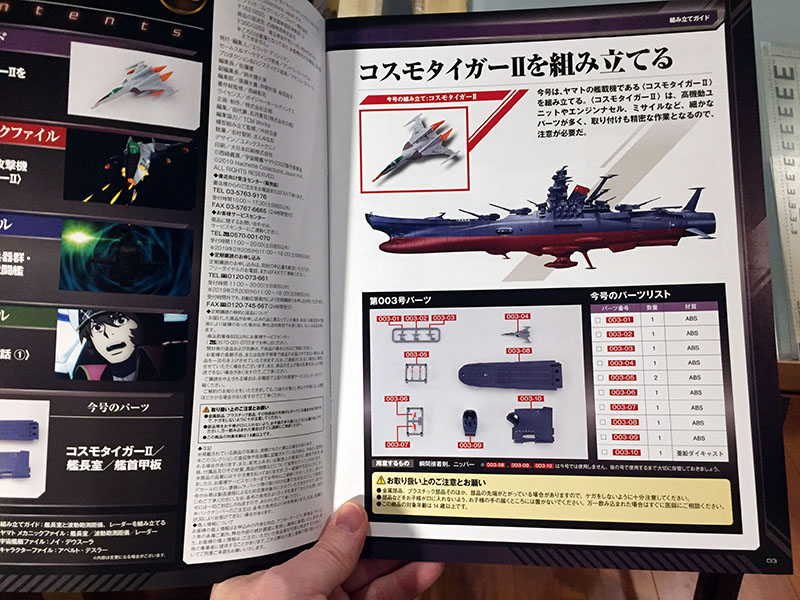
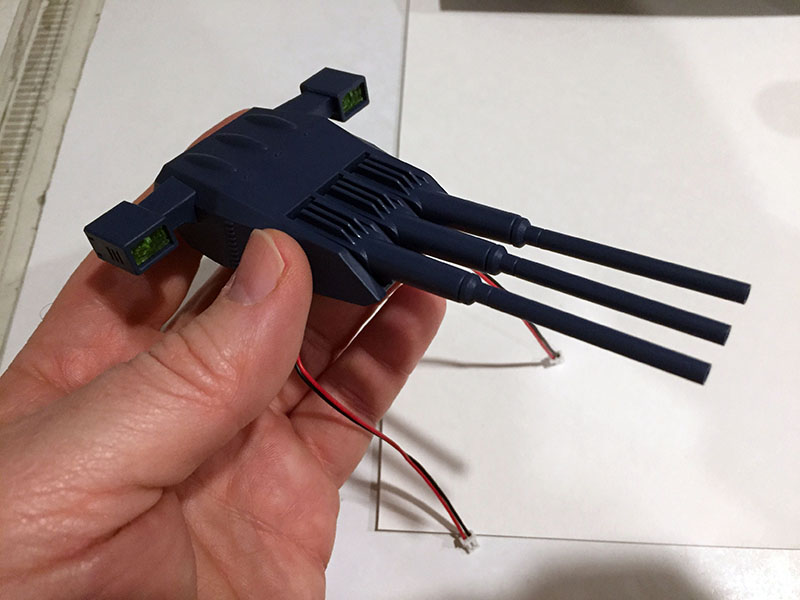
A few ship parts in this one, but the only thing being built this week is a Cosmo Tiger.
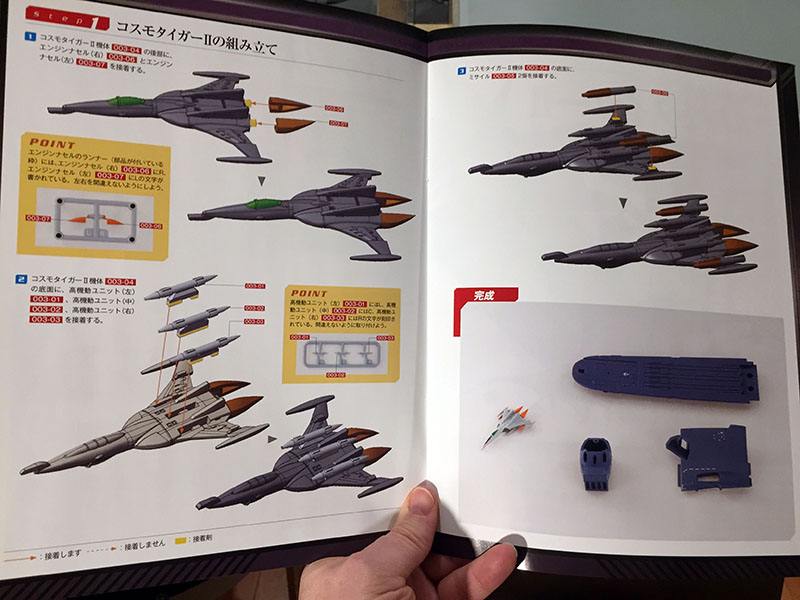
It looks easy, and would be if the thing wasn’t so tiny. You need a forceps and a tiny glue brush to get this together.
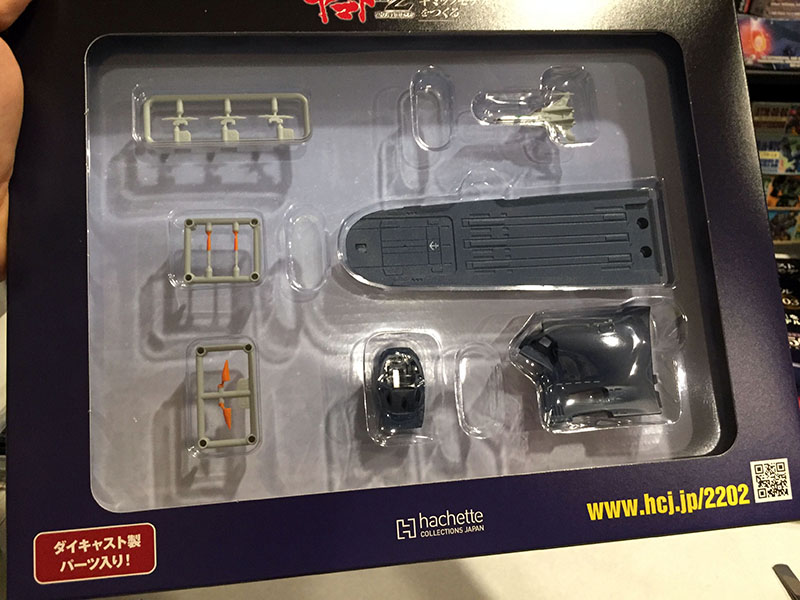
Here are the parts.
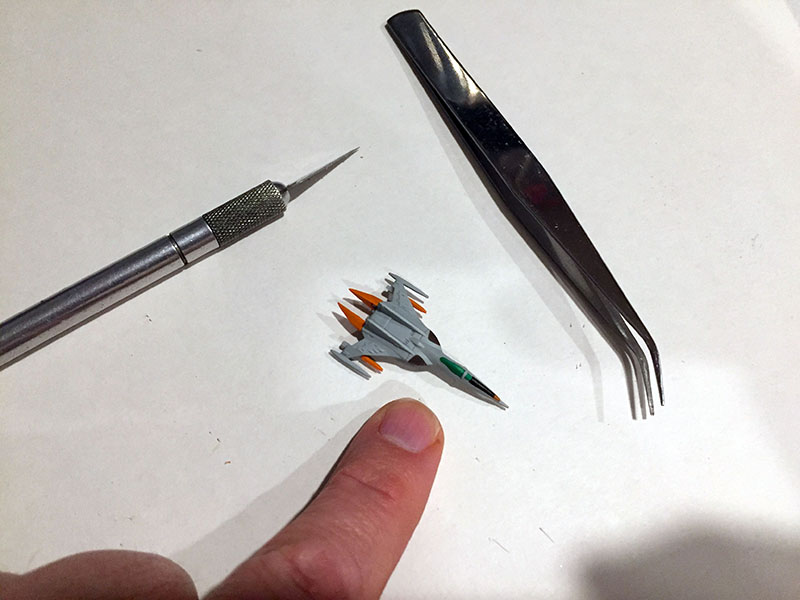
The finished Tiger is only 1.75″ long. Eventually there will be a whole squadron of these to go in the hangar. This was another case of getting something cool into Volume 3 that would spark everyone’s interest.
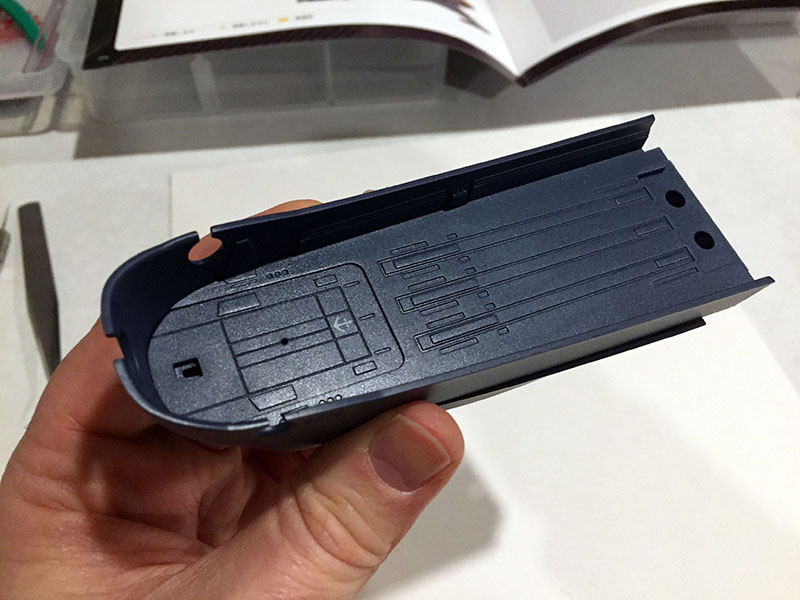
The foredeck is also included. Here it’s just sitting in place, not assembled yet.
Ditto with the first hull plate. I’m just holding it on to get a sense of it.
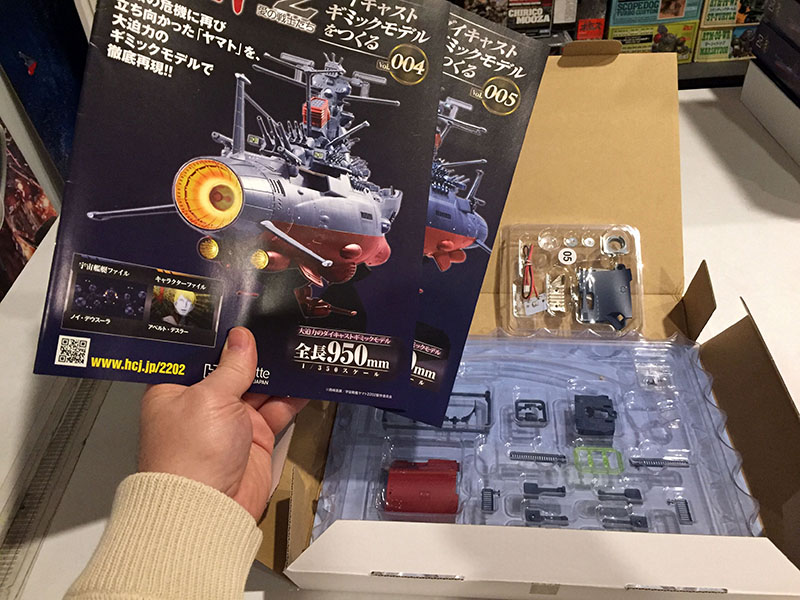
Here’s where the packaging got more sensible. Subscribers started getting bundles that sensibly cut down on materials.
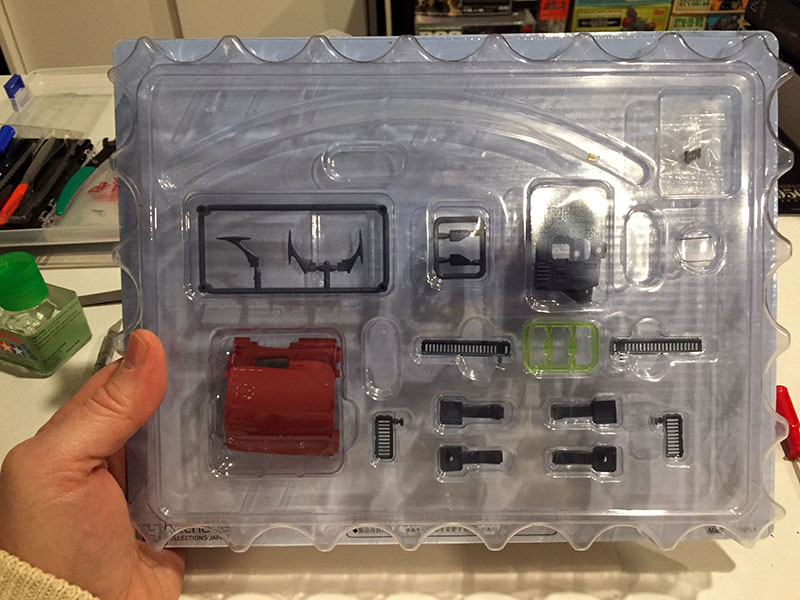
Parts for Volume 4. Thankfully, it’s the last time I had to deal with the plastic shell from hell.
In Volume 4 we jump to the top of the bridge tower. We also get another hull part, but won’t do anything with it yet.
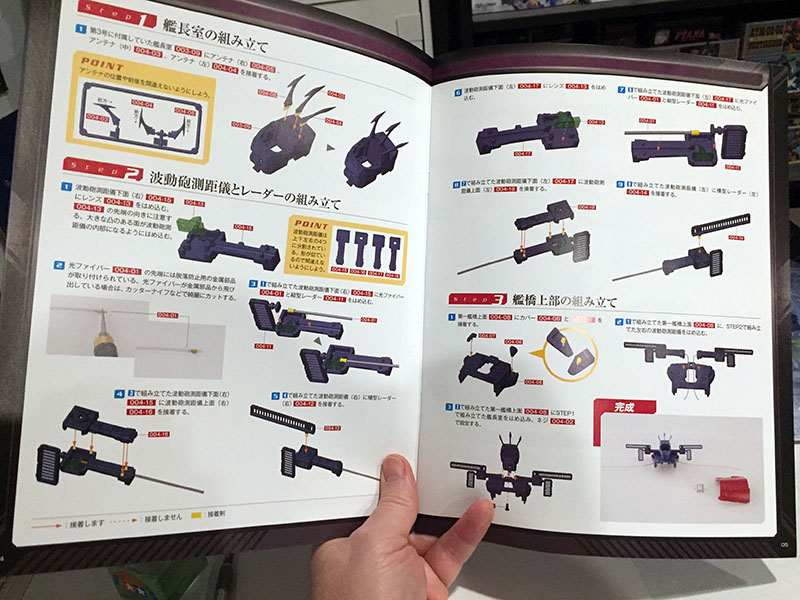
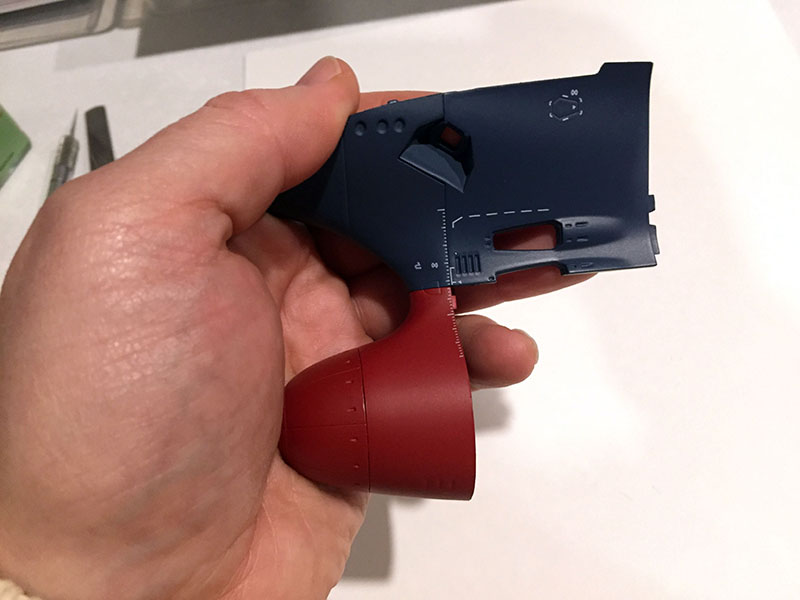
We’ll be assembling the captain’s dome and the sensor suite.
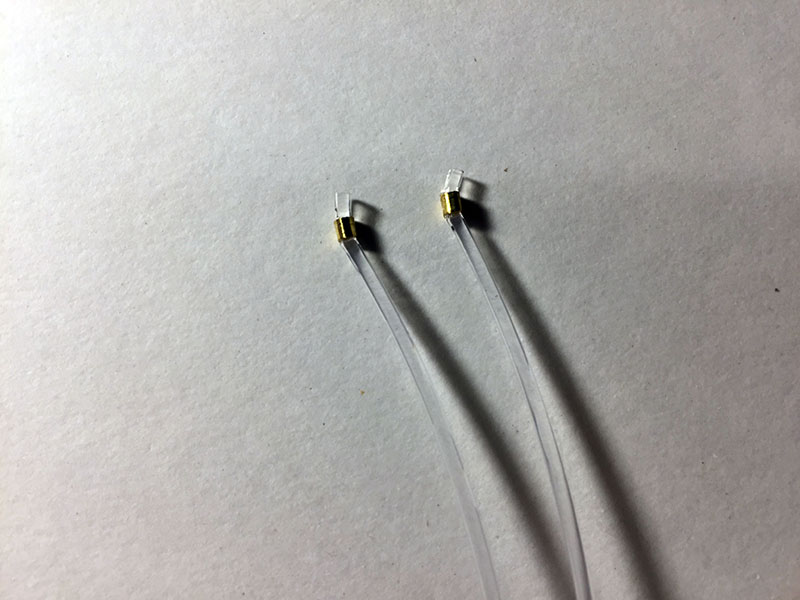
This is the first time we start handling fiber optics. There will be a LOT of these. They each come with a metal cuff at one end. The first step is to slice off the extra bit so the actual end of the fiber is flush with the cuff.

Finished assembly of the tower top. Knowing how much flipping and turning is coming up later, I decided NOT to put the three fins on the dome yet. That turned out to be a very wise decision. Some later operations would have been much more difficult if those fins were in the way. I realized after the fact that I should have left off the large sensor grills for the same reason. Oh, Well.
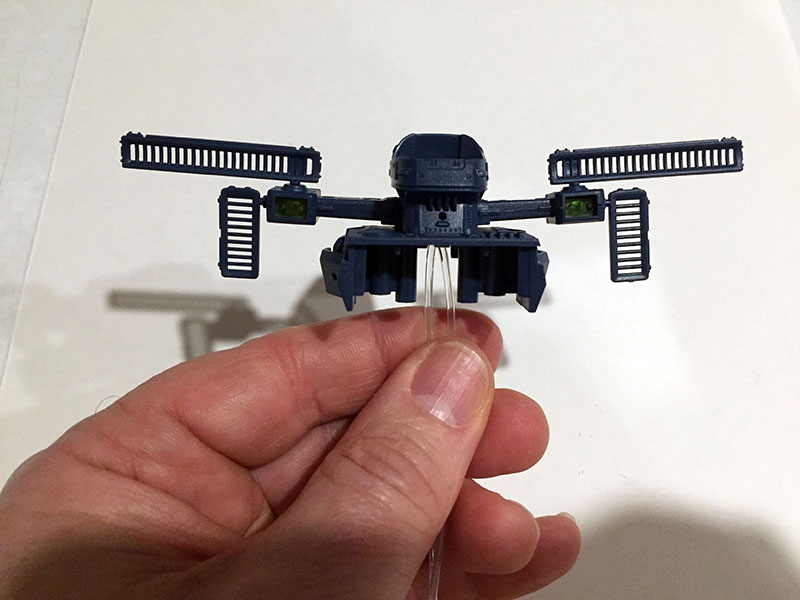
The fibers each go out to the green lamp in the sensor block. They are flexible so they can bend around corners, but they’re still quite springy. Left on their own, they force the two arms upward. The instructions didn’t say to glue the arms down, but I did it anyway. (This was the correct assumption; a later volume said to glue them down.)
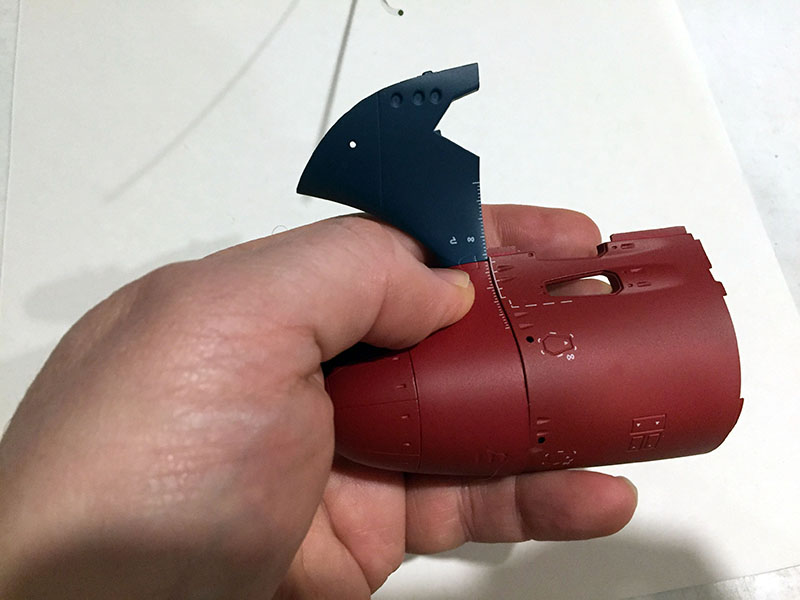
Here’s where the new hull plate will go. The printing on these is phenomenally precise and really stands out.
Everything received and assembled so far in Volumes 1-4.
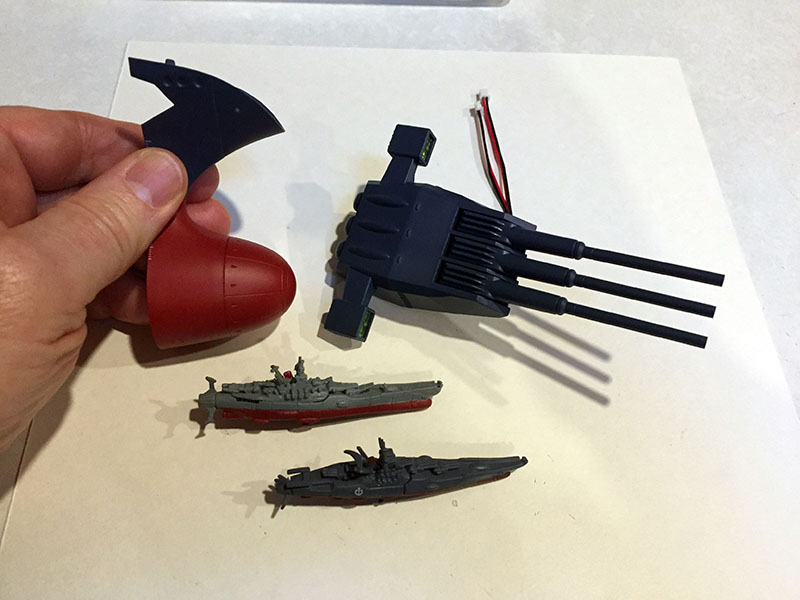
Here’s the first size comparison just for reference. These are the smallest Yamatos I could dig out of the collection, both roughly 3″ long.
Let’s get into Volume 5: the interior parts for the Wave-Motion Gun.
It doesn’t look like much, but there’s a VERY bright LED involved.

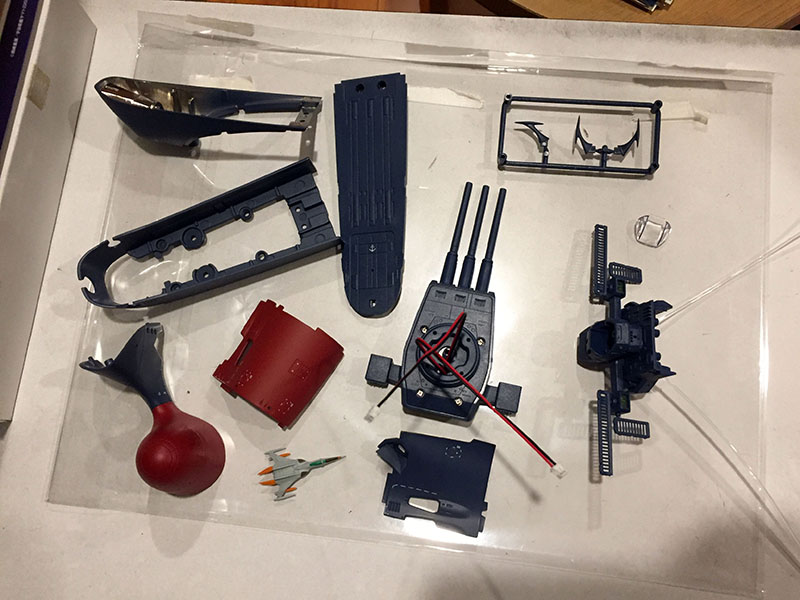
Parts for Volume 5.
Finished. The tower top is shown because of an important step that will become very common; every fiber optic looks alike, so they all have to be labeled with individual “flags” for identification later.
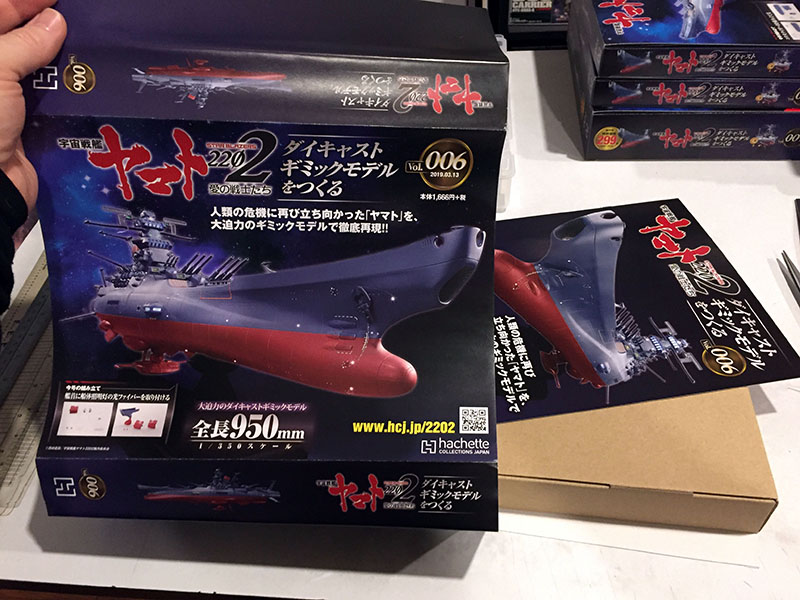
Volume 6 had different packaging, a large paper sleeve wrapped around the magazine and the box. This was transitional.
This time we’ve got another hull plate and a bunch of internal parts, including fibers for six lights.
The instructions indicate this is where the bow parts will come together and the WMG will be installed.
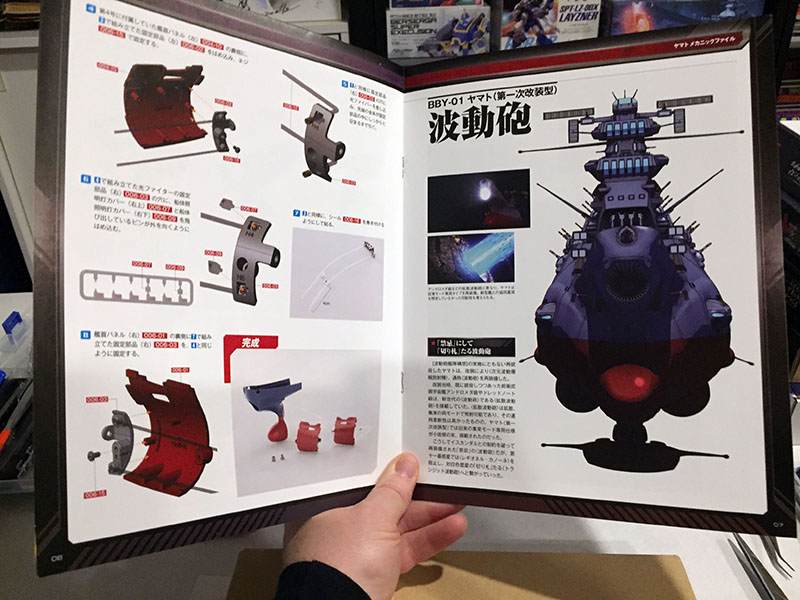
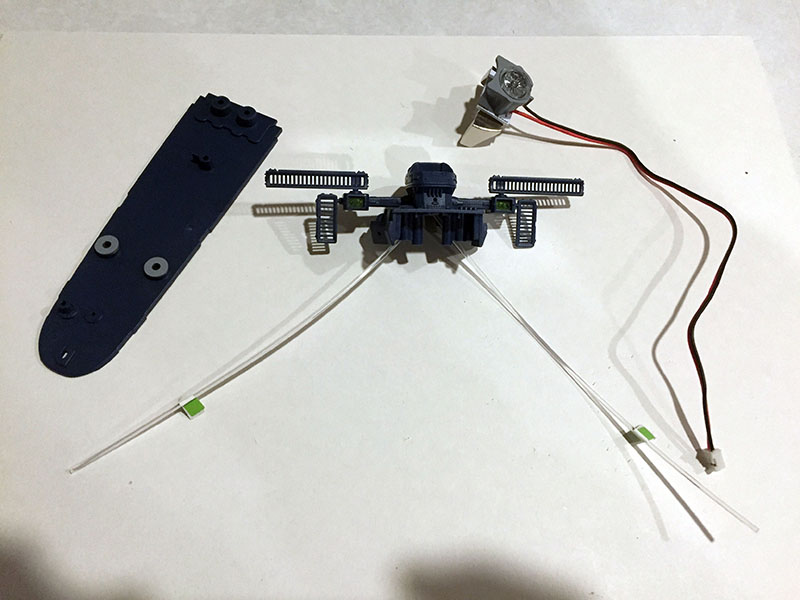
We’ll also add lights to the insides of some hull panels. Every such light has three component parts: fiber optic cable, a tiny clear bit, and a bracket to attach them both to the hull. The cuffed end of the fiber is pushed right up against the clear bit, which pokes through a tiny hole in the hull. It looks simple now, but all those parts will pile up fast once we get going.
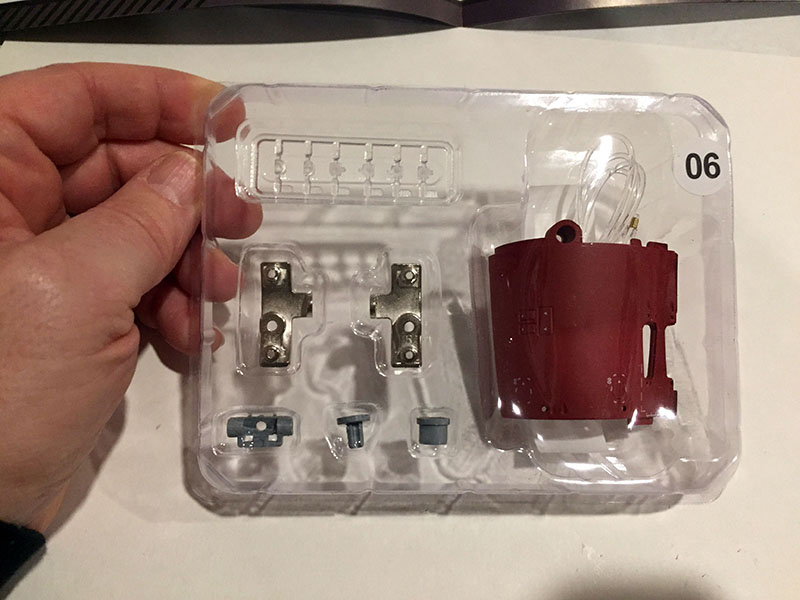
Volume 6 parts. The fibers are bundled up behind the hull plate.
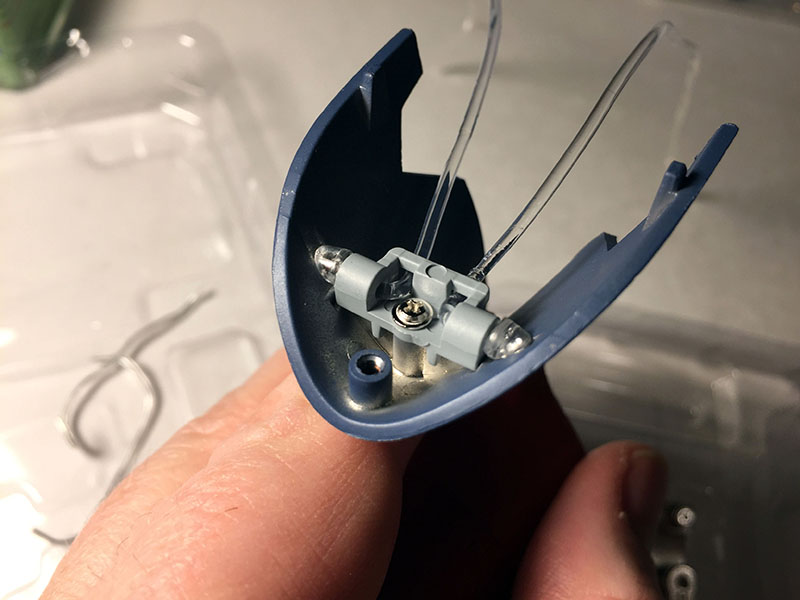
Here’s a closeup of two hull lights at the bow, just under where the WMG will go. You can see the fiber cables in the bracket, turning to jam up against the clear bits. The other end of the fiber trails away, eventually to hook up with a light source.
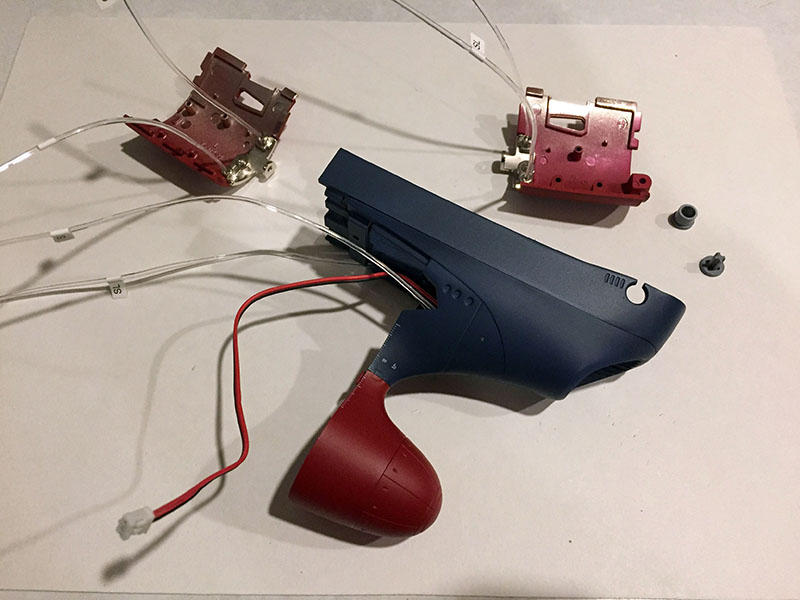
Done with Volume 6. Each of the red hull plates has two lights installed. The red/black wires lead to the LED for the WMG. In a while, they’ll plug into their power source.
Volume 7 was packaged up like Volume 6. It was the last one to be wrapped up this way.
Continuing work on the bow this time. All interior parts.
Instructions say we’ll work on the bow torpedo launchers and put some hull plates together.
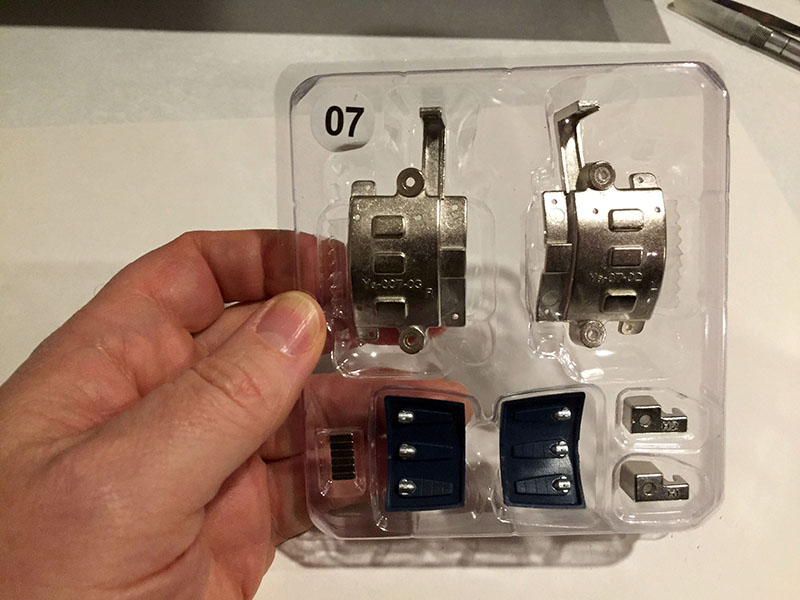
Parts for Volume 7. At lower left you see what looks like a block with seams in it. Those are actually six of the strongest magnets I’ve ever seen. They’re meant to be glued into the large metal plates, but all they wanted was to jump off and stick to each other.
All done, after some struggle. Those magnets were INSANE. I had to resort to super glue to hold them down, or they’d literally leap out of their sockets and attack to each other. Their purpose is to attract the torpedo tube covers that will come in a later volume. Much better than just hoping the covers will stay on by themselves.
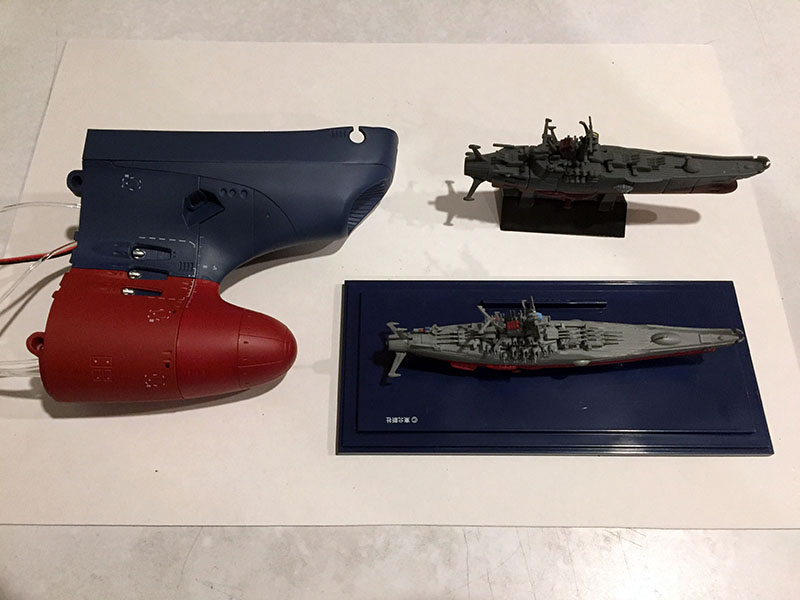
At this point, we’ve surpassed the length of these 5″ Yamatos from my collection. The one at upper right pulls in half to become a USB flash drive. The other one is a miniature I got at the Battleship Yamato Museum.

‘
These two volumes were bundled together for subscribers, just like 4 and 5.
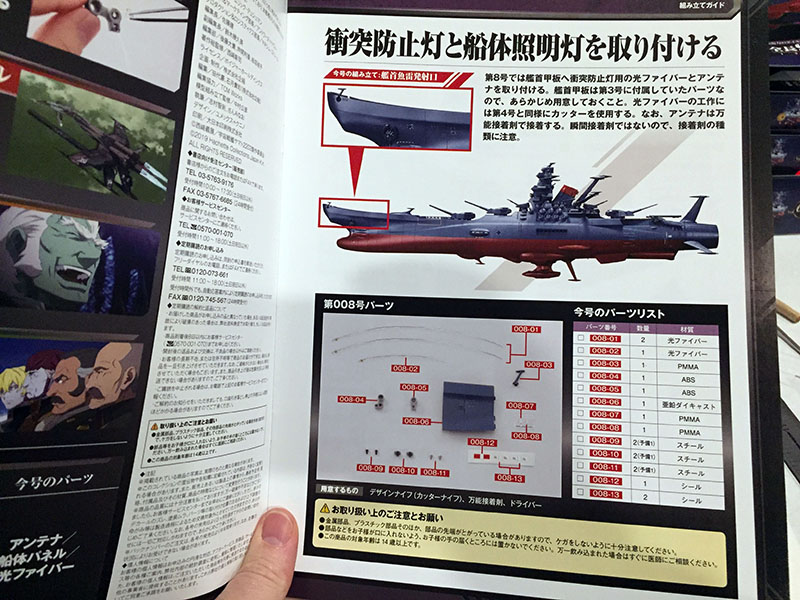
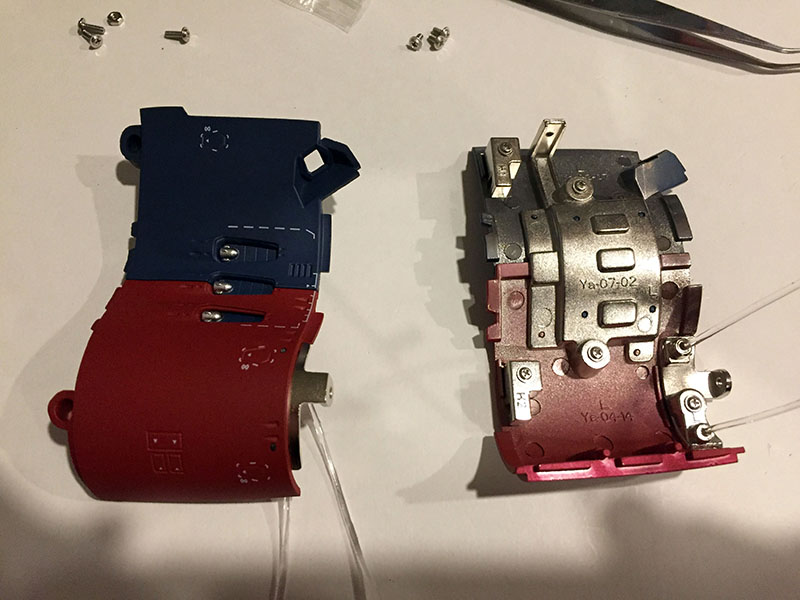
For Volume 8 we’ll continue work on the bow section.

Pretty simple, just wiring up lights on the forward deck and a new hull plate.
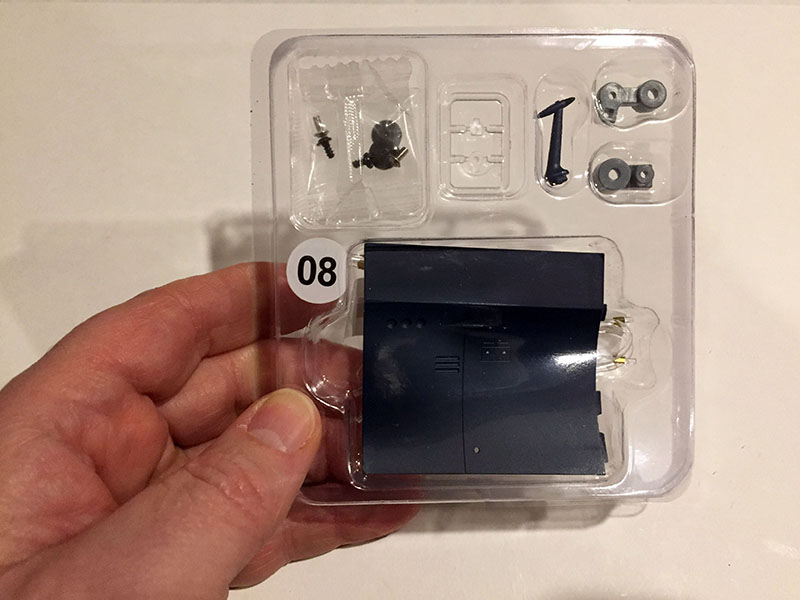
Parts for Volume 8. fiber optics coiled up behind the hull plate.
Done. Fibers installed and flagged.
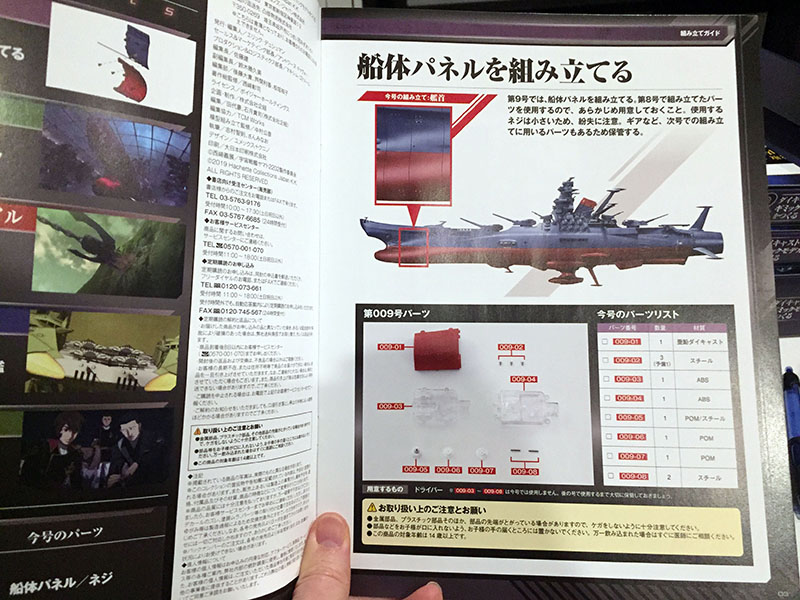
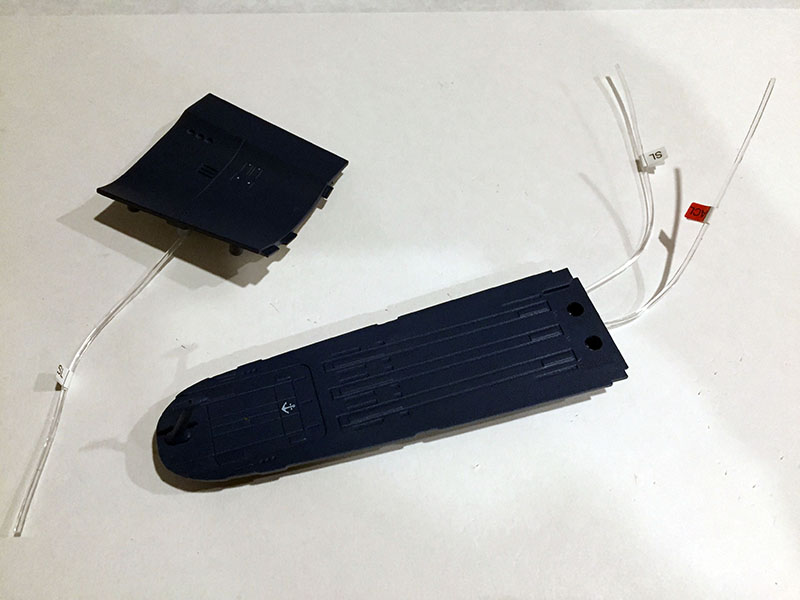
In Volume 9 we’ll work on the front flank.
Simple hull plate assembly, but there are some other parts we’re not using yet.
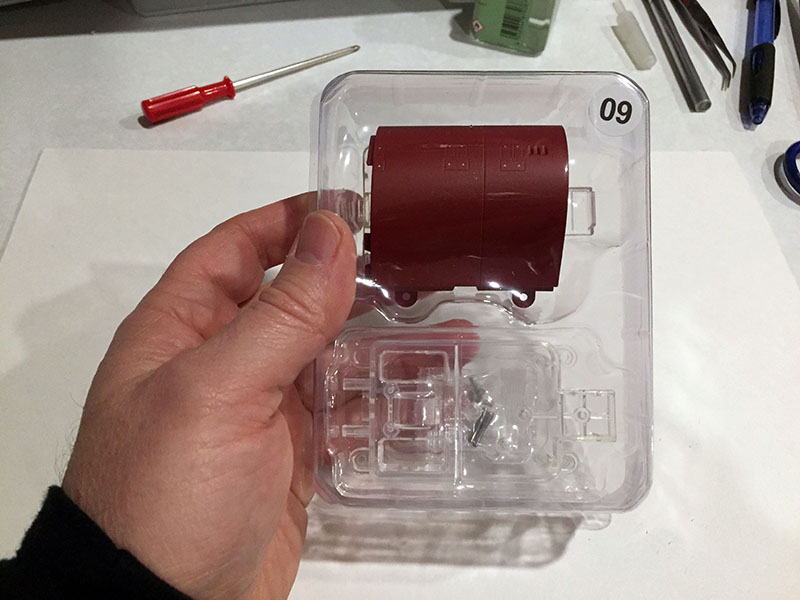
Parts for Volume 9.
Done. We’ll see what happens with the unused bits soon.
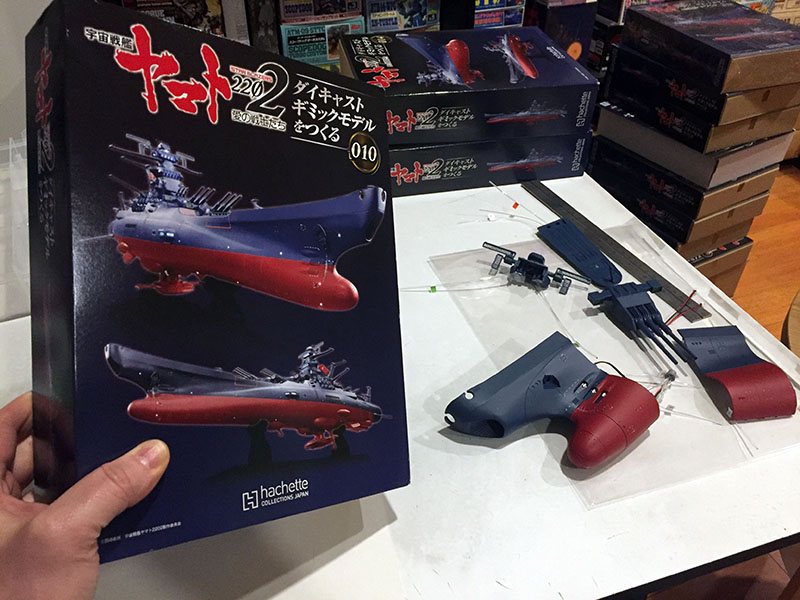
Starting with Volume 10, subscribers received everything in batches of four. That’s how it went for the rest of the series.
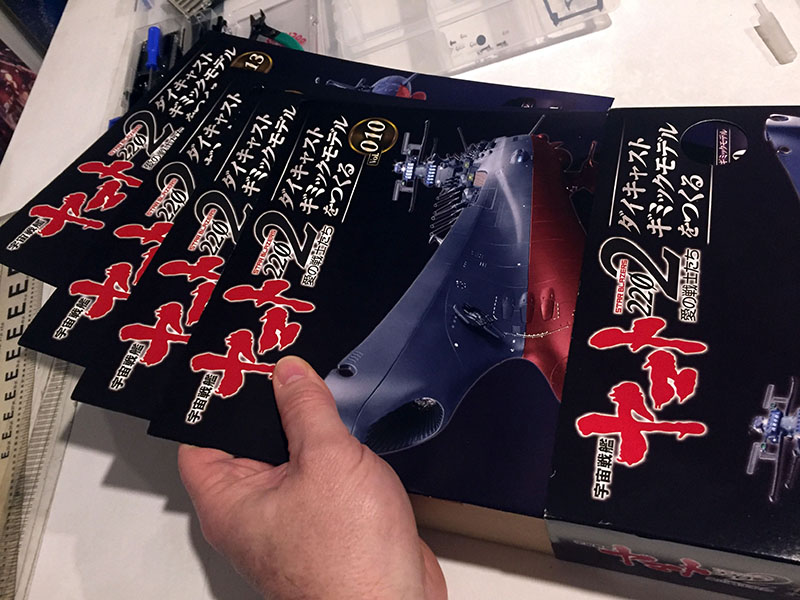
It only looks like one volume from the outside, but there are four magazines in the outer sleeve.
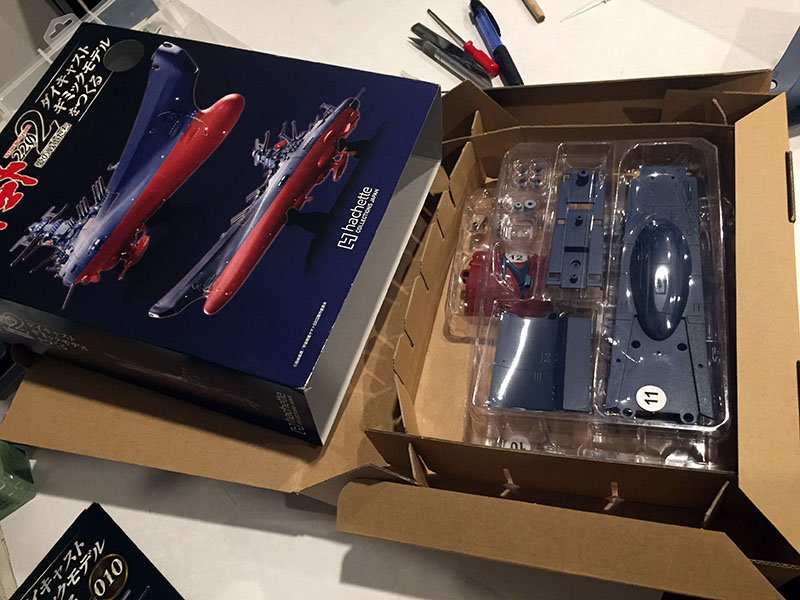
And all four part sets are in a single box now.

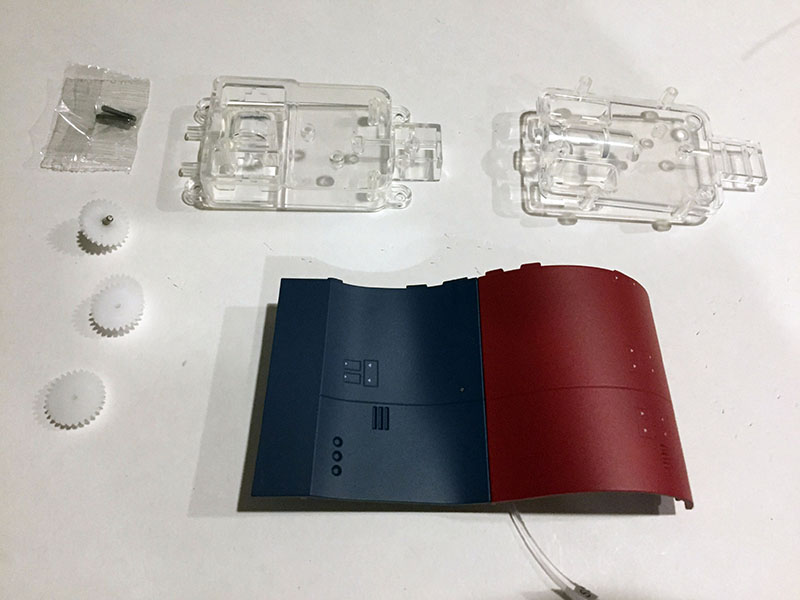
Let’s get into Volume 10. No exterior parts this time.

We’ll be working on the rocket anchors.
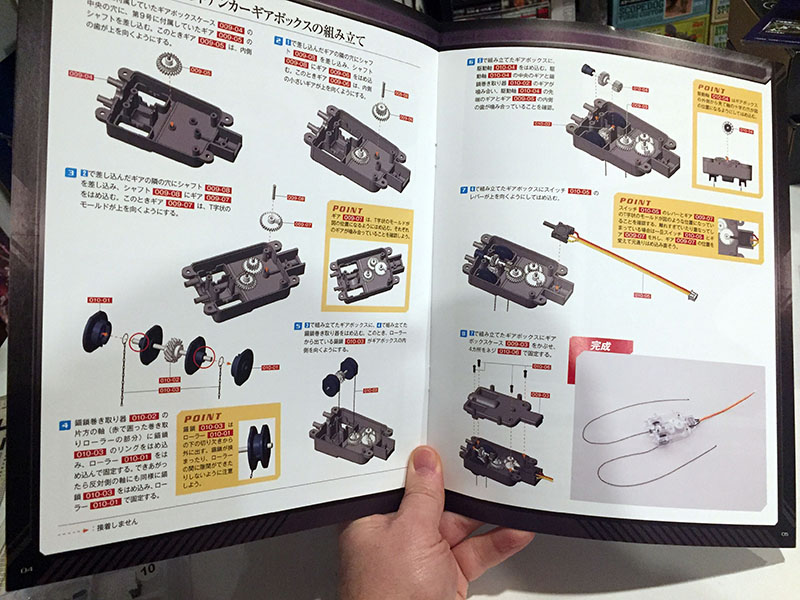
The unused parts in Volume 9 will form a gear box with two chains on pulleys.
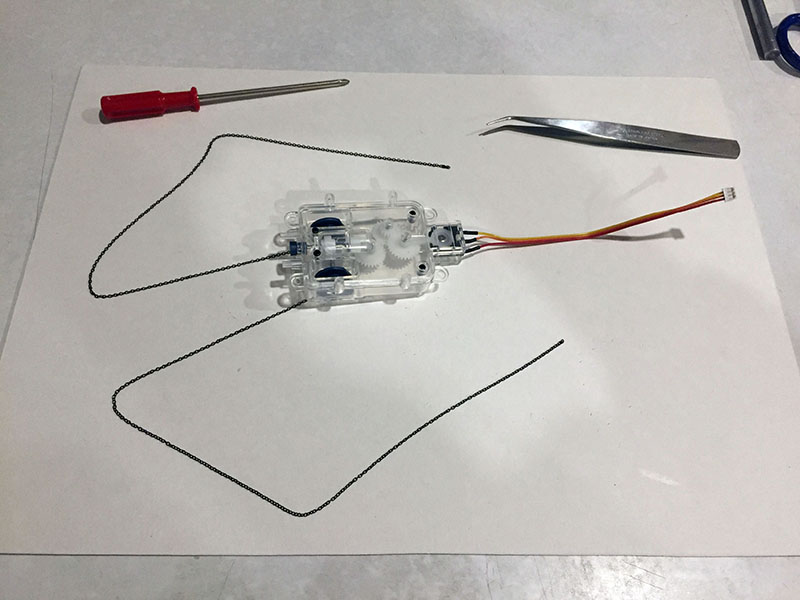
The finished gear box. The wires will lead to a power source.