
The Decisive Battle! All Ships, Combat-Ready!
By Arthur Painter (with notes from Tim Eldred)
Despite the title, this is a comparatively quiet episode, containing very little in the way of action. The storyboard was by Animation Director Noboru Ishiguro.
The Comet Empire was blown off course by the destruction of Telezart, allowing the Star Force time to escape. Free of Telezart’s solar system, the Argo is now able to execute a warp. Wildstar advises the crew to belt themselves in since they will be making a much larger jump than normal.

Star Blazers transitions directly from the announcement of the warp to the warp itself. In Yamato 2 there is a series of preparation scenes. First, Dr. Sado [Dr. Sane] prepares for the warp by swilling sake in his cabin while his cat Mii [Mimi] sleeps contentedly nearby.
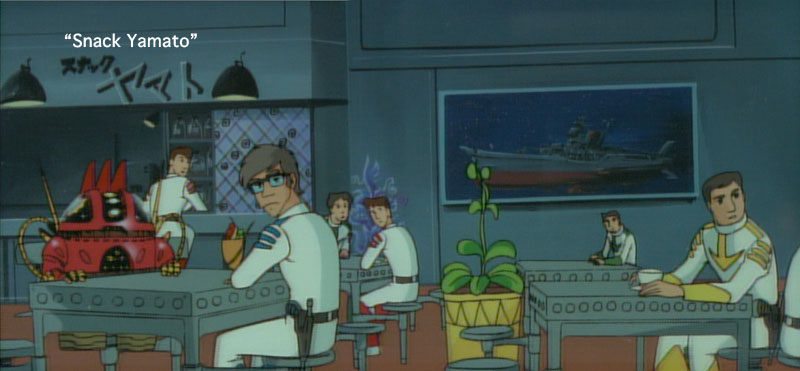
Production note: There is also a rare look into the ship’s mess hall, which actually has a name: “Restaurant Yamato.” There’s even a fast food corner named “Snack Yamato.” This scene briefly revives the ultra-rare yellow-on-white crew uniform, which occasionally appeared in the first half of Series 1 but was never matched up to a specific department. Let’s hope it’s not waste disposal.
This is followed by a short visit to the Space Cavalry’s [Space Marines’] quarters. Three of them are playing a card game when the warp announcement pipes through. They try to rouse a sleeping Captain Saito [Sergeant Knox], but he refuses to wake up.
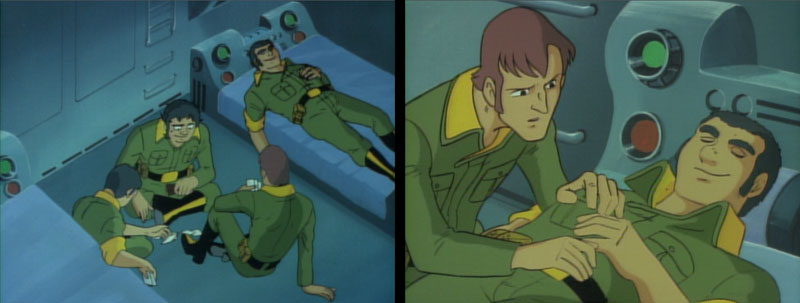
Misunderstanding their warnings about a “warp,” he sleepily replies “I don’t want any soup.” After further prodding, Saito punches one of his men across the room, growling “Rope? I don’t need rope. I’m not going to hang myself,” then rolls over and goes back to sleep. Deciding he’s too drunk to reason with, Saito’s subordinates leave him be and rush to their bunks to strap themselves in. This scene marks the second time the Japanese language version made a warp/soup connection. The first time was before the ship’s very first warp in Series 1, where Dr. Sado thought it sounded like an “extra-delicious soup.”
Production note: there’s an odd scene of a marine belting himself and his bedsheet down, as if the buckle works through the sheet. Maybe it’s magnetic.
The animators seem to give a tip of the hat to Star Wars during the warp sequence. The warp effect (which becomes the Yamato 2 episode title) looks similar to the Star Wars hyperspace effect. Since that movie opened in Japan about eight months before this episode aired, it would still have been fresh in their minds during production.

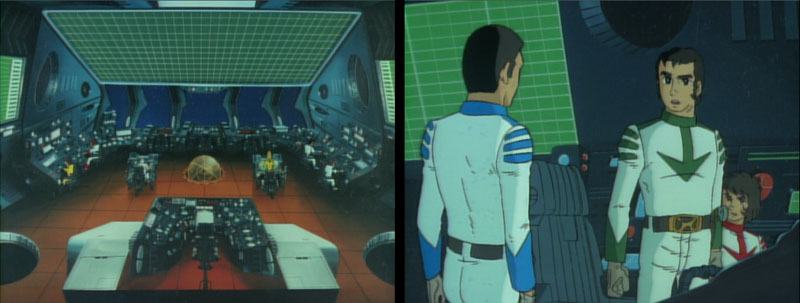
Upon emerging from the warp, Wildstar receives status updates from all stations. After some initial “all clears,” Sandor reports a problem in the computer room, and warns that performing more large scale warps will lead to further problems. Venture says that they have to keep moving lest they squander the time Trelaina has bought for them. As the discussion continues, Venture becomes more aggressive, insisting that the Argo will have to make at least two more jumps like the last one, and Sandor will simply have to fix anything that breaks. Venture then turns his attention to his own nav crew, yelling at them over the intercom for some minor infraction. The entire crew stares at him, stunned at the surliness of the normally even-tempered Navigation Chief.
According to Venture, this warp set a record. A jump of 2,000 ly, approximately 19 quadrillion kilometers, or 12 quadrillion miles. In Yamato 2, Shima’s post-warp complaint to his crew was that their cruising speed had dropped below 50 space knots. The ship’s normal cruising speed is around 30 to 40 space knots. Even between warps, the ship is traveling at top speed.
Story note: In Series 1, the ship’s performance was to warp twice a day, about 500 light years at a time. Pushing the limit to 2,000 light years is a tribute to its remodeled engine. In the Japanese recording script, it was mistakenly indicated as about 200 light years and corrected during voice recording. Afterward, Shima says, “it will be necessary to do that two more times.” But this would actually have to be done nine more times to cover the 20,000 light years from Telezart to Earth.
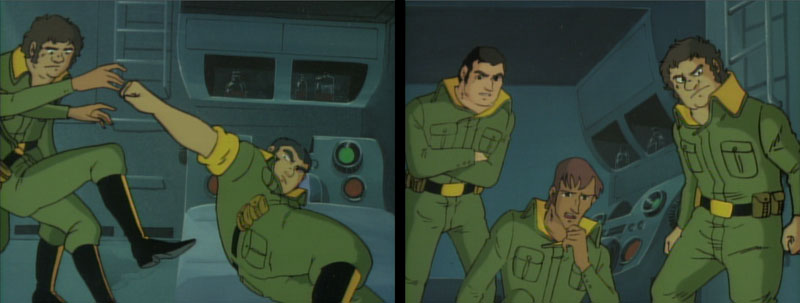
Yamato 2 follows up on the earlier Saito scene. Saito’s men carry him in to Dr. Sado. He complains about pain in his legs and waist, after-effects of not being strapped in during the warp.
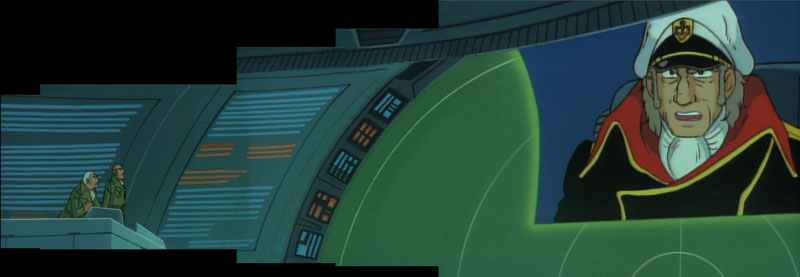
At the Comet Empire, Zordar dresses down his staff, specifically Invidia and Dyar. Although the fortress survived the confrontation with Trelaina, they’re damaged and off course, something Zordar claims has never happened before. Turning attention to Earth, Zordar initiates the invasion plan. In Yamato 2, his aim is to triple the speed of the conquest of Earth, which would mean overtaking the planet in about 2 weeks instead of 40 days.
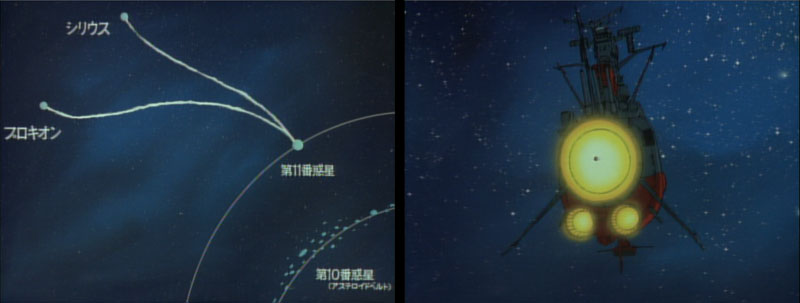
General Bleek [Baruze] is ordered to deploy his fleets to Earth’s solar system. Yamato 2‘s script identifies his current position as the star Sirius, which is in the Milky Way Galaxy, 8.7 ly away from Earth’s solar system. This is consistent with both the Comet Empire’s tactical map and information given in Episode 5, where it’s stated that Baruze’s forces have captured Sirius and Procyon. Star Blazers misindentifies Bleek’s location as “about 8 ly from the Milky Way.”
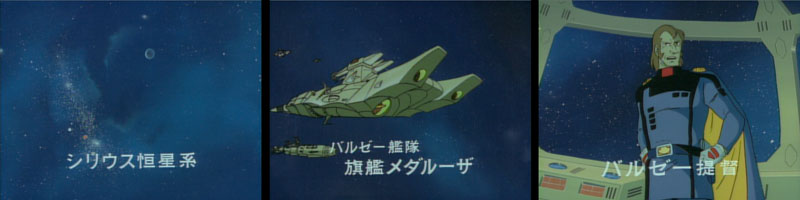
General Bleek had a few brief scenes earlier in the Comet Empire series. With his reintroduction, both he and his flagship, the Medaluza, are identified with labels. Throughout series 1, Star Blazers often covered up Japanese text with English-language captions. In Series 2, most of the scenes with captions were removed entirely. This scene marks the first time they use a new method: they leave the scene in, but zoom in to crop out the text. This technique was used several times in this episode (which was originally replete with labels), since it was probably easier than generating replacement captions.
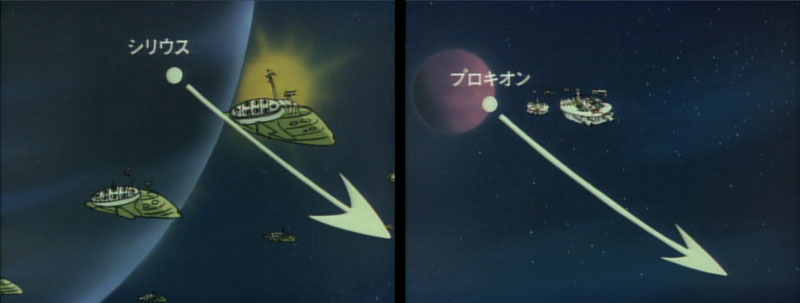
Bleek’s forces move toward our Solar system, joining up with the fleet from Procyon (a star located 11.4 ly away from Earth) along the way. In Yamato 2, the fleet movements were explained in more detail, using maps and narration. While Baruze is confident of victory in Yamato 2, Bleek admits the upcoming fight “won’t be easy,” particularly if Earth consolidates its forces.
Production note: The music behind the fleet movements is the disco version of the Comet Empire theme. This track and others like it have a history of their own, being derived from a unique record album released in December 1978. To capitalize on the popularity of disco, composer Hiroshi Miyagawa wrote an entire album of “Disco Arrange” Yamato music (in the same vein as Meco’s Star Wars and Other Galactic Funk) which was released on the Polydor label. All other Yamato music had been released by Nippon Columbia, so the fact that some music from the disco album was repurposed as actual BGM must have been the result of some interesting negotiations. The unfortunate result is that collectors looking for these tracks have had a tough mission since the Polydor album was never reissued until 2012. Visit our Links page to access the entire “Disco Arrange” album on YouTube.
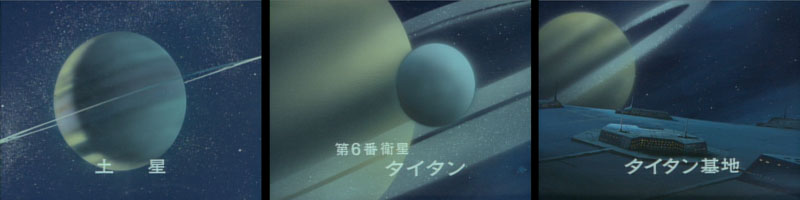
The story shifts over to the Earth forces (where more caption-cropping occurs on establishing shots of Saturn, Titan, and the Titan Base). Captain Gideon is informed of the Comet Empire fleet massing at the edge of the Solar System. Gideon’s Executive Officer (XO) lists the force as consisting of 80 space battleships, 66 carriers, and 88 cruisers. (Yamato 2 lists the last item as 288 destroyers.) Instead of ordering the outer fleets to start defensive procedures, Gideon has all ships recalled to Titan. The XO points out that he needs permission from EDF HQ. Gideon responds “It takes them too long to make up their minds.”
“They’ll kick you out of the service for this!” the XO warns him.
“That may be so, Lieutenant, but until then, I’m in charge!” he replies.
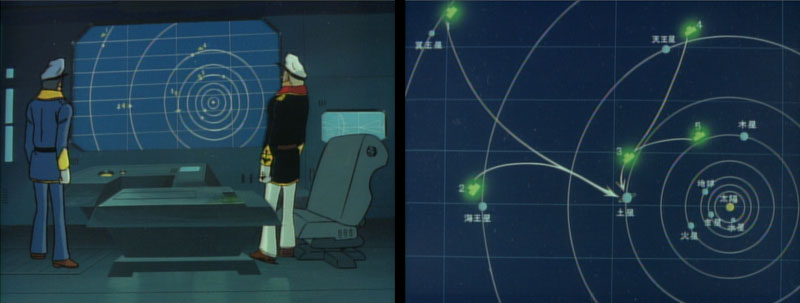
When Gideon is relaying his plan for the fleets to meet at Titan, he and his XO look at a tactical map. Star Blazers remains on a far-away shot. In Yamato 2, a close-up was shown (with planets labeled in Japanese).
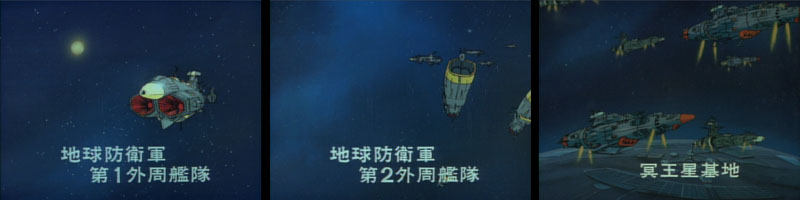
The scenes of the Earth Fleets’ movements were accompanied by more identifying captions, also cropped out in Star Blazers. First is the “1st Solar System Border Fleet,” which is led by either the Andromeda or an Andromeda-class ship. If it’s the latter, it may be one of the ships we saw under construction a few episodes ago, and this would mark its one and only appearance. Next is the “2nd Solar System Border Fleet,” followed by the Pluto, Neptune, and Uranus base fleets, each shown leaving their respective planets. Some of these scenes can be seen on the Star Blazers: The Comet Empire DVD Vol. 5, complete with their Japanese text. They appear during the start-up after the disk is inserted, before the main menu comes up.
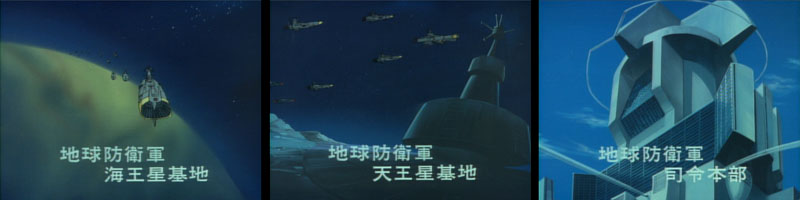
The fleet’s sudden rearrangement causes chaos at EDF’s Earth base (introduced with another cropped caption). General Stone recommends that Commander Singleton countermand Gideon’s orders. The Commander stares at his screen, first viewing the planned course of the Comet Empire, then the huge armada waiting outside the Solar system.
Before the Commander can make a decision, Gideon appears on the video panel, requesting retroactive approval of his actions. Stone, true to form, begins reprimanding him. By consolidating all of Earth’s forces at Titan, he’s stripped every other territory of their protection, Stone says. If the Earth fleet is defeated, there will be no one else to resist the Comet Empire fortress itself. In Gideon’s view, they must defeat the enemy armada in an all-or-nothing battle, then worry about the fortress.
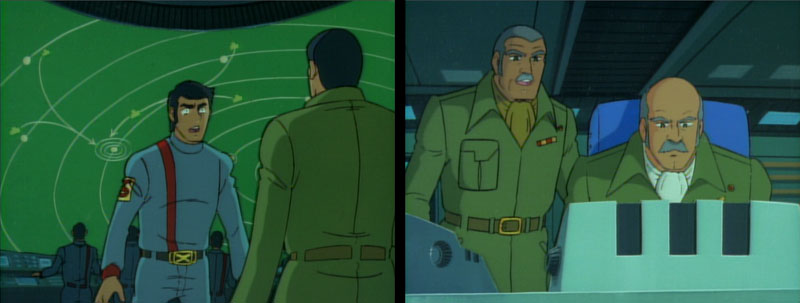
Singleton says the Defense Committee needs to approve these decisions, and asks for more time. Gideon has two pithy responses: “Battles are not fought in defense council rooms,” and “The enemy is gathering.” When it seems obvious that Singleton will not make his decision quickly, Gideon says he will act as he sees fit and accept any disciplinary action later.
While Commander Singleton is the head of the EDF, situations like this portray him as a powerless cog in the Earth government’s bureaucratic machine. He feels pressure from both above and below; from General Stone, whose stubborn attitude seems more in line with the government.
There was a brief bit of dialogue that was lost in the edit from Yamato 2 to Star Blazers. It’s a shot where we see Hijikata [Gideon] on the giant view screen, then the camera pans over to Todo [Singleton] and his aide [Stone], who are tiny in comparison. It’s a fitting visual analogy: the EDF commanders and government are insignificant, while Hijikata is larger-than-life.
Gideon once lectured Wildstar on the importance of rank and respect for senior officers, and later hunted down the Star Force for disobeying orders. Gideon is now in Wildstar’s same predicament, to either listen to his superiors or take what he considers the correct course of action. Like Wildstar, he chooses the latter.
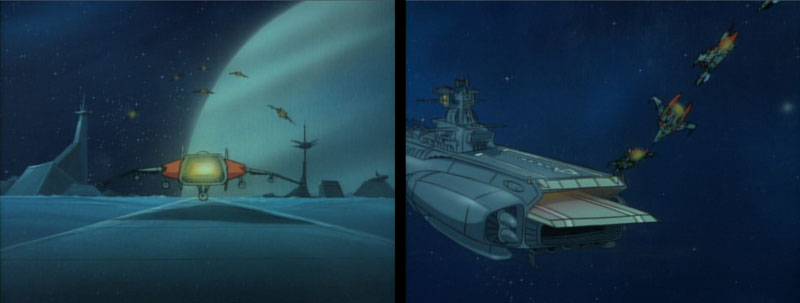
Gideon’s orders spread inward to Jupiter. Fighter squadrons join up with carriers, which then proceed to Saturn.
Back at the Argo, Venture is continuing to be difficult to the rest of the crew. When Sandor announces that the Comet Empire has already made repairs and is back on course, Venture insists on another long warp. Sandor continues to urge caution. Venture forcefully argues his point, and Wildstar agrees with him.
Before warp preparations can get underway, Royster calls over the intercom about a problem with the warp mechanism. Sandor assures Venture he can fix this problem, but adds that the next large warp may break something he can’t fix. Venture insists once more that large-scale warps are essential. Sandor has a sudden mood swing — he chuckles and admits Venture is right, then runs off to make the repairs. My take on Sandor’s sudden change of heart is that he remembered he’s Sandor. There is no mechanical malfunction he can’t fix!
Yamato 2 takes us back to the recurring comic relief thread, Saito and his Cavalry. Having learned his lesson earlier, Saito is in his rack, strapping himself down with multiple belts. His men tell him there is plenty of time before the warp, but he’s not taking any chances. In Star Blazers, Knox and his marines are scarcely seen in this episode, most of their scenes probably cut for time.
Down in the engine room, repairs are proceeding apace. Apparently there’s no one on the bridge for Venture to yell at, so he’s come down to harass the repair crew. Sandor calls down from his maintenance platform, telling him to relax and let them do their jobs.
Although it’s a minor thing, I like this view of the engine room, with cables strewn everywhere and repair crews working in the background. It gives the sense of the ship being a real place and not just a series of pretty background paintings.
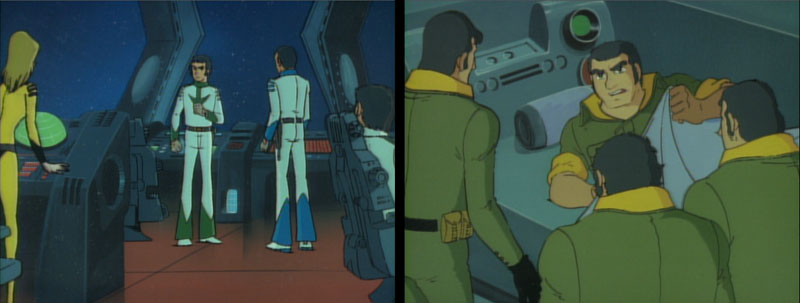
Venture stands in the aft observation deck (a favorite spot for contemplative moments) and remembers Trelaina. Nova joins him for a little talk. She tells him that he’s not behaving like the kind of person Trelaina fell in love with. Her words get through to Mark, and he agrees to calm down.
Reminded of his lost chance at love, he gives Nova some advice: she and Wildstar should get married. They’ve found one another, but with all the danger around them, they can’t be sure they’ll live long enough to share it. Nova thanks him politely and leaves. Entering the next room, she catches Wildstar attempting to sneak away. Derek admits he overheard their discussion, and says she did Mark a lot of good. While moments ago Nova seemed to have all the answers, Venture’s comment reminded her of how fragile their lives are. Derek assures her that they will be fine. She collapses into his arms.
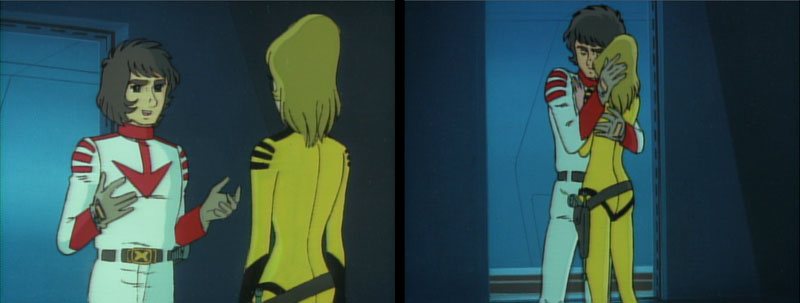
The scenes with Nova reveal her place as the heart of the Star Force. Venture is usually the calm, steady one of the group, but the loss of Trelaina has knocked him off center. In a few short sentences, Nova is able to reset him to his true character. After giving support to her friend, she needs support from Derek. Just as the scene in the engine room makes the ship seem “real,” these interactions make the characters more real. They act and sound like living, breathing people in high-pressure situations. (I could do without the “Derek…” “Nova…” ending, which borders on cliche by this point, but voice actors Ken Meseroll and Amy Wilson even make that convincing.)
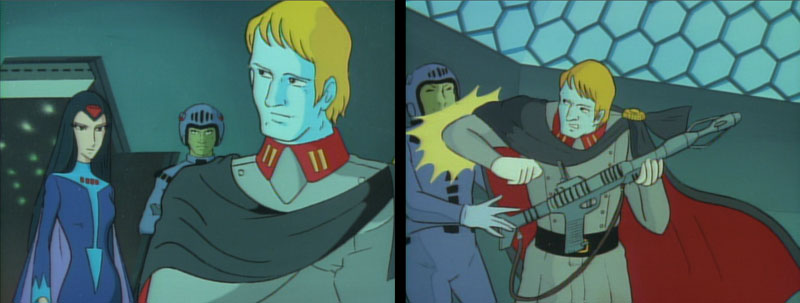
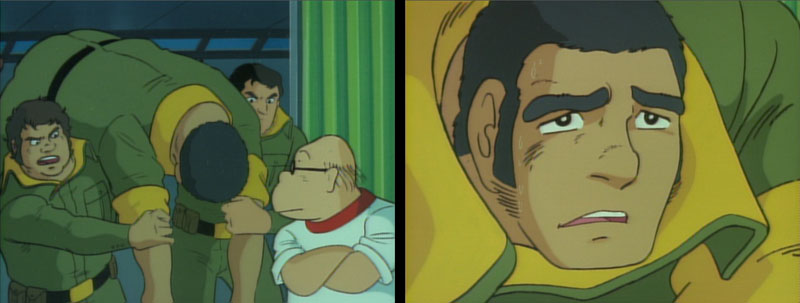
Princess Invidia enters Desslok’s cell, gleefully announcing that the Comet Empire is fast approaching the Milky Way and the Star Force will be among its first victims. Desslok ignores her mocking tone and demands a trial. She agrees to have one “right now, before my guards, outside.” Despite the word “trial,” Invidia seems to have a quick execution in mind. This is much more on-the-nose in Yamato 2, where Dessler requests to be executed on the grounds that, since the Yamato‘s fate is sealed, he has nothing more to live for.
Additional note from Matt Murray: Again we see the apparent “no suicide” rule come into play, as Desslok is not allowed to seek his own death, even though it doesn’t happen. As a rewrite, though, a public trial doesn’t make that much sense, as the last thing Invidia should want is for Desslok to gain the public’s ear.
As Desslok walks past the guard, he grabs his rifle and elbows him in the face. Holding the rifle to Invidia’s throat, he demands to be let out. They walk past the armed guards and meet up with Talan. (I’m not sure how Talan was able to respond so quickly. Perhaps he remained at-the-ready just in case?) All three get into a waiting aircar, which takes them to the landing strip. Desslok releases Invidia, mockingly thanking her for her “help.” Talan pilots a Comet Empire fighter out through the Comet’s tail. Two fighters pursue, but Talan deftly avoids their fire.
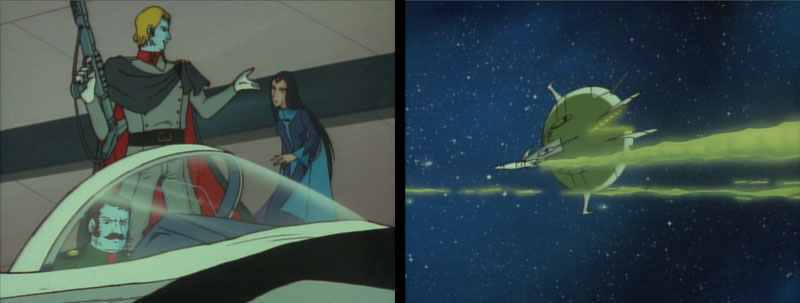
The Gamilon fleet is hovering nearby, following the White Comet. As Talan’s stolen spacecraft approaches, the fleet prepares for combat, indicating a level of ambient hostility. Before they can fire, Talan contacts them on the radio. The two officers who receive Talan’s message aren’t just random faces. A close look reveals these are two of the officers who met with Desslok at the Magellanic Cloud in Episode 3. One is Arkadeen of the Tanshibal battle area [Japanese Name: Bareld Akshon] and the short, stocky one by his side is Maizer from the Galk battle area [Maisel Nomdoram]. In Yamato 2, the narrator tells us that this fleet was gathered here to orchestrate a jailbreak, had the Leader not freed himself.

Story note: the issue of Gamilon officer names is (as recounted at length in our Episode 3 analysis) complicated enough, but there’s yet another dimension to grapple with here; both of these character designs were reused in Series 3. The characters were recast, renamed and slightly recolored, but they were most definitely cut from Series 2 cloth.
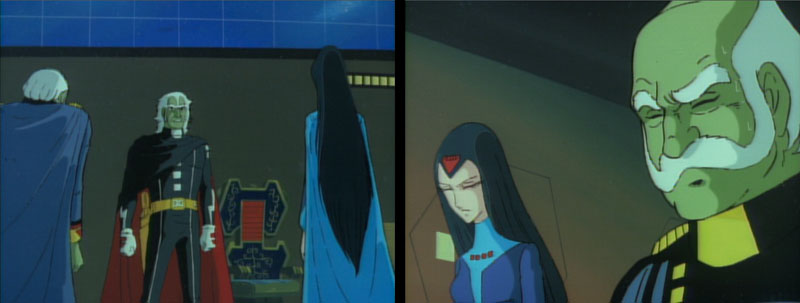
In the Comet Empire fortress, Invidia, Dyar, and Gorce prepare to engage the Gamilon fleet. Before the situation can deteriorate any further, Zordar appears. He’s finally uncovered what’s been going on, and is outraged at this deception. Zordar is much harsher in Yamato 2, where he says he would execute the two ringleaders, but since the invasion of Earth is imminent, there isn’t time. He’ll forgive their actions just this once. The two he’s directing his anger towards are Invidia and Dyar. Gorce is let off the hook, presumably because he ranks below the other two.
Additional note from Matt Murray: It’s not even certain that Gorce was intentionally complicit in deceiving Zordar. He wasn’t present at Invidia and Dyar’s secret plotting session, nor when Desslok unraveled their deception. It’s possible he sincerely thought Desslok had abandoned his post when he reported thus to Zordar in episode 14.
The Comet Empire pursuit planes are recalled and Desslok’s flagship is released, a peace offer from Zordar. Standing once more on his command bridge, Desslok prepares to resume his vendetta against the Star Force.
Star Blazers ended the episode at that point. There was one more scene in Yamato 2 that included a map showing two forces converging on Planet 11 [Brumis], foreshadowing the events of next episode.
Story note: It was previously estimated that as of January 25, 2202, the White Comet was 40 days from Earth. Now that it has tripled its speed, it is approximately 16 days away.
I wonder if “Restaurant Yamato” can be a distant nod with the actual nickname of the Yamato in the WWII: “Hotel Yamato” (so called for his relative comfort in comparison with other ships and for the long periods she spent at anchor at the Truk Base, for the need to keep it secret and, towards the end of the war, for chronical fuel resupply difficulties).
This episode shows how cunning and badass Desslok is. His escape with that music is fantastic!
I also love the fleet gathering scenes that show all the various classes of ships.
The fact that Capt Gideon has to take such decisive action really ramps up the urgency and the stakes of the upcoming battle.