

Here are the parts for Volume 41.
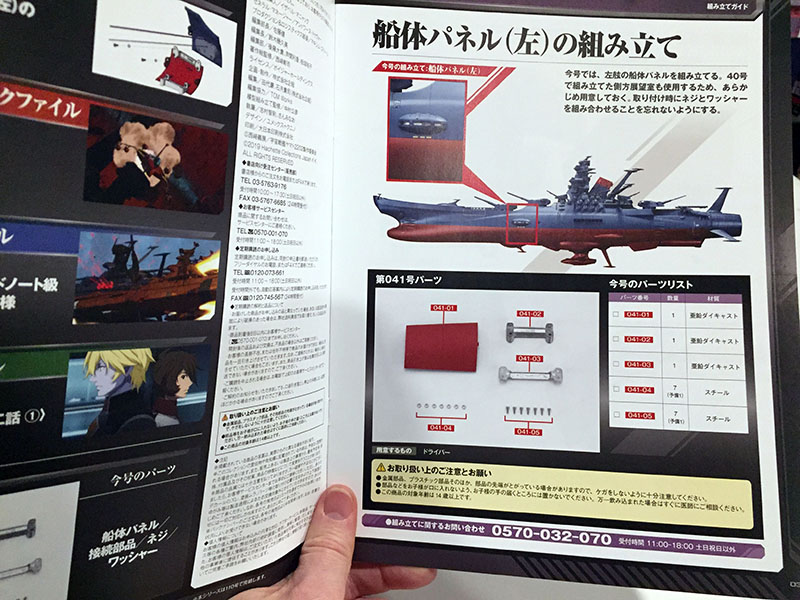
Another nice and easy hull plate to deal with.
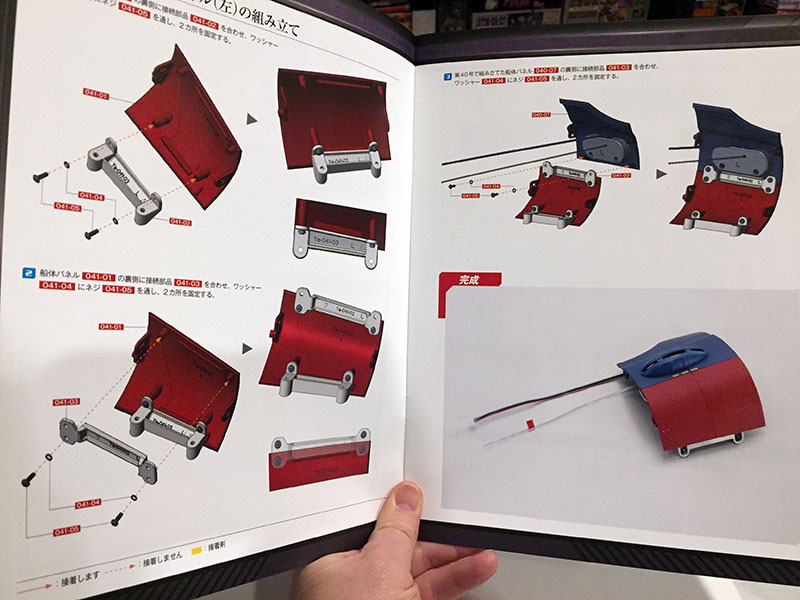
Just attach it to the last one for the port side.
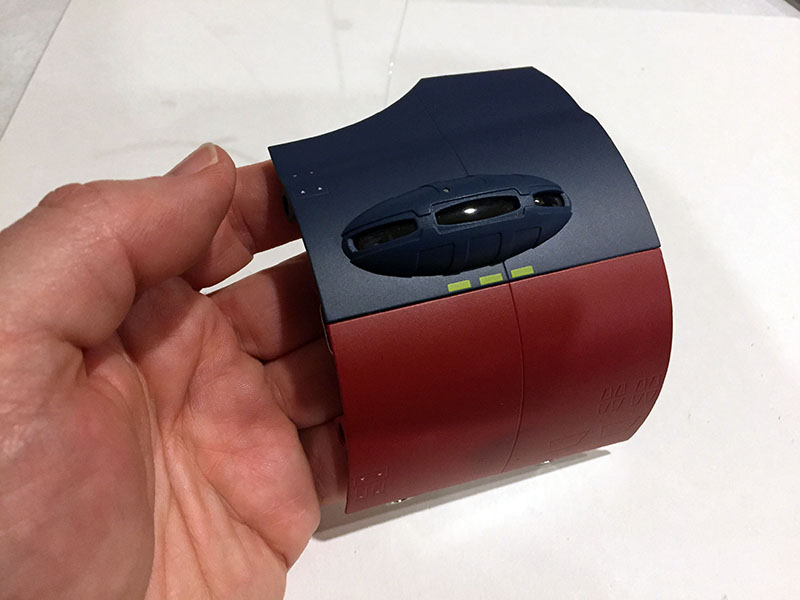
Finished in moments.
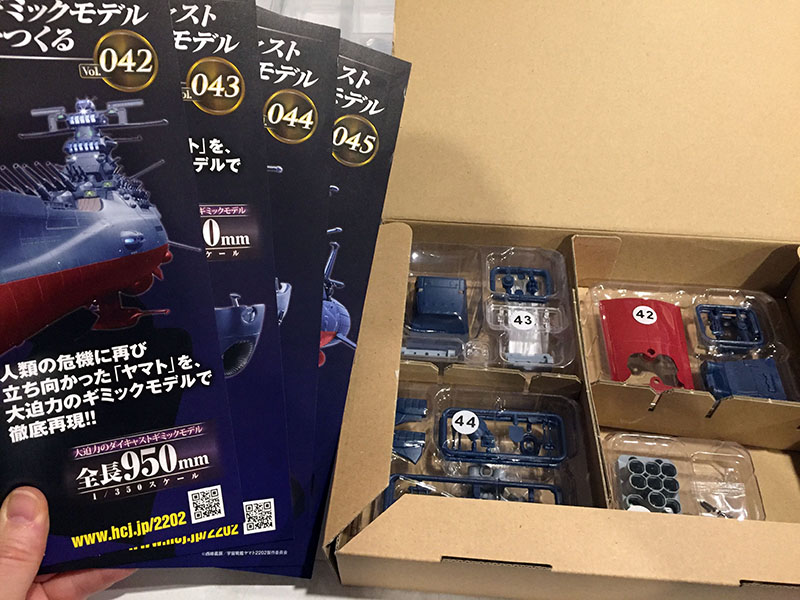
Next batch of four. I know what’s coming, but I won’t spoil it yet.
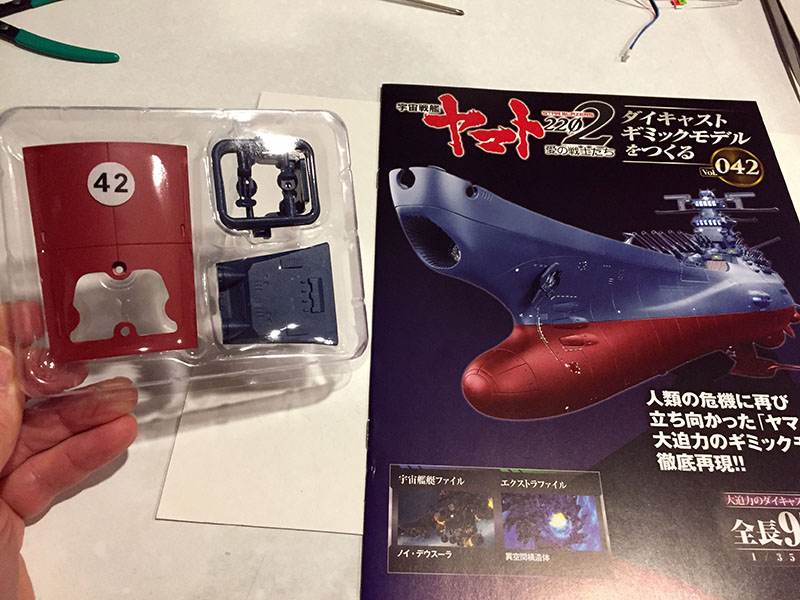
Here’s Volume 42.
Another hull plate for the flank and something for the bridge tower.
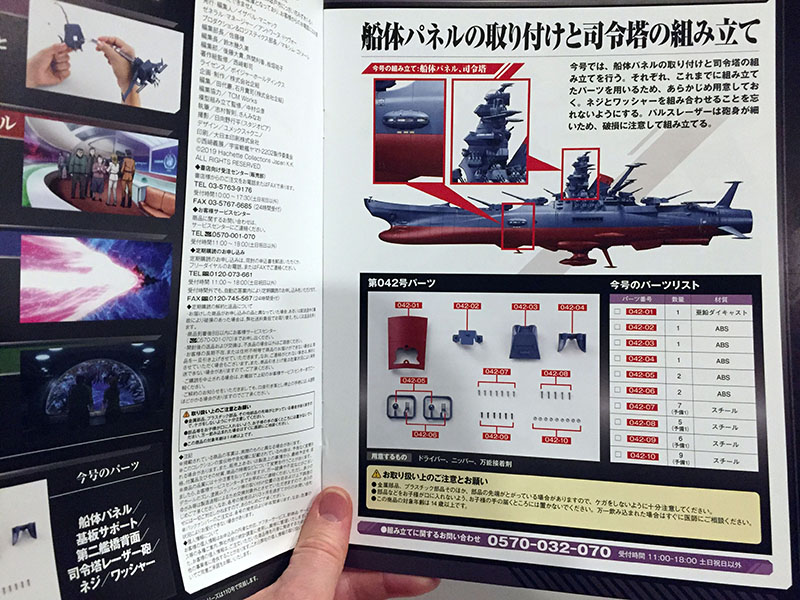
Only two pages of instructions. This hull plate will complete another section and lengthen the ship again.
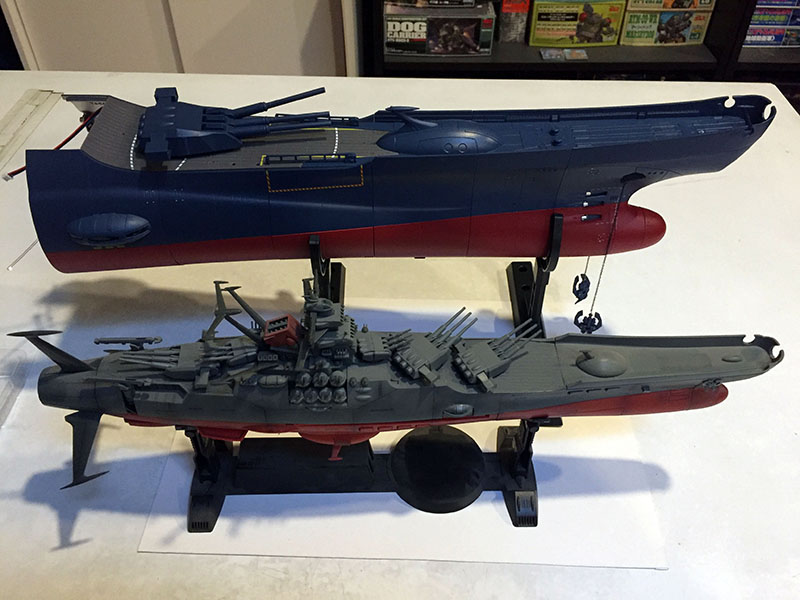
Now it’s up to 18 inches, which matches a trio of other Yamatos in the collection. First, the 1/625 Soul of Popynica version from 2001.

Next, the Soul of Chogokin version from 2010.
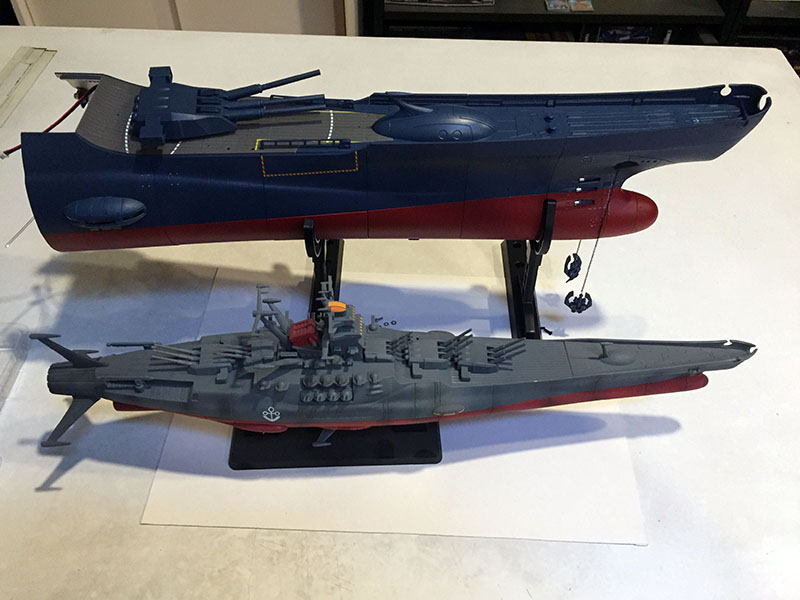
And finally, the 1/590 Super Mechanics version from 2009, released for Yamato Resurrection. This one is the closest of the three to 18″ long.
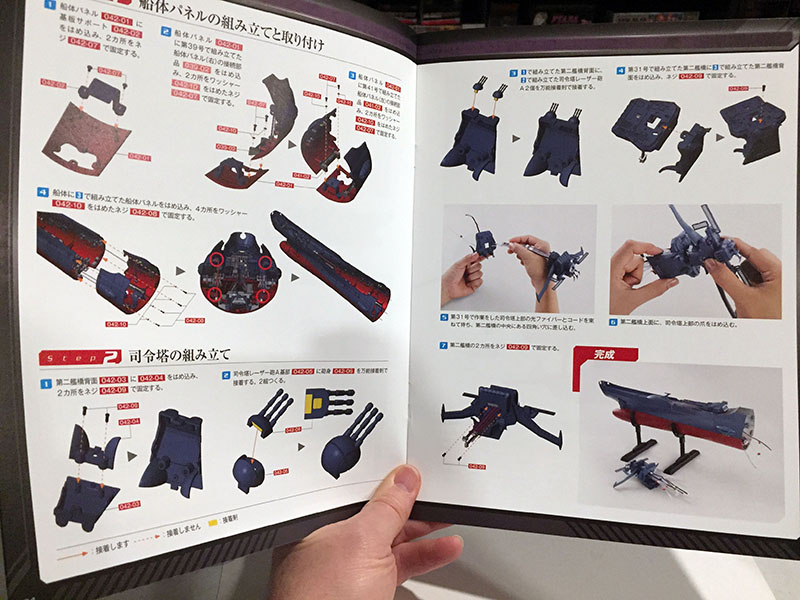
Back portion of the bridge tower attached, and moving on.
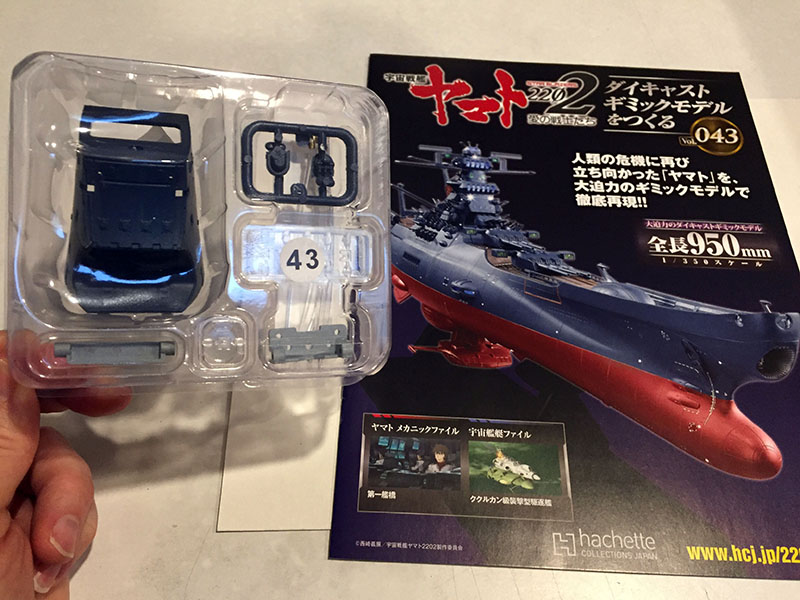
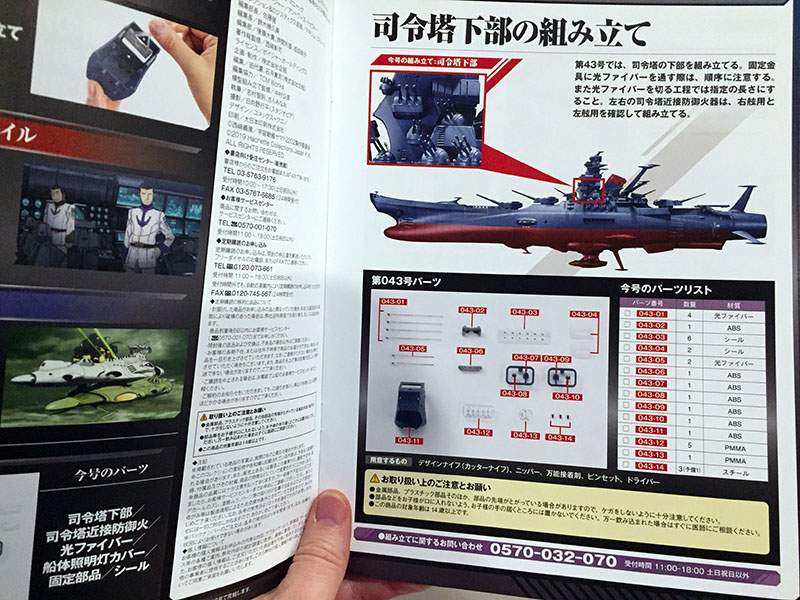
Volume 43 is next.
Still focused on the bridge tower.
We’ll rig up and install four more fiber optic lights.
When this volume is done, the lower portion of the bridge tower will be complete.
There we go. Two weapons installed, obviously more to come.
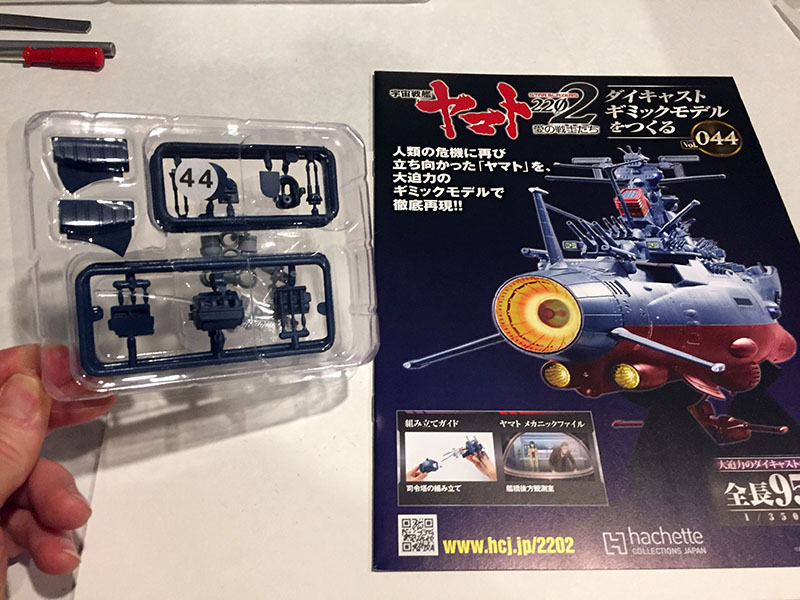
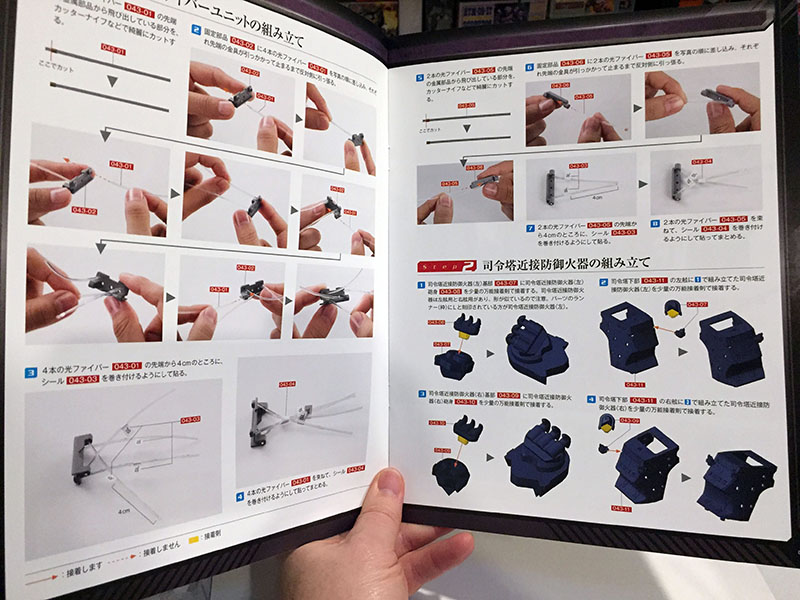
Now for Volume 44.
Continuing on the bridge tower.
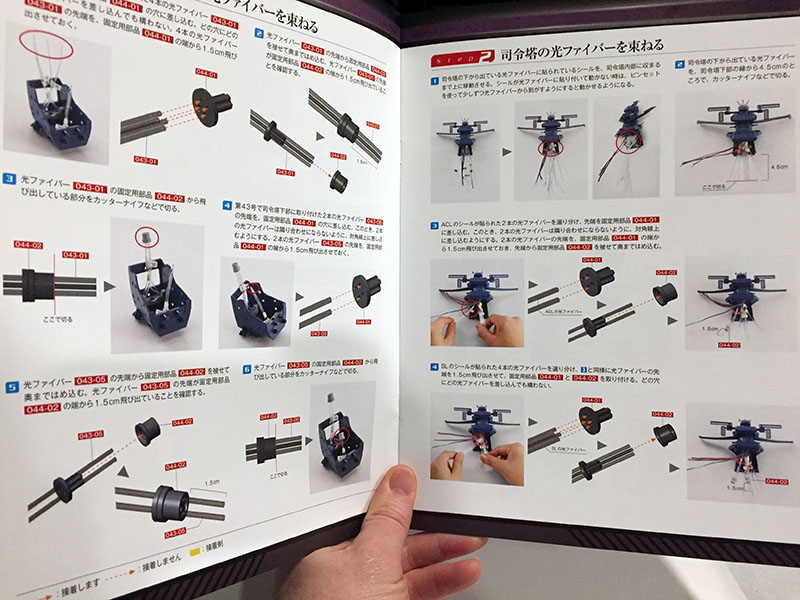
The instructions call for collecting and capping the latest fibers. A lot of indicators for what length they should be when finished.
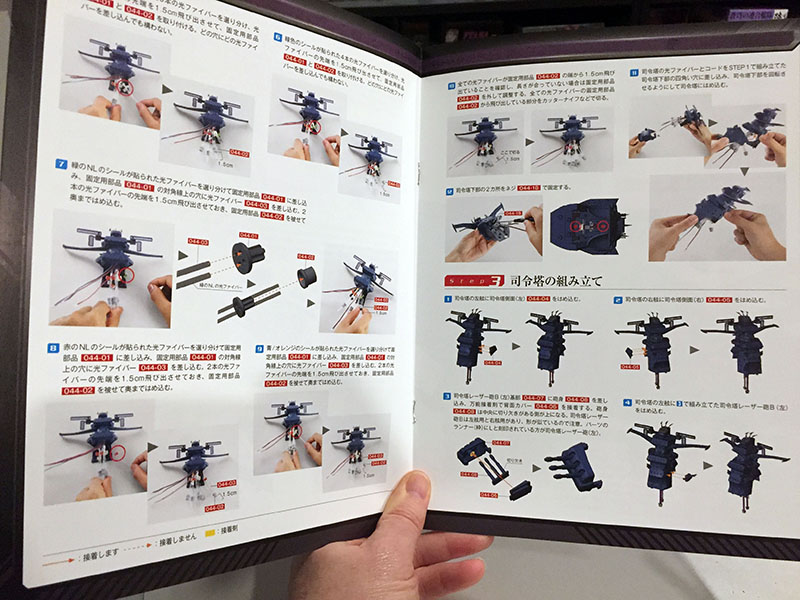
When that’s done, we’ll add more weapons to the tower structure.
Five pages of instructions this time. Lots of detail.

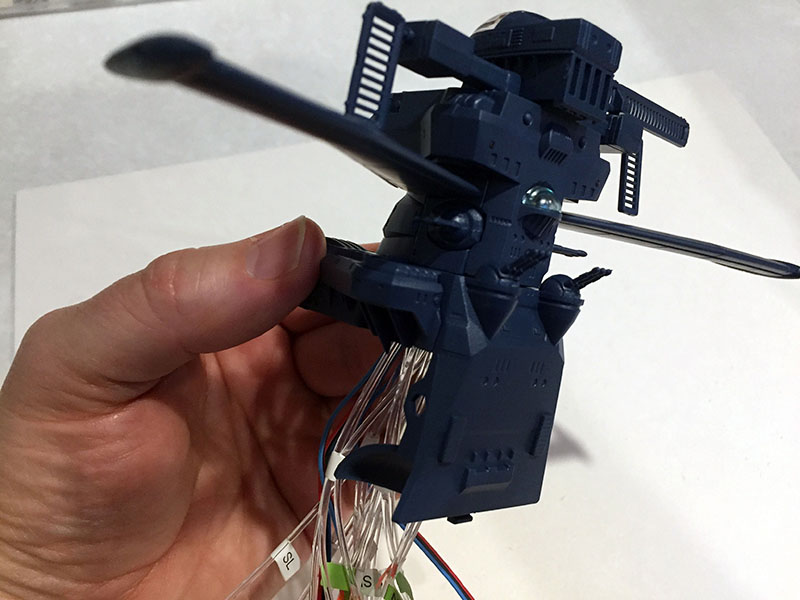
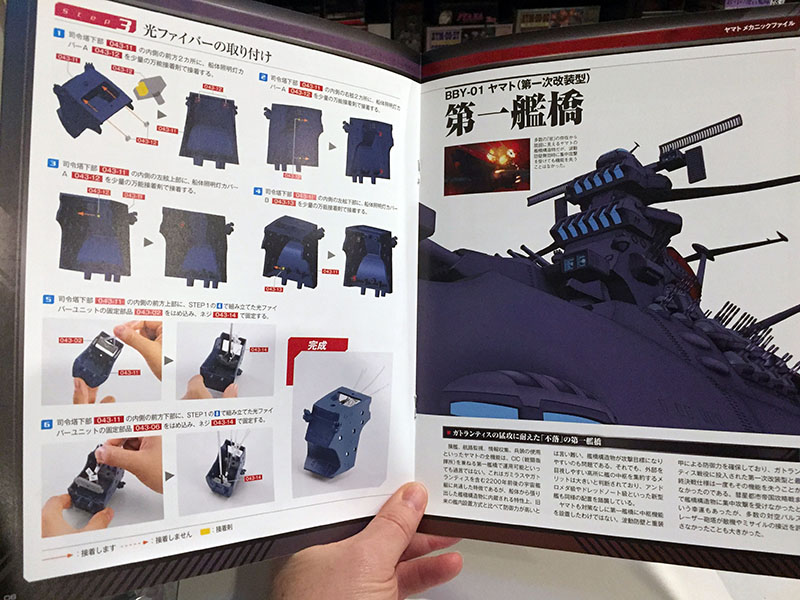
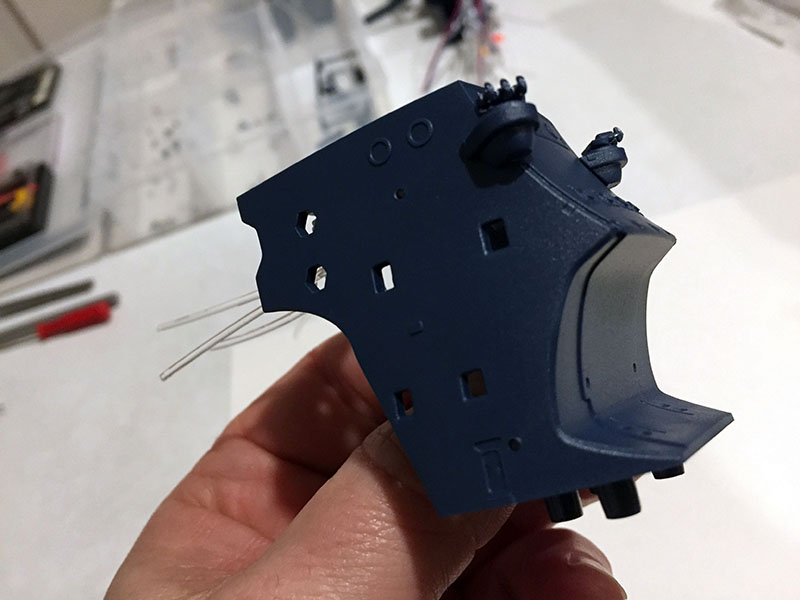
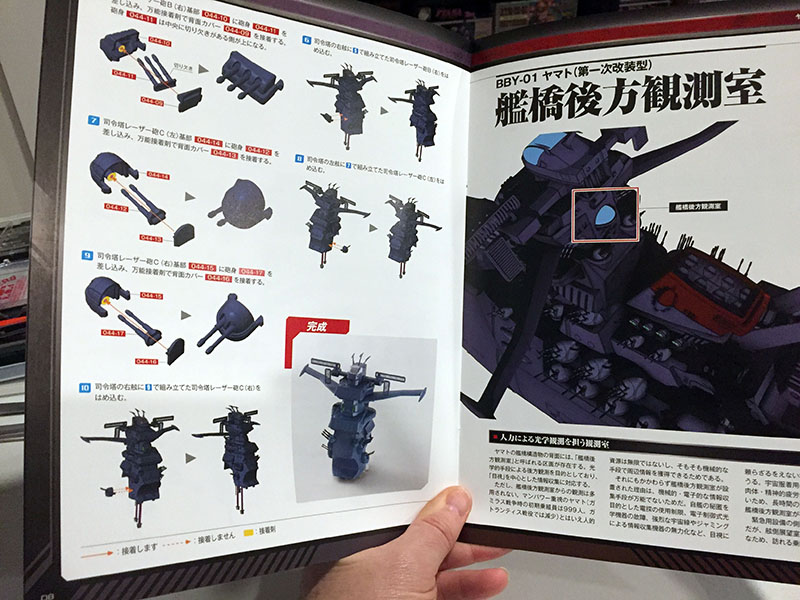
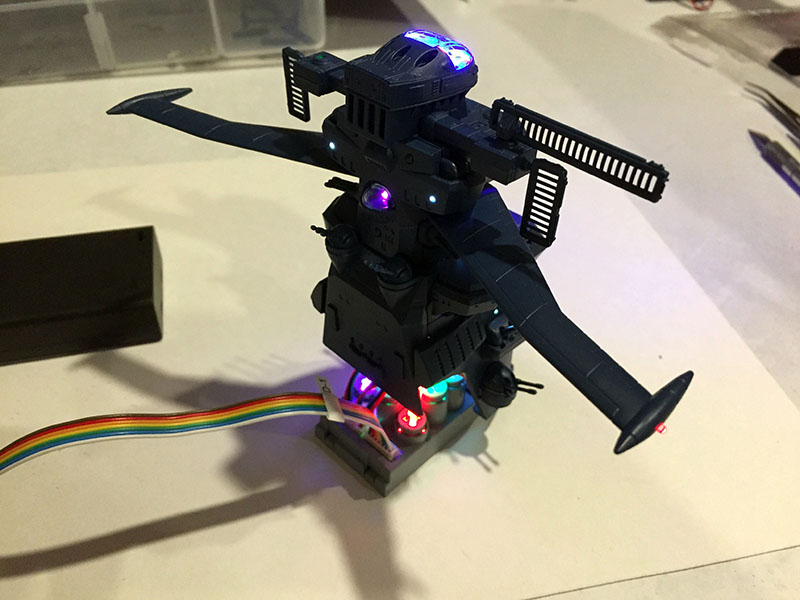
Done. Lookin’ good, tower.
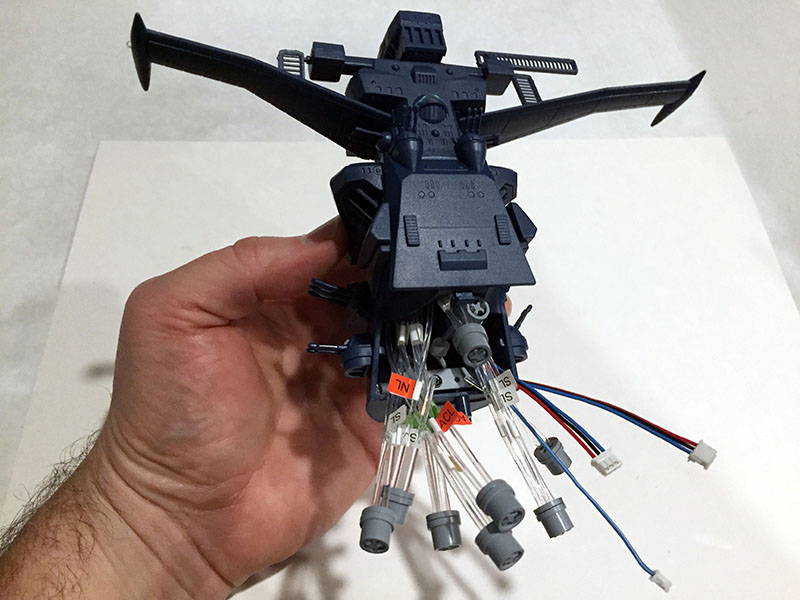
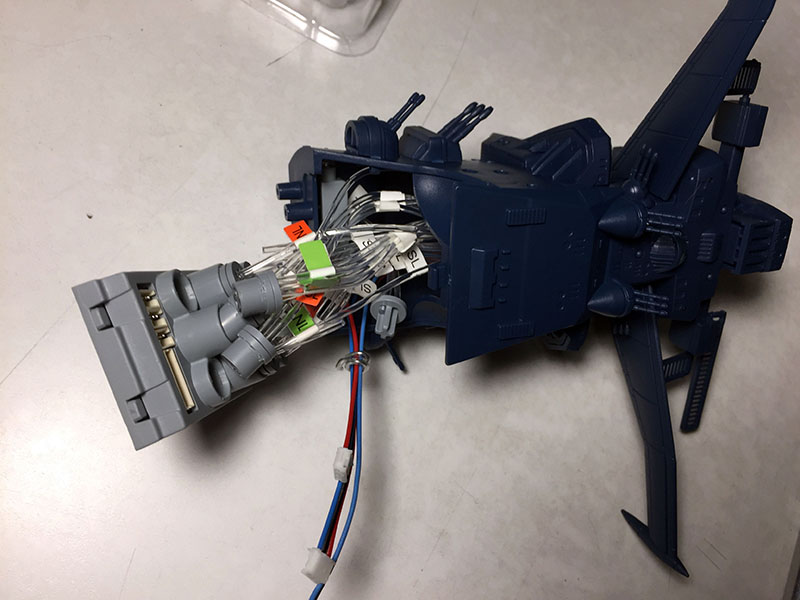
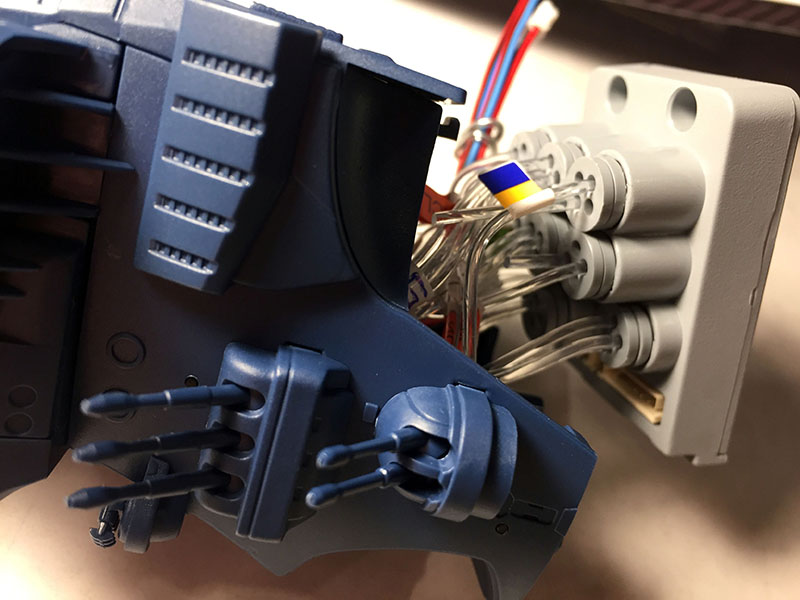
Here’s the back end. That’s a LOT of spaghetti. Each individual fiber leads to a light. The wires lead to LEDs inside the dome and both bridges. Take note of how far down they protrude and how stiff they are. That’s important.
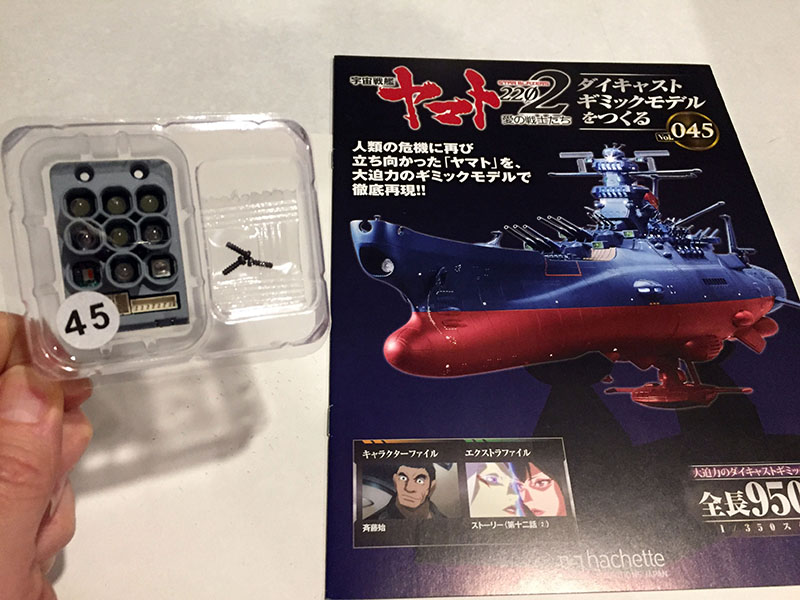
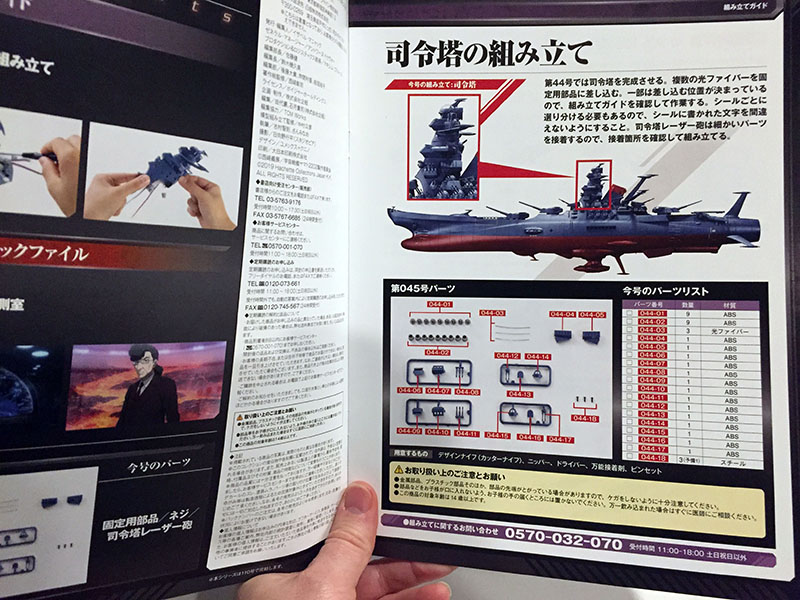
Okay, Volume 45. I was warned about this one.
It’s an LED bus. This is will be the light source for everything in the tower.
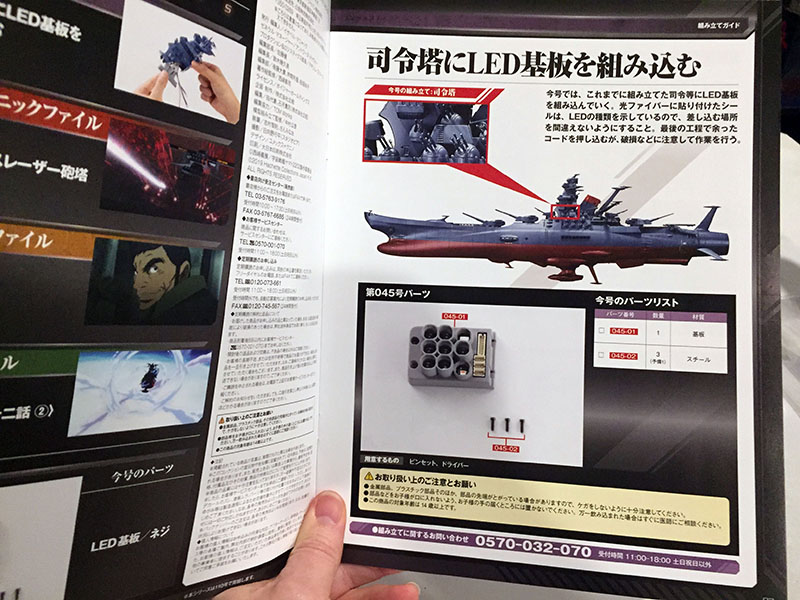
Only two pages of instructions. How hard can it be?
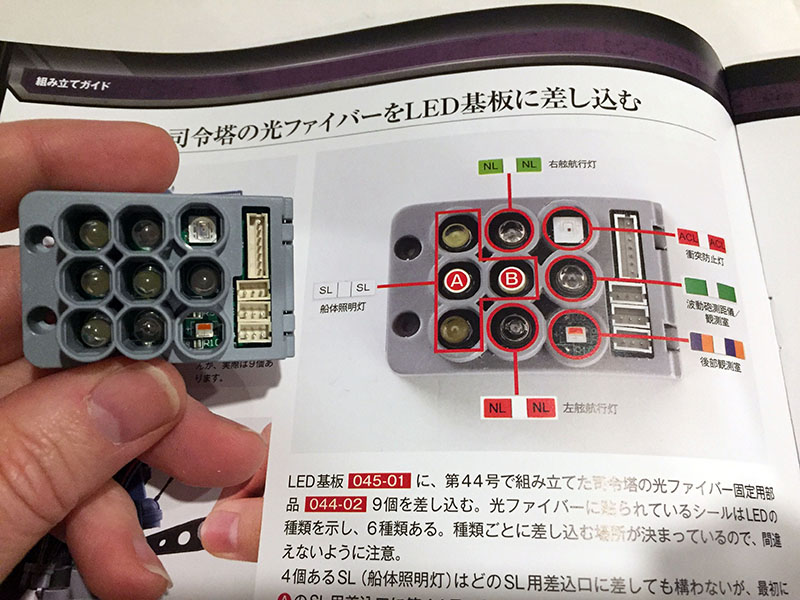
Each of those nine ports contains an LED bulb or circuit. The plugs on the right side are for the wires. The lights in the dome and bridges will change color, so they are a little more complex. I translated the text to figure out what the A and B ports are all about. Certain fibers should go there to make installation easier. All right, let’s get started.
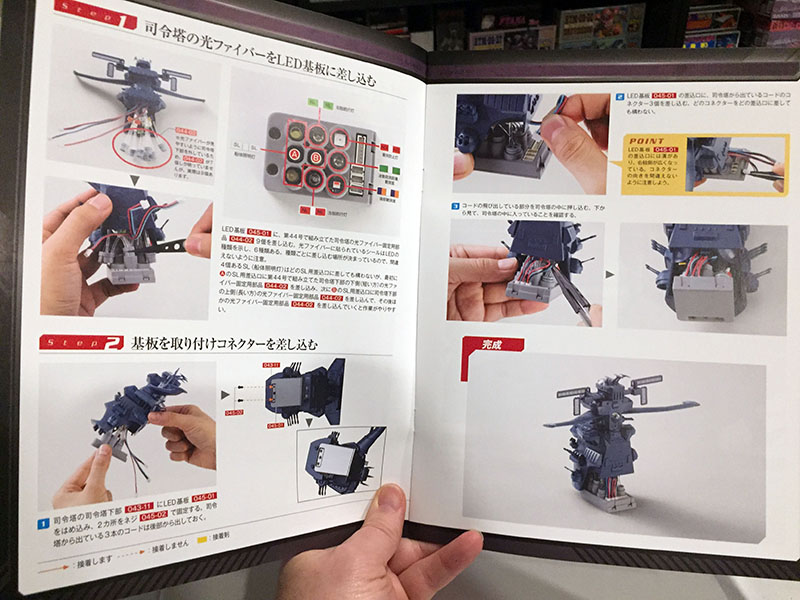
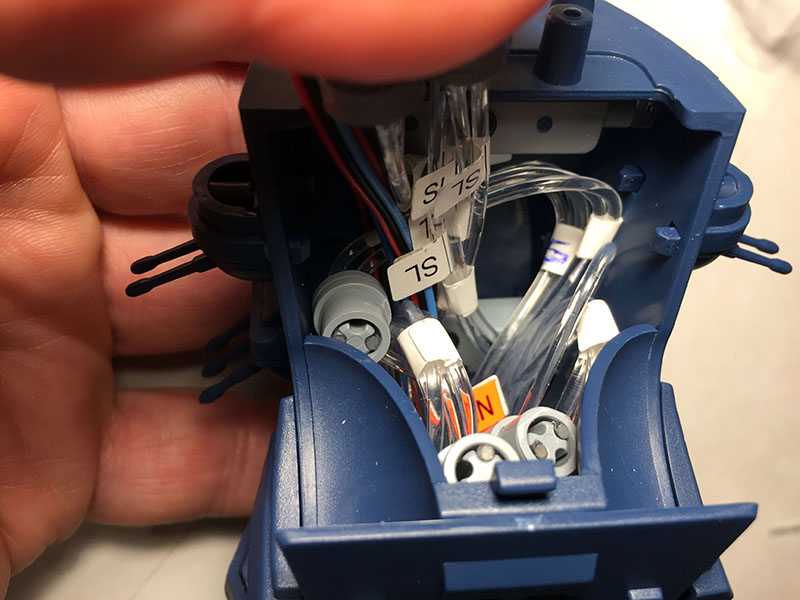
And the nightmare begins. Here’s the problem: those fibers were all cut to the prescribed length, but they’re too stiff and bulky to fit up inside the tower after they’ve been plugged into the bus. And that bus has to attach to the BOTTOM of the tower. In this configuration, it’s physically impossible.
Every source I went to in my research warned that this is the WORST part of the build so far. And they were right. Even without the length problem, the more you try to work them all into their slots, the more they come apart on you. At one point, every single cap had popped off and had to be wiggled back on. And the more times they popped off, the weaker their grip became, until they would just fall off with the slightest wiggle. Not good.
By the way, those nicks and gouges you see on the fiber caps came from me having to repeatedly pry them out of their sockets when I had to rethink my approach. Fortunately, they won’t interfere with light flow.
After struggling with this thing over and over and inventing new combinations of 4-letter words, I decided the only solution was to shorten all the fibers. This was risky, since they still had to drop down far enough to reach their plugs. Plus, shortening them meant removing some of the flags, so I had to re-label a few bundles. All that was step one.
Step two was to start bending and turning them so they’d actually fit inside the cavity. To make that work, I had to wedge and jam them up inside and leave them that way overnight. In other words, train them to WANT to stay bent. No easy task. One or two fibers give no resistance. But some of these are bundles of four that might as well be made of wood. I hate to apply brute force to something like this, but there was no other option.
The next afternoon, I let them out to breathe and they stayed bent. Good sign. Now to try the plugs again.
Miraculously, I got them all into their plugs. Then I realized the bus was turned the wrong way. I put them in backward. So I had to pull them all out. AGAIN. And re-cap a couple along the way. AGAIN.
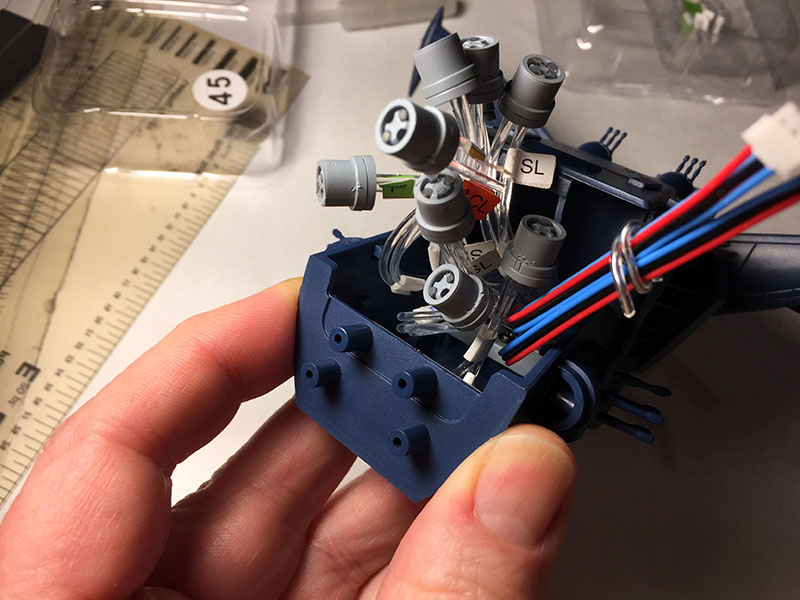
One more round, and they all got into their correct plugs. I pushed them all up into the cavity and they fit. Barely. There’s still a LOT of pressure in there. But if it was too much for the plastic shell to contain, it would have come apart then and there. Thanking my lucky stars, I screwed that bus on tight and unclenched my jaw for the first time in 24 hours.

I really don’t like how hard those fibers are still pushing down on the bus. But they’ll have to push harder if they want to break it off. Plug in the wires, and this nightmare is finally over.
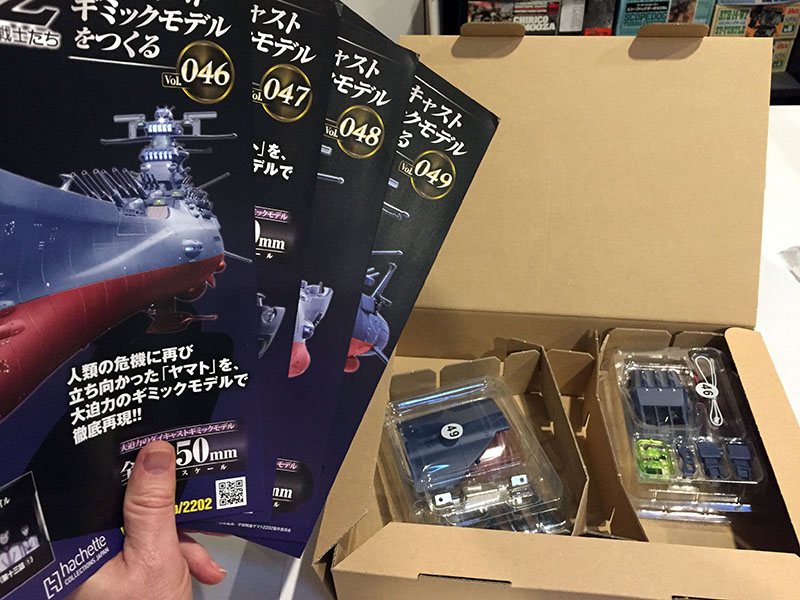
With a sigh of relief, the next box opens.
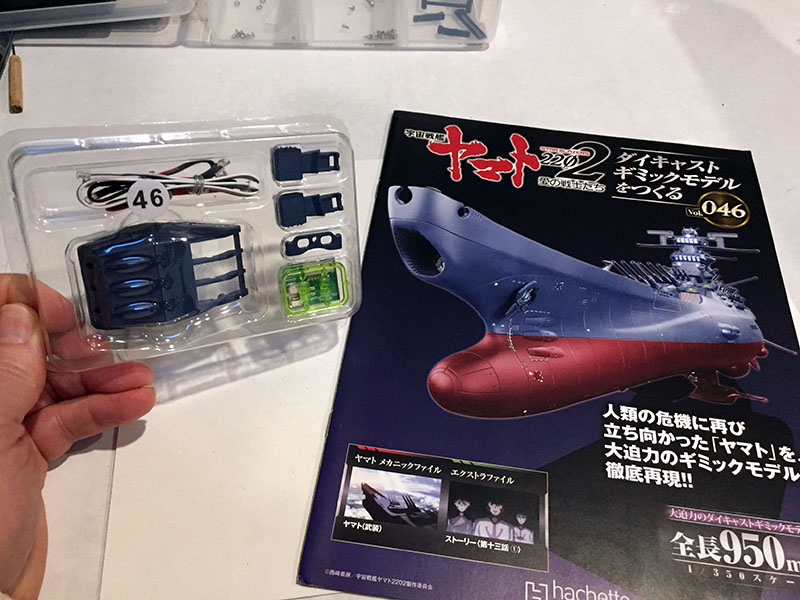
Volume 46 looks like Volume 2. Remember Volume 2? Seems like years ago now.
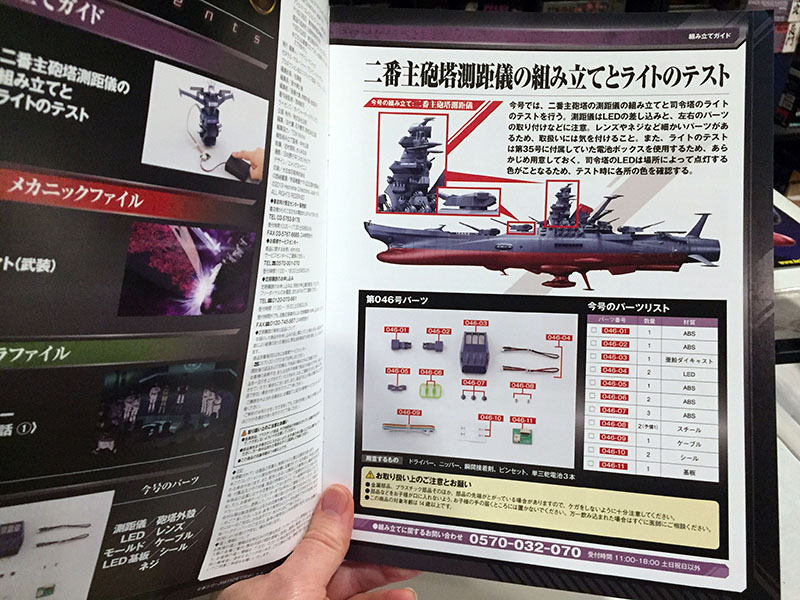
This time we’ve got the second main gun turret and something else to do with that horrible, horrible bridge tower.
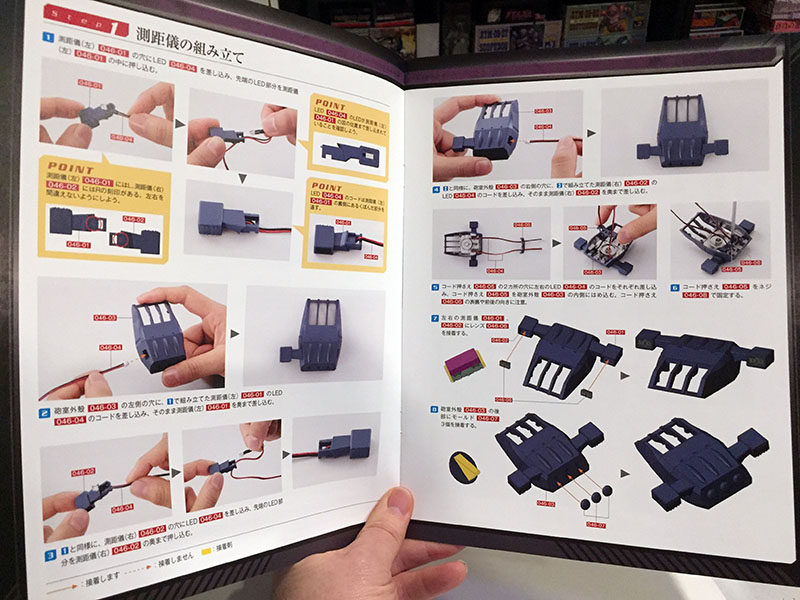
The gun turret assembly is familiar ground.
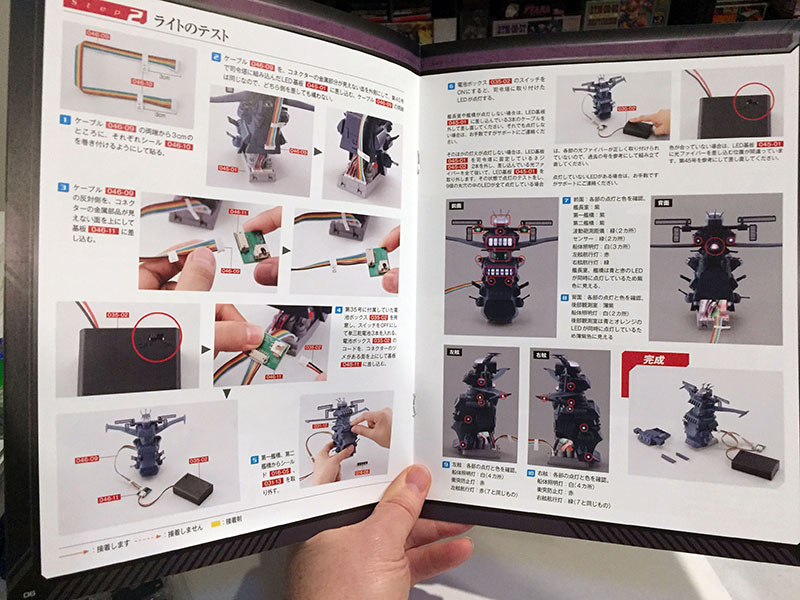
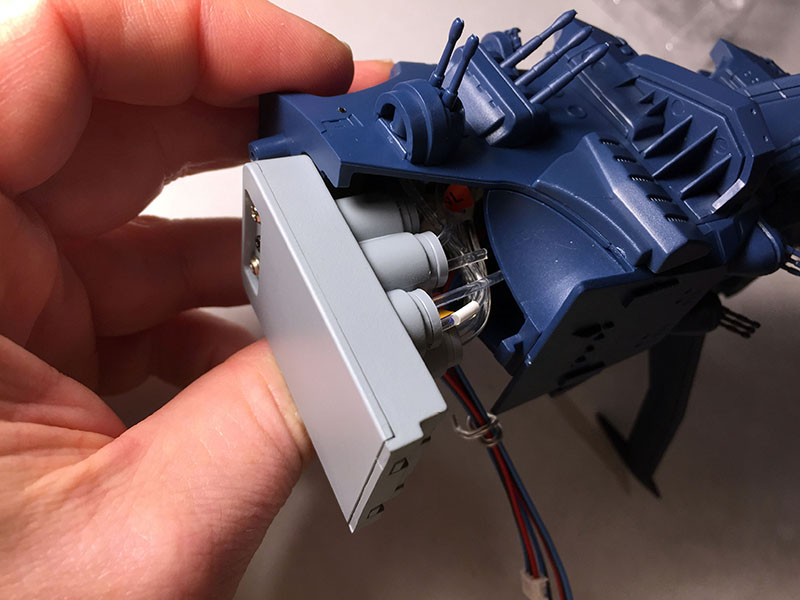
Ooh, a nice surprise. The next thing to do with the bridge tower is give it a lighting test, using the battery pack that came in an earlier volume. That will either be lovely or disastrous depending on the outcome.
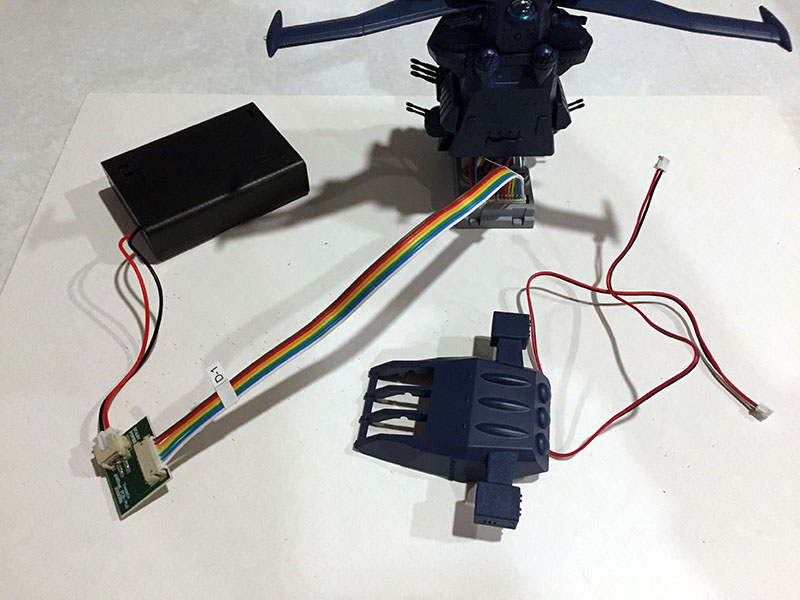
Assembly complete. Now the moment of truth. Was the nightmare worth it?
OH MY GOD.
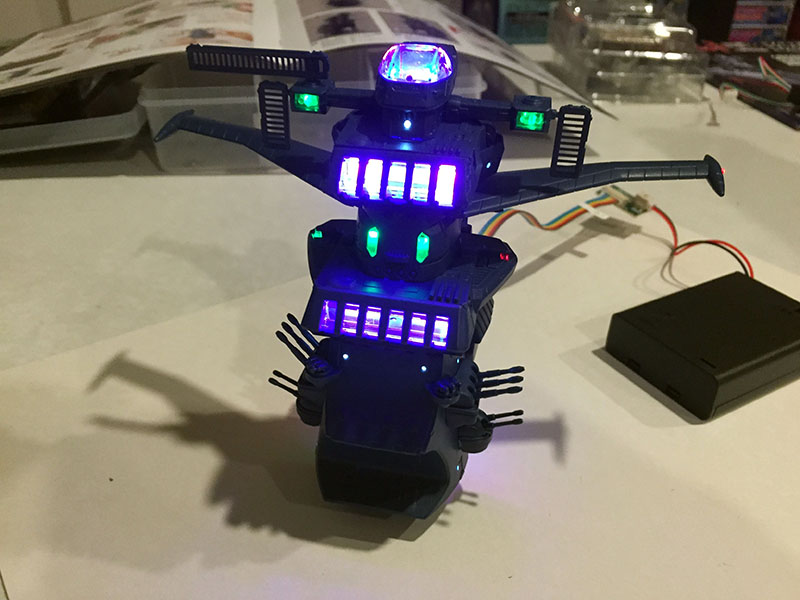
IT’S LIKE CHRISTMAS MORNING.

Worth it? I’d have to say yes. Even with a couple of light leaks.
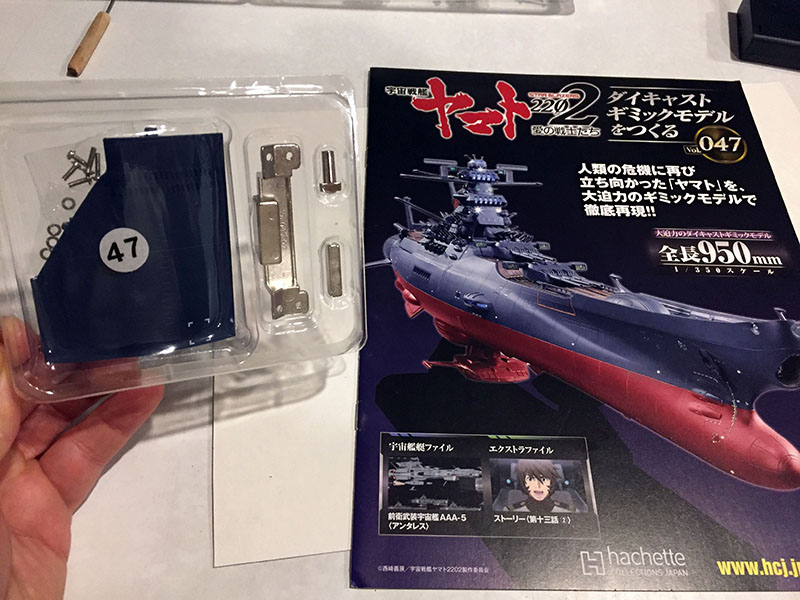
Volume 47 returns us to sanity.
We’ve reached the midsection at last.
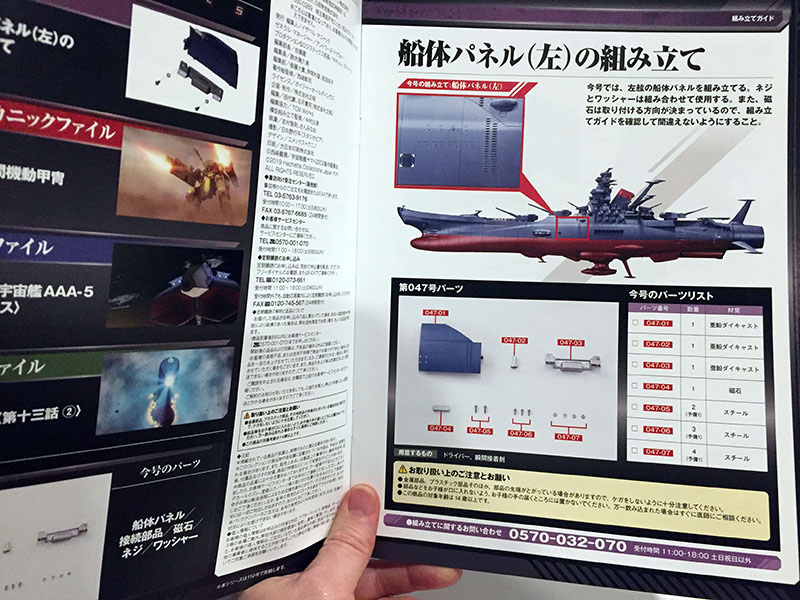
A refreshingly simple hull plate again, for the starboard side. It includes a magnet (seen in step 2) that will hold the wing on.
Thanks, Hachette. I needed that more than you know. You can see the magnet at the bottom (with a dot drawn on it to tell which side goes out). That thing was so powerful that just touching it with my tools caused them to become magnetized. That would have been super handy earlier when I was trying to maneuver tiny screws into tight places.
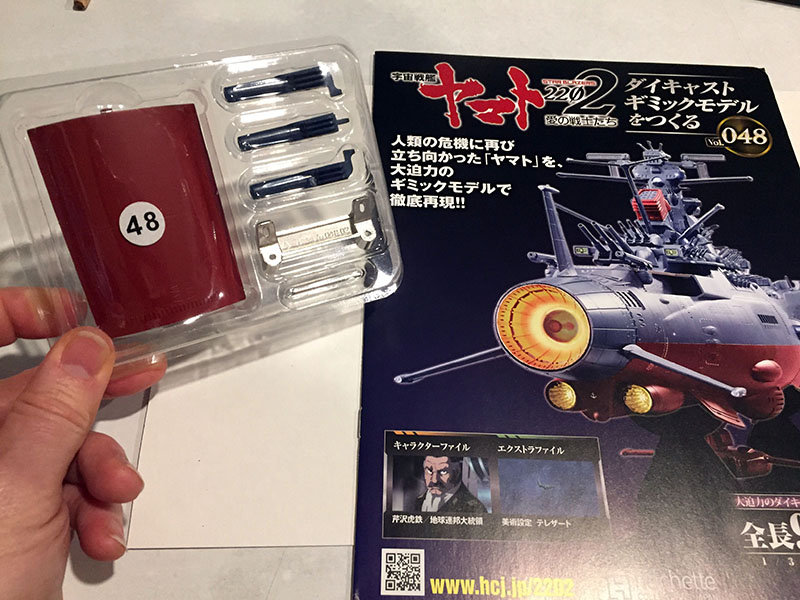
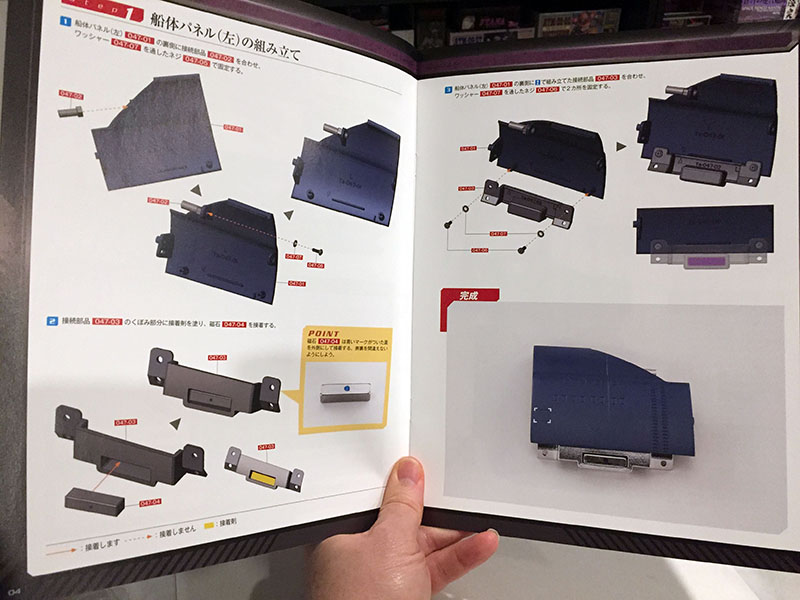
Right into Volume 48.
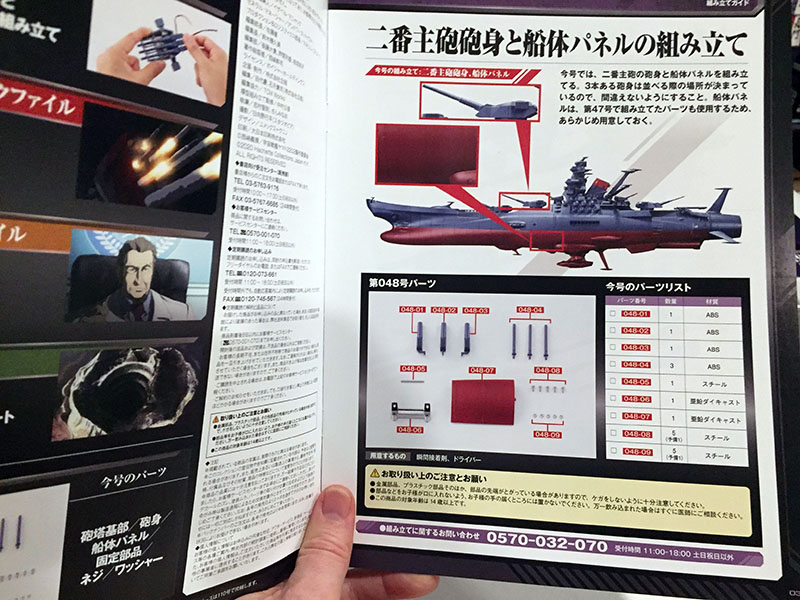
Next hull plate and some gun parts.
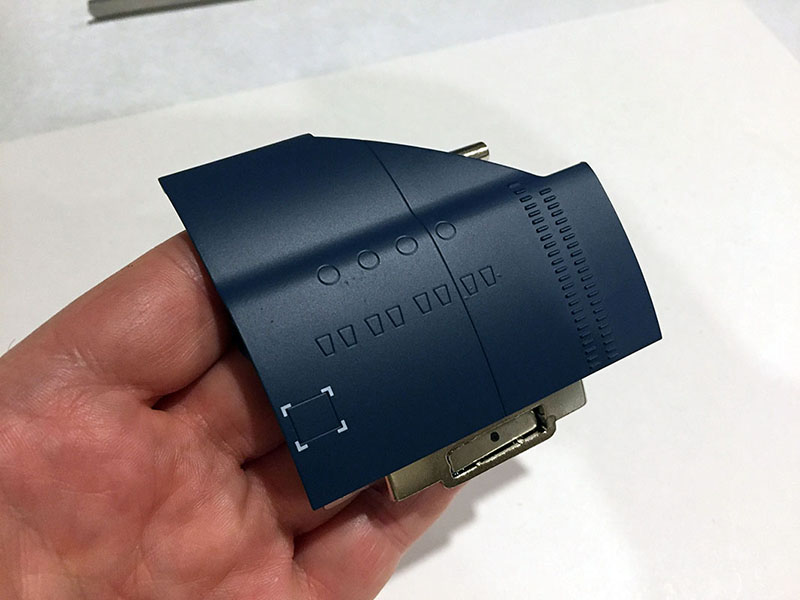
We’ve got the cannon barrels for turret 2 and the next hull plate.
LOVE me some hull plates. They’re effortless now. On the other hand, there was a problem with the cannon barrels. Stay tuned.
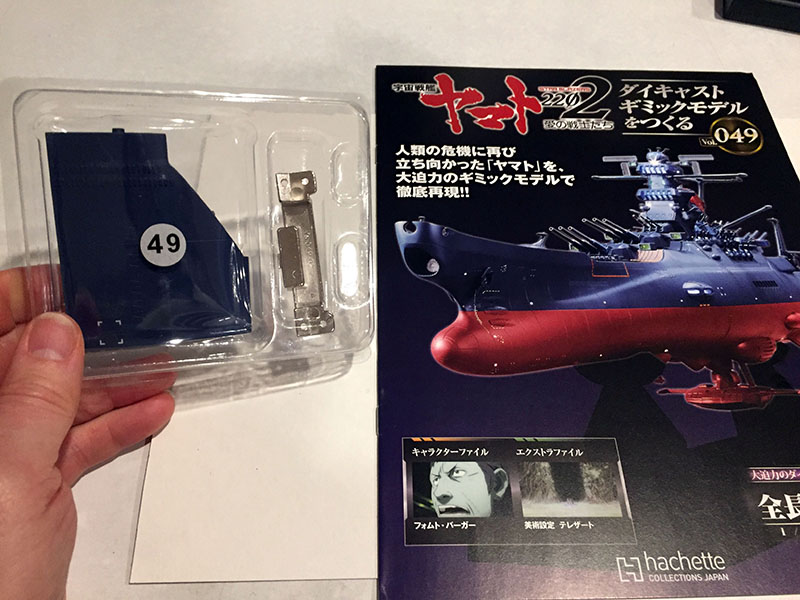
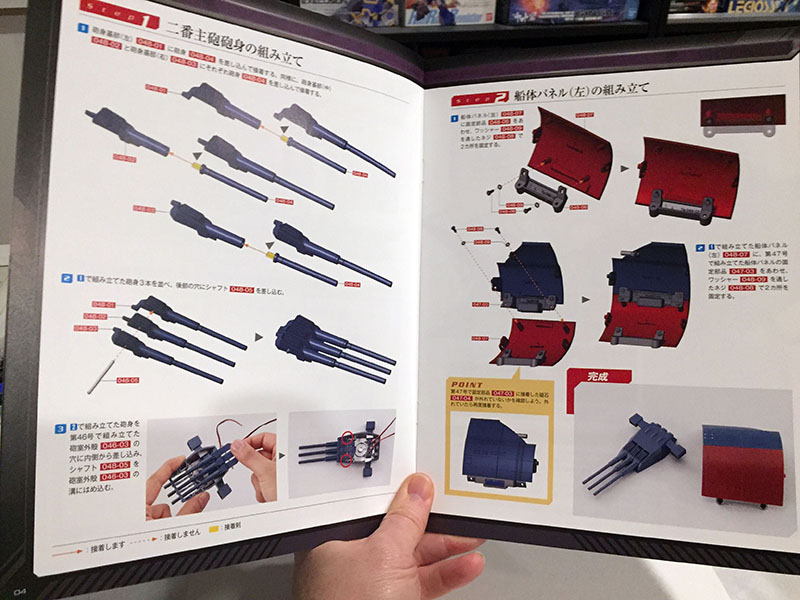
Volume 49 comin’ at ya.
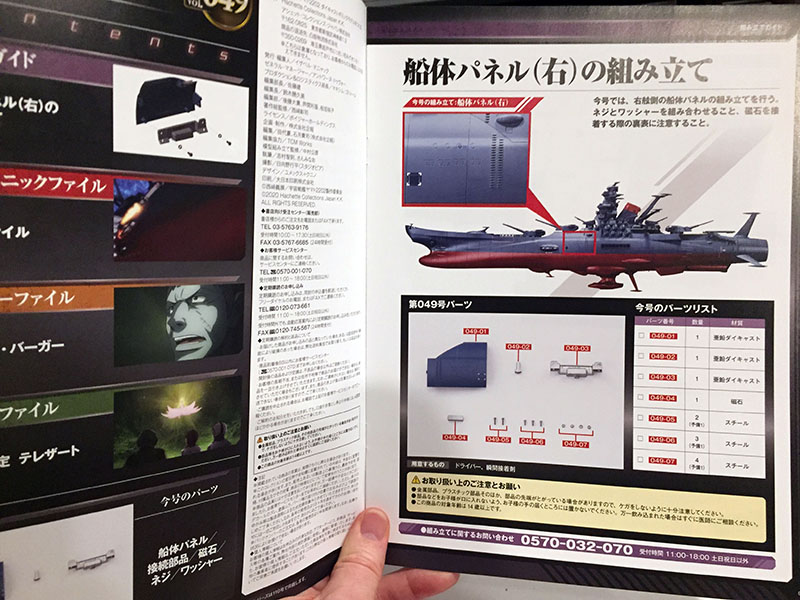
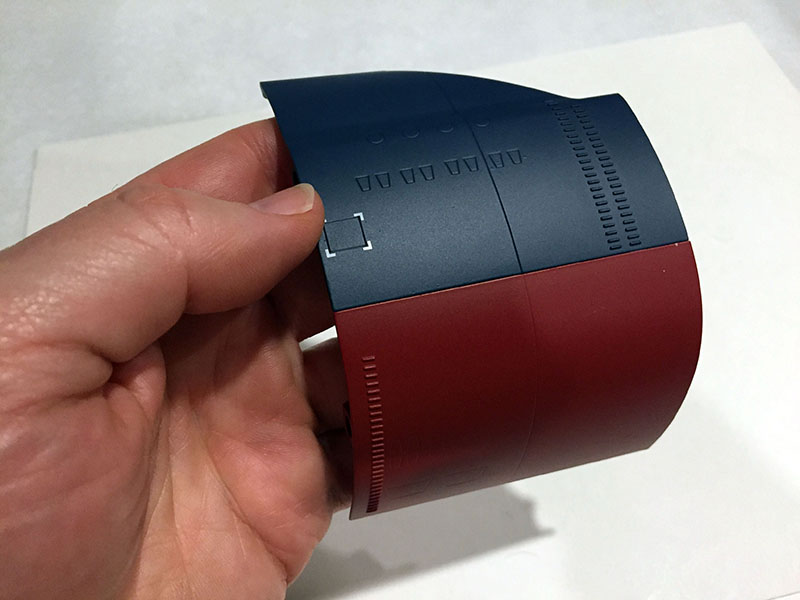
Hull plate again, for the port side.
Same as Volume 47, with another magnet. It has to be powerful, because it still has to work with a hull plate will go over it.
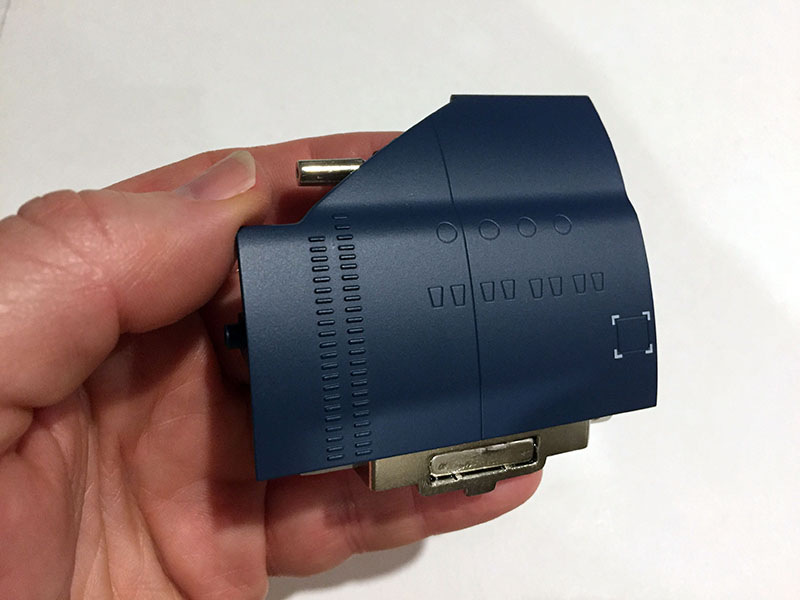
Finished.
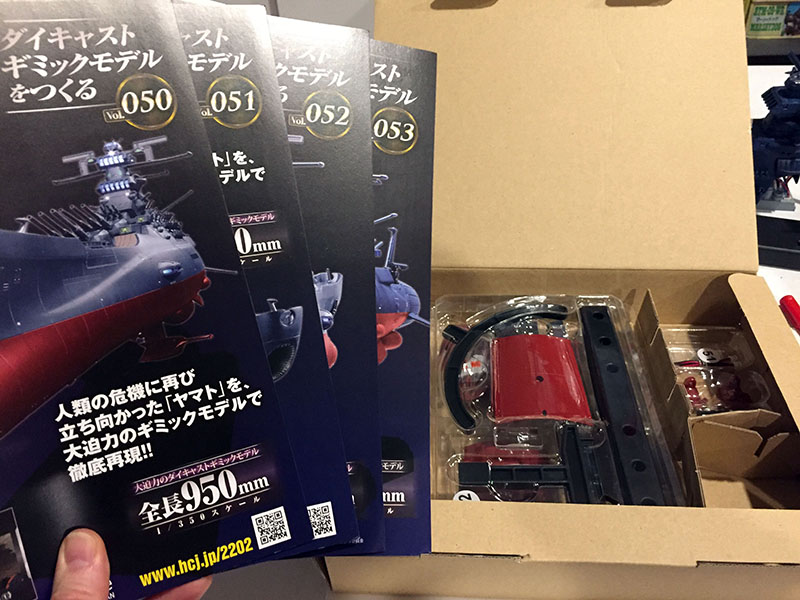
Next set of four, ready to go.
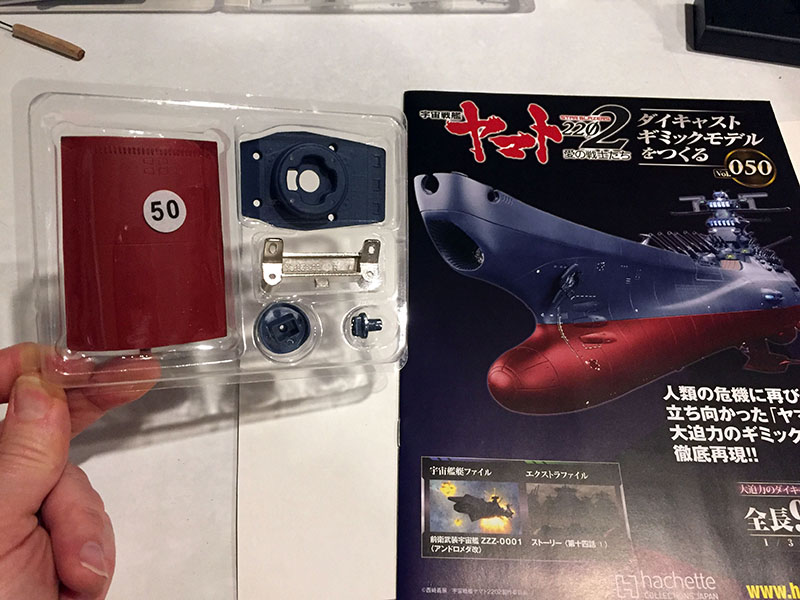
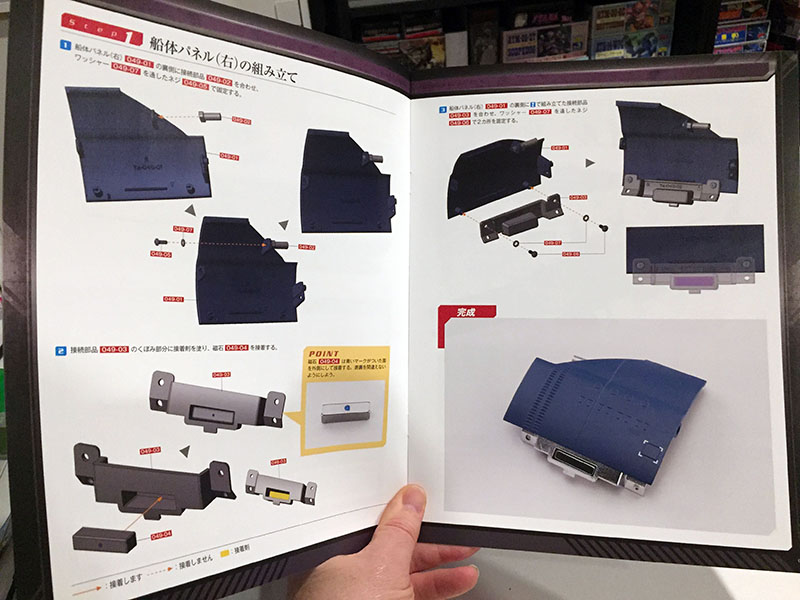
Volume 50 delivers another hull plate. And another problem.
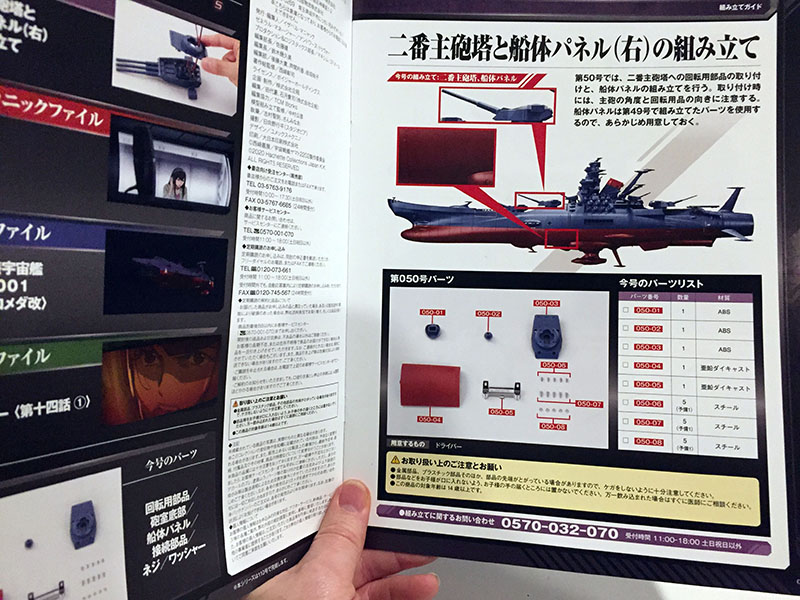
This plate will attach to the last one, and we’ve got another gun part.

Instructions are simple. Or so it seems.
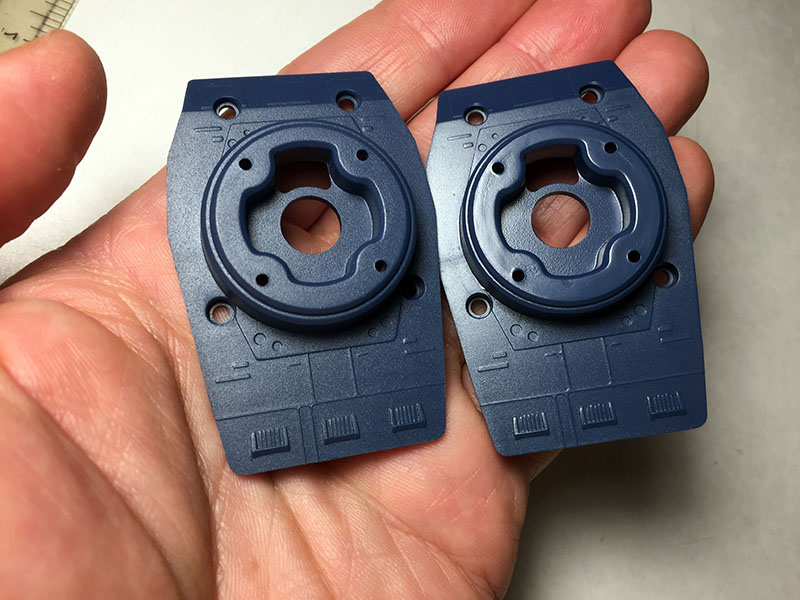
Here’s the problem: the underside of the gun turret. When Volume 94 came out, it had a replacement for this part. This was something else I learned from my research. So I opened up Volume 94 to confirm, and there it was.

I marked the replacement part before putting them together, but I don’t see any difference. They look exactly the same. But Hachette issued it for a reason, and unlike those who didn’t have the replacement until they got Volume 94, I could apply it here and now. That allowed me to avoid the labor of coming back and disassembling a bunch of stuff to swap it out.
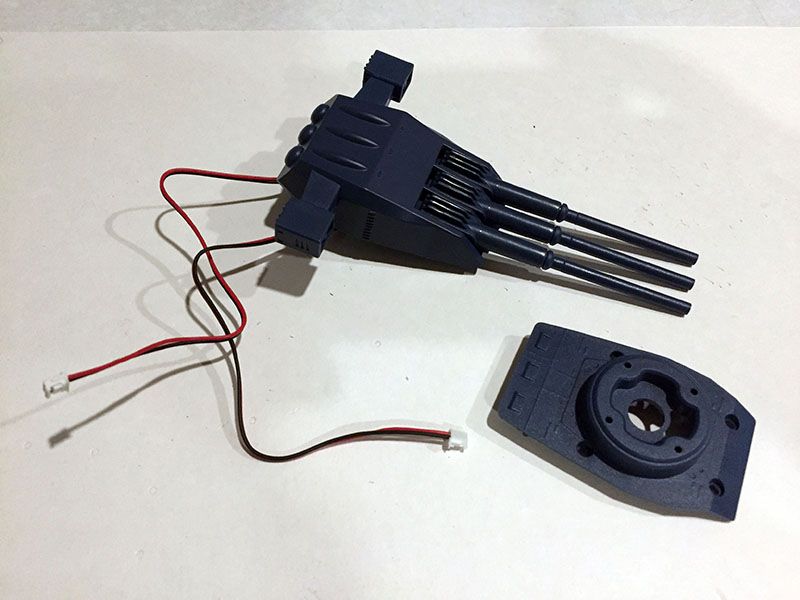
And there’s the finished turret with the replacement installed. The “defective” part is off to the side. Now, remember what I said earlier about a problem with the cannon barrels? They all connect to each other with a metal rod. It’s a hinge that fits loosely into a hole that runs through all three of them. Two of them worked fine, but the third was far too tight. I had to get out a drill and bore a wider hole through a VERY small part so they’d all work properly. If I didn’t do that, one barrel would always be stuck in place. It was sorta nerve wracking, but it went as smoothly as could be. Whew.

But, of course, putting the hull plates together was a breeze. Onward we go.