
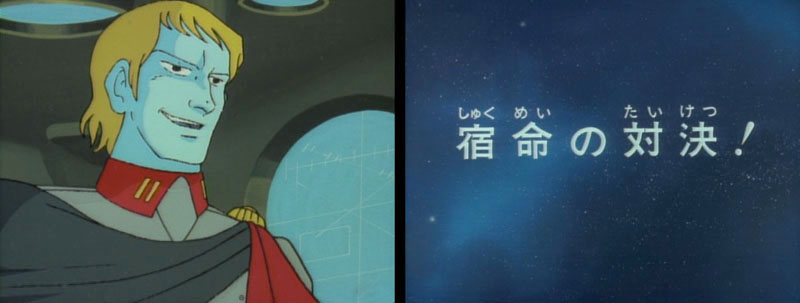
The Destined Showdown!
By Arthur Painter (with notes from Tim Eldred)
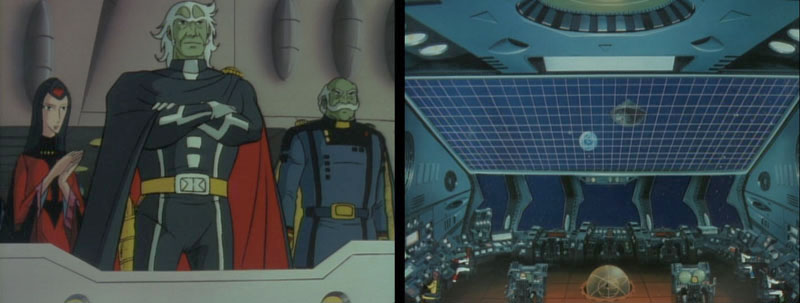
“Planet Earth is mine!” Zordar declares. The Comet Empire moves toward Earth.
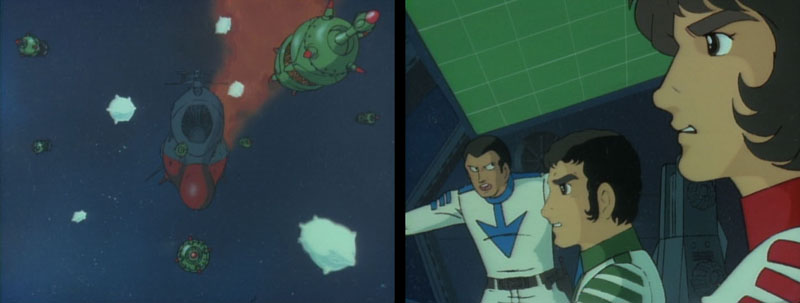
On the Argo, Eager pinpoints the Comet Empire’s current position. Nova makes a strange comment in Star Blazers: “It’s just left the Jupiter area.” It sounds like she’s talking about the Comet Empire, but she’s actually referring to the Argo. Her comment is correctly worded in Yamato 2. Wildstar announces that they will warp directly to the fortress and attack immediately.
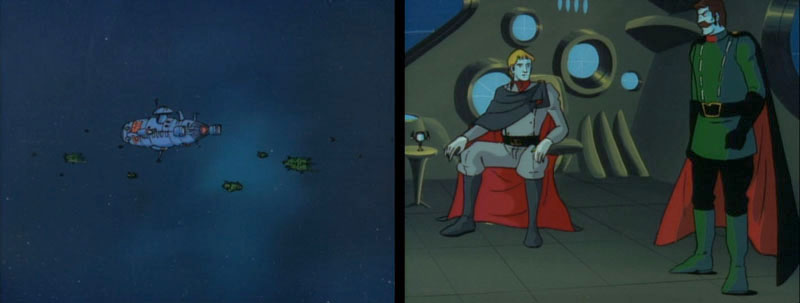
As the warp preparations begin, it’s revealed that the Star Force is being stalked by Desslok. Star Blazers has a brief cut–most likely trimmed for time–of Desslok’s ships coming into view. After a Gamilon tech reports the Star Force’s position, Talan exclaims, “the Star Force!” Desslok takes a drink from his spiky goblet. “Yes, the Star Force,” he repeats. He pauses a moment as he stands up. “What luck.” This is followed by a half-hearted laugh. His short, repetitive dialogue and strange laugh makes me wonder if Desslok hasn’t had a bit too much Gamilonian wine.
Yamato 2 extended this scene a bit, panning over to show Talan and the tech staring at their leader as his chuckle grows into full-bore laughter. This makes him appear even more drunk. (And it doesn’t help that these scenes were obviously drawn quickly so he looks a bit disheveled.)
Production note: The Japanese script originally indicated the ship’s warp start time as “space time X hour, X minute.” It was decided during voice recording to make it “Space time 0:05.”
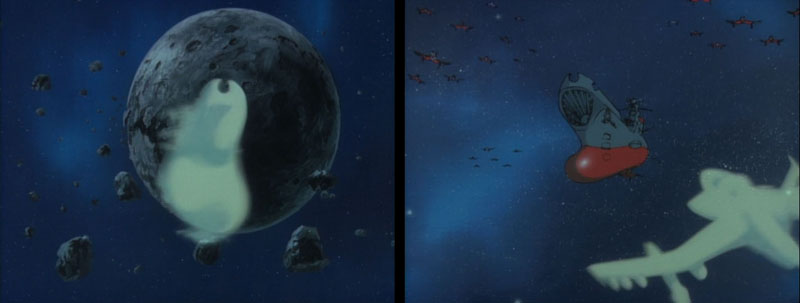
The Argo warps directly to the Comet Empire, only to find it’s no longer where it was. In the background, we can see the charred and cracked remains of the moon (which has now cooled to its former color), and the area is littered with lunar debris. Eager quickly pinpoints the fortress’s new position. Before Venture can move the ship, a squadron of Gamilon bombers materializes in front of them, teleported in via SMITE projectors. Within seconds, they are surrounded.
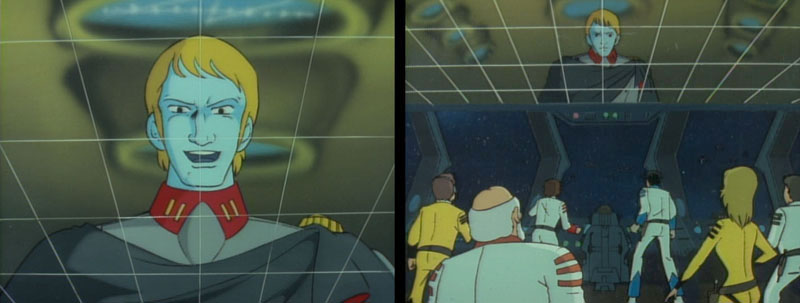
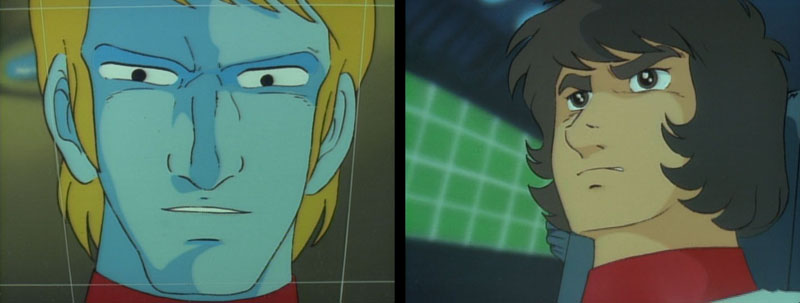
Desslok appears on the video screen. He’s rather glib and speaks in short, clipped sentences as he mocks his foes, which again makes him seem a bit drunk. Wildstar, clearly angry and frustrated, makes a genuine appeal to Desslok. “There’s no time for jokes. Earth is in danger,” he tells him with a slight plea in his voice. Since the takeover of Earth was Desslok’s goal in series 1, it makes sense that the Gamilon leader would be concerned with the safety of the planet, or at least with who controls it. Desslok gleefully responds that his goal is the destruction of the Star Force, not the conquest of Earth. Derek, with a voice like bedrock, proclaims “You can’t do it!”
“We’ll see, Wildstar, we’ll see…” Desslok says as his image fades.

“DESSLOK!!” Derek shouts as the Gamilons begin their attack. Derek’s blood-curdling cry invites comparisons to one of the more memorable moments from the movie Star Trek II: The Wrath of Khan, where Captain Kirk, facing a similar situation, cries out his foe’s name. (I feel it is my duty, as a Star Blazers/Yamato fan first and foremost, to point out that this episode came out 3 years earlier.) Ken Meseroll (voice actor for Derek Wildstar) was not mimicking Kei Tomiyama (Susumu Kodai’s voice actor) in this instance–if you view the episode in Japanese, his cry to Dessler is rather understated. This is one of those times where I feel the American version improved upon the original.
Dozens of fighter-launched missiles streak toward the Argo. They all hit at once, their yellow-red explosions consuming the base of the bridge tower. Subsequent missile strikes hit along the mid-to-aft area near the smokestack launcher. Sandor reports that the hangar doors are stuck. Down in the hangar, Black Tiger personnel work a manual control to open them.
Yamato 2 contained a few differences. The missile bombers begin their run by pealing away from the Yamato and looping around, and several more hits to the ship are shown, including a few to the pulse laser clusters and main turrets. More interestingly, the dialogue says nothing about the hangar door mechanism being jammed.
Additional note from superfan Matt Murray: Here’s another example of an instance where Star Blazers made an improvement on the original. We see a couple of Black Tiger pilots hand-cranking open the hangar door: no comment is made on this in Yamato. We’re apparently supposed to assume that manually opening this door, which must weigh many tons, is just standard procedure. Star Blazers added Sandor’s line about the automatic mechanism being damaged, making the scene more logical. Opening the dock by hand is hardly plausible as the normal mode of operations (and never before seen, to boot), but a manual backup in case of emergencies makes perfect sense.
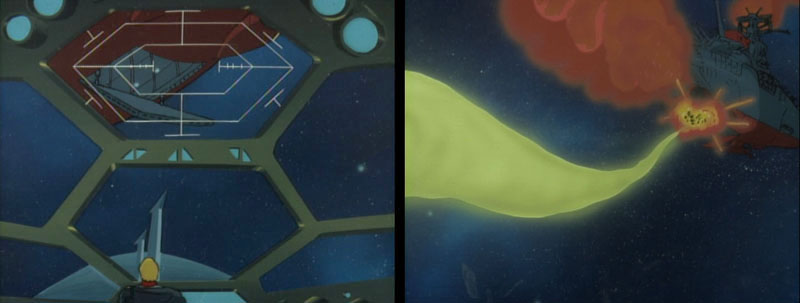
The opening of the hangar door does not go unnoticed by Desslok, and he orders a flight of torpedo bombers to strike the area. One by one, the torpedo planes launch their payloads. Each one seems to hit its target.
Animation inconsistencies are practically a hallmark of battle scenes, where we see different areas of the ship damaged and undamaged as we switch between different views. Here is one of the more egregious mistakes: after the landing bay has been hit several times, we see a shot of an undamaged bay as two missiles streak in, blowing the door completely off.
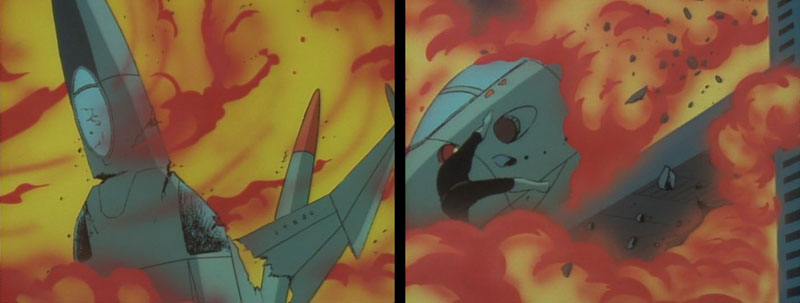
The Star Blazers edit carefully removed scenes of Black/Cosmo Tiger pilots consumed by explosions. In one such scene, you can see a pilot clinging to the edge of a fighter storage shelf, flung away when the fighter in front of him explodes.
Conroy radios up to the bridge that the landing bay is heavily damaged and the fighters will not be able to launch. The destruction of the hangar points up a weakness of the Argo‘s configuration that has rarely been addressed: the underbelly is woefully undefended. Granted, that’s where it would be most heavily armored, but an enemy should be able to attack it with impunity and wear it down in short order, armored or not. The Argo doesn’t even have any guns that fire below its midline, which limits the Star Force’s offensive options: the main guns can only attack ships above them.

The only possible means of attacking an enemy under its deck is through guided weapons like torpedoes and missiles, which would have to take a rather circuitous route to strike the enemy. Of course, this all points out the “realistic” problems of reenacting WWII naval battles in space. This show isn’t realistic, it’s art. However, Desslok’s attack points out a problem that the story is usually content to ignore. (Fans who have played the Yamato Playstation games tell me this is dealt with by constantly rolling the ship over. Players who don’t learn this maneuver don’t last very long.)
At this point, the Argo‘s pulse lasers respond with a defensive screen. It’s entirely ineffective. A bomber weaves its way through the laser bursts and hits the ship. In Yamato 2, there is another discrepancy in the animation here: a dozen or so missiles weave their way to the ship, all striking the starboard side at once, which appeared completely unscathed despite previous hits.
As Desslok watches the battle, he turns to a more serious state of mind. “Remember, this is the showdown!” His forces move up and surround the ship.
In short order, the Argo is left all but defenseless. As damage reports filter up to the bridge, Derek seems frozen with indecision. Homer relays a report from Earth. They are preparing to surrender to the Comet Empire. The continuing attacks seem to fade away in Wildstar’s mind as he gazes out toward the home planet. This is another of those incredible moments when Hiroshi Miyagawa’s score says what no line of dialogue could, painting this unquestionably as one of the darkest moments of the saga. With only one way left to turn the tide, Wildstar orders the ship turned to face Desslok’s command ship in preparation for firing the Wave-Motion Gun.

Desslok has been expecting this, and indeed, he even sounds disappointed by this “obvious” tactic. The fighters are recalled, and mines (a sleeker variety than those seen in series 1) are released to position themselves in front of his ship.
During the Argo‘s turn-around, Star Blazers added a few explosion sound effects that were missing in the original. Speaking of sound effects, there is a recurring element heard many times during the show’s more intense battle scenes: glass shattering. Whenever I hear this, I picture Dr. Sane weeping in a corner somewhere, having lost another bottle of “spring water.”
The scene shifts to the Comet Empire. There is an animation error here, where the camera slowly pushes in on the fortress while Earth shrinks in the background.

Production note: this was one of those rare composite shots that were notoriously difficult in the days of manually-operated camera stands. If two elements were changing sizes at different rates in the same scene, one would be shot first with a holdout area preserving space for the other. The film would be cranked back to frame 1, and then the second object would be shot to fill the holdout area. This was always a time-consuming and math-intensive operation that could be all for naught if just one frame was miscalculated. Since shows were perpetually behind schedule when they got to the photography stage, composite shots were always risky. This one basically worked out except for one glaring problem: it was mistakenly shot in reverse. Otherwise we would have seen the fortress shrink as it dropped toward a slowly enlarging Earth. It could be fixed in a digital remastering, but this has not yet occurred in Japan.
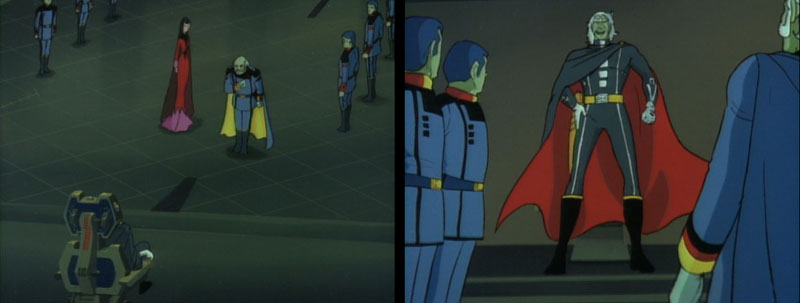
The deadline to surrender has arrived with no word from the Earth government. Just as Zordar is ready to go into action, they receive a message from the Earth President agreeing to the unconditional surrender. Zordar celebrates in a very Zordarian way: he laughs hysterically. All I can say is that it must be fun to be the bad guys. They’re always laughing.
Production note: Zordar’s laugh is far more maniacal in Star Blazers than it is in Yamato 2; you get the impression he was saving it up for just such an occasion. It’s worth noting that the music under this scene is a medley of the Comet Empire theme and Desslok’s theme.
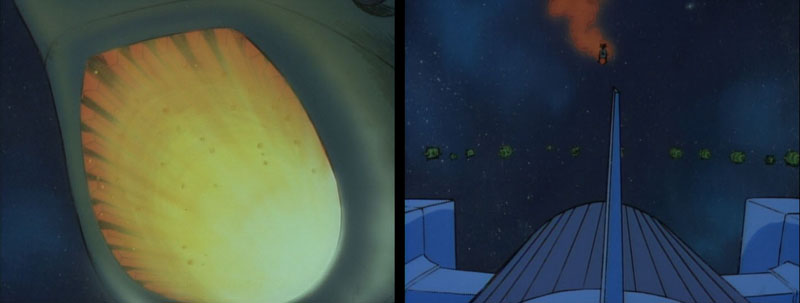
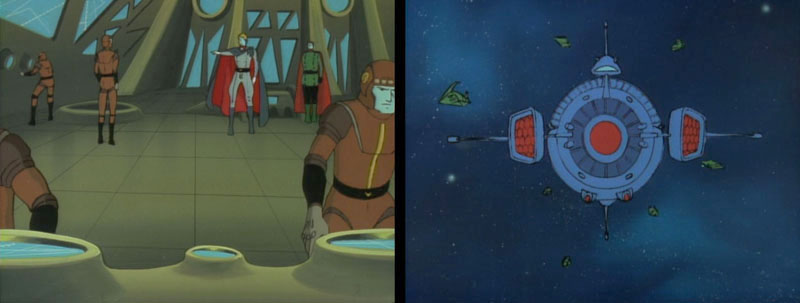
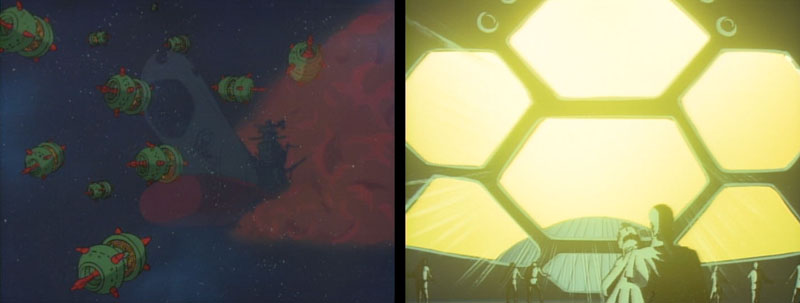
Back at the Argo, the mouth of the Wave-Motion gun starts to glow as the countdown to firing begins. Meanwhile, the new space mines (referred to as magnetic mines in Yamato 2) are assembled in front of Desslok’s ship. At the Gamilon leader’s command, the SMITE projectors mounted on the front of his ship teleport them to the Argo.
The mines are quickly recognized by the Star Force crew. Dash is ready to shoot them down, but is reminded that there is no energy to spare while the Wave-Motion Gun is charging. More mines continue to appear in front of the ship. In Yamato 2, there was a brief shot of Shima [Venture] looking to Kodai [Wildstar], who trembles in anticipation.
Just as the safety lock for the Wave-Motion Gun is removed, Sandor springs out of his seat and halts the firing. The mines are in the way of the Wave-Motion Gun barrel. If they fire, the mines will detonate and destroy the Argo.
Story note: the physics of this are a bit questionable. The mines would need extremely fast internal relays to beat instant atomization, and even if they detonated in time their explosive energy would be swept away by the Wave-Motion blast. But Sandor is usually right about these things…
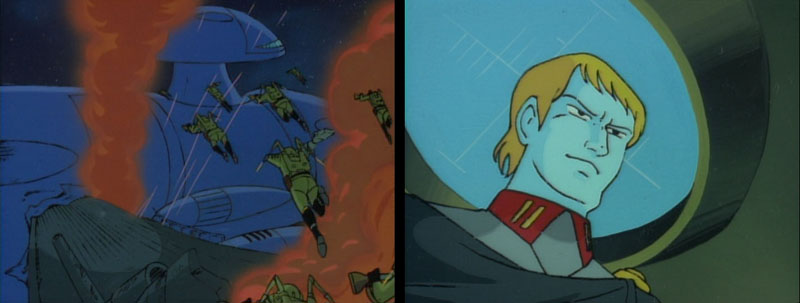
Desslok appears on the main monitor to once more mock their situation. “Go ahead. Fire the gun,” he taunts. Wildstar shakes with rage, a growl of frustration in his throat. (While I think the growl sounds a bit over-the-top, the preview for this episode showed this clip without the growl and it was less impactful.)
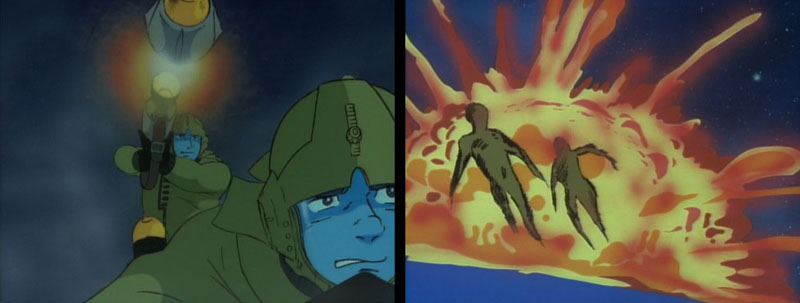
The Star Force is now helpless and Desslok couldn’t be happier. He orders another round of attacks, this time from his capital ships. Dozens of them open fire, and all seem to strike their target. While Star Blazers showed only the ship getting hit, Yamato 2 shows rank and file crew members blasted over and over again as inner compartments buckle and collapse under the force of the explosions.
On the bridge, damage control reports continue to be heard as Derek sits motionless in his seat. “A small warp…” he says to no one in particular. Venture hears him and reacts with confusion. The idea now solidified in his mind, Wildstar explains that if they do a small warp they will be able to ram Desslok’s ship for a hand-to-hand encounter. Venture questions the danger of warping with space mines all around them, but Sandor assures him that the warp will work. Warping affects the area around a ship, so the mines will be carried along with them. Observation reveals that the mines must be controlled by Desslok himself since they aren’t affected by nearby explosions. (Which should clear the WMG for firing, but never mind.) The plan decided, Wildstar announces it to the entire ship. Marines, Black Tiger crews, and commandos are called to a strategy session.
The first time the Argo encountered mines in Series 1, Sandor said they couldn’t warp in the middle of a mine-field. I thought this meant they needed some forward momentum to warp. In Farewell to Yamato, they performed what was called a “standing warp,” indicating that a warp without momentum was possible. Here it’s revealed that an unspecified area around the Argo is warped along with the ship. This could be the reason they didn’t warp way back when; the mines would have been carried with them.

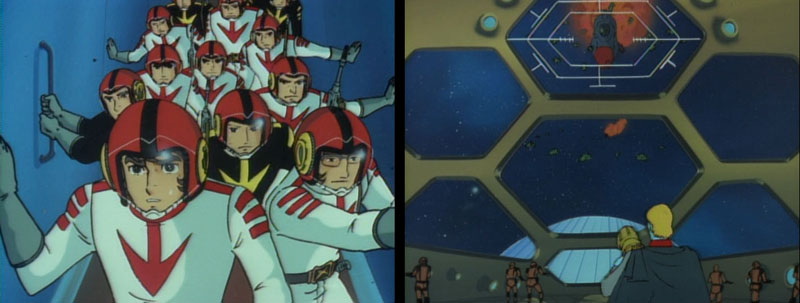
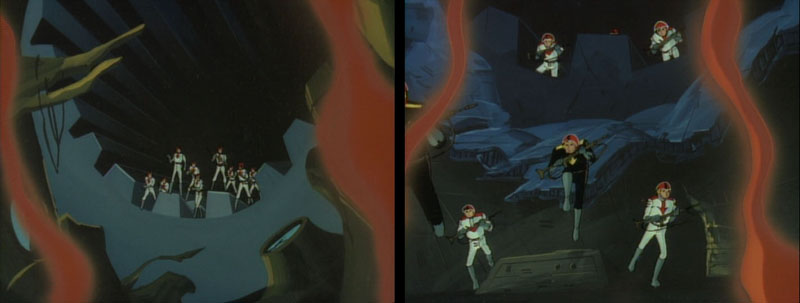
Wildstar divides the invasion forces into 3 groups. The Marines are to go in first, attacking Desslok’s ship from the outside. Wildstar will lead the commandos into the ship itself, and Conroy’s Black Tigers will back them up.
The Argo picked up about 20 Marines at Brumis, and they had been whittled down to about a dozen, as noted in episode 19. In the operations room scene, the Marines now number about 30. Perhaps they picked up some more at Saturn or Ganymede?
Desslok orders his ships to cease firing. He wants the pleasure of the final shot with the Desslok Gun. As fate would have it, he again becomes locked into a simultaneous countdown with the Star Force. (And anyone who doesn’t get a shiver up their spine at this moment just isn’t paying attention.)
Desslok’s eponymous gun fires just as the Argo warps. Not all of the mines warp with the Argo, and the ones that remain behind explode as Desslok’s beam blasts through them. On the bridge of his flagship, Desslok remains transfixed, gazing at the explosion. His face is one of supreme satisfaction. In one of the most breathtaking moments of the series, we see a point of view shot from Desslok’s bridge. Before the glow fades, the Argo shimmers into view, pushing several mines along in front of it.
Production note: the main shot of the ship charging forward dragging mines like barnacles is drawn with several off-model distortions, but they give the scene a momentum it might not otherwise have; the rushed drawing somehow perfectly captures the urgency of the moment. Not all animation has to be perfect to be right.

This maneuver was also done in Farewell to Yamato, but it plays out a bit differently in the TV version. In the movie, the two ships collide side-by-side. Here, Desslok’s ship has a few moments to react. Rather than just reverse course, the ship attempts to turn around. It gets halfway before being t-boned by the Argo. (Evidently no one thought of moving the ship up or down to evade the charge.) Within moments of impact, the Marines emerge and use backpack thruster units to fly over to Desslok’s ship. They immediately encounter enemy fire.
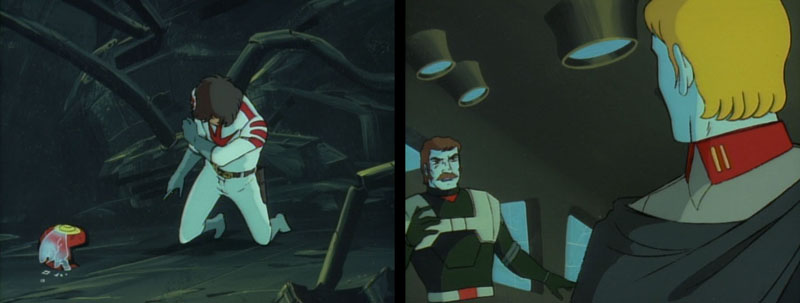
Desslok receives word that the engine has been badly damaged and Star Force troops are coming aboard. Talan rushes off to lead the counter-attack while Desslok fumes. He’s nearly at a loss for words, so he summarizes his feelings with a simple broken phrase: “Star Force…devils!” In the context of the situation he seems positively eloquent.
I’ve pointed out similarities between Series 1 and 2 before, and there’s a less obvious one here. In Series 1, Desslok rammed and invaded the Argo. Here, the Star Force returns the favor.
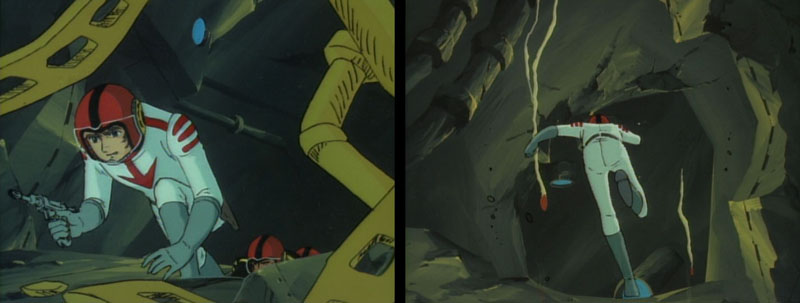
While an impossibly large number of Marines keeps the Gamilon forces occupied topside, Wildstar and Conroy’s groups infiltrate the ship through the Wave-Motion Gun gate. I have to point out that 23rd Century medicine has really made tremendous leaps. Derek had trouble walking in the last episode, but jumps and runs normally only a day later. Dr. Sane’s medical miracles will be seen in the next couple of episodes as well.
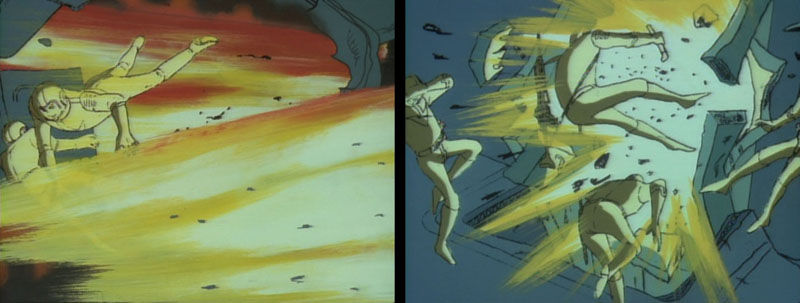
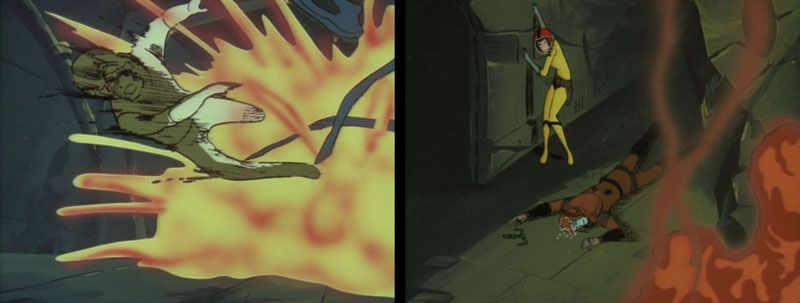
But as good as Dr. Sane is, he’d be at a loss to help Venture in the following scene. Nova exits a hatch on the deck and straps on a jet pack to follow Derek. Dr. Sane tries to drag her back inside. A series of shots strikes the deck nearby, the unseen gunner steadily walking the shots toward them. Venture, who is revealed to be on the same deck for some reason, leaps over to push Nova out of the way. In mid leap, an explosion rips up through the deck.
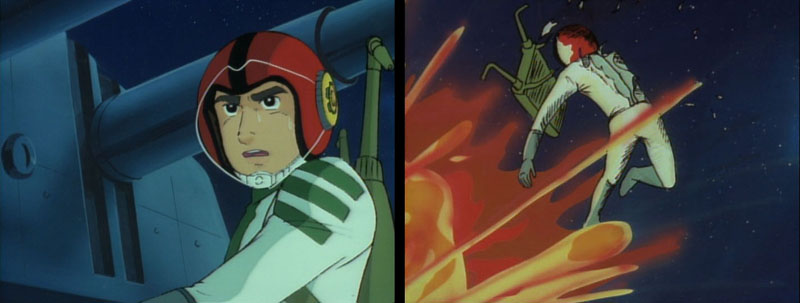
Venture catches the full force of it; his suit is visibly torn and he is hurled off into space. The edit of Star Blazers removed some of the more vivid frames, which made it appear a little jumpy. To be fair, even without the edits the scene is still a bit jumpy. It didn’t help that Venture, like Nova, was wearing a red helmet, and has a combat-red uniform in one quick shot as well. (For that matter, Nova is still wearing her jet pack and might have been able to retrieve him, but it may be too dangerous with all the ambient gunfire.)
The Marines charge over the enemy ship. They flatten against the hull when shots are fired their way, then a Marine responds with a “bopper gun” rocket launcher, which in Yamato 2 footage is shown to kill two Gamilas soldiers.
Inside, a wall explodes, forcing Derek and his group to the floor. Wildstar gets up and sprints ahead when another explosion hurls him forward. Debris collapses in its wake, separating him from Conroy and the rest of the men. There was a very brief edit here, a scene that showed Derek thrown forward. Either it didn’t pass the editor’s “no personal violence” rule, or they didn’t like the sketchiness of the animation.
Another brief edit occurs in the very next scene, which originally opened with Yuki [Nova] standing near the bloody body of an enemy soldier. She is fumbling around, desperately trying to find Derek. If I’m very charitable, I could imagine that she’s in shock. That would provide an excuse for her behavior in this scene. Nova is a seasoned veteran by now, and should know her defined duty during a battle. If she wants to provide emergency care for injured soldiers, fine, but to blunder around an enemy ship looking for her boyfriend is dangerously idiotic. Of course, this is to get her in place for next episode. I just wish she was given a more compelling reason for being there.
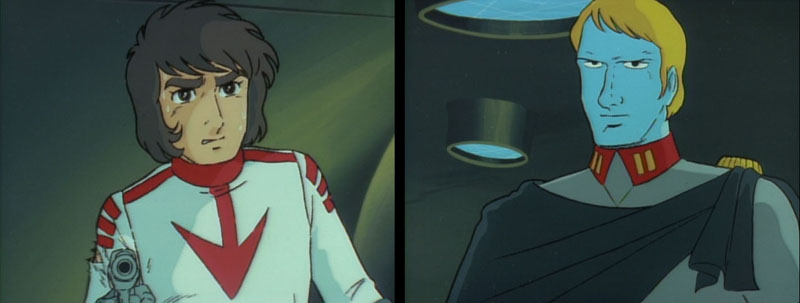
Derek picks himself up off the floor. His helmet face-shield is now smashed, and his right shoulder is wounded. Nonetheless, he gets on his feet and starts toward the bridge.
Talan convinces Desslok to abandon the flagship for carrier one. Desslok seems offended by the very notion of leaving, but Talan adds the word “temporarily” which makes it more palatable. They turn to leave, only to face an injured Derek, holding a gun.
Meanwhile, the Comet Empire has finished a low-level “victory flyby” over Earth and lands in the Pacific Ocean. Without its comet halo, the fortress is definitely not half the size of Earth as stated by Trelaina earlier (it looks small even compared to the moon) it’s still large enough to cause major tidal waves with its landing.
And here it ends with perhaps the greatest cliffhanger of the entire saga. Unlike Yamato 2, Star Blazers forgoes the narrator’s final comments. With nothing but musical accompaniment, we’re left with images of the Comet Empire resting in the Pacific Ocean while Desslok and Wildstar face off at last.

Continue to Episode 24 (dare you not to!)