
Courage: The Death Of Captain Gideon!
By Arthur Painter (with notes from Tim Eldred)
Production note: This one has it all. Nowhere else in the Space Battleship Yamato saga will you find a more engaging space battle, pouring over with artistry and drama. With so many complex and detailed scenes, it would have been easy to lose track of the action. But this episode had the benefit of Noboru Ishiguro drawing the storyboard AND directing the animation. As the single most accomplished Yamato veteran at the time, there was no one more qualified to take on a monster like this episode, and his experience shows in every scene.
At some point, the temptation must have been great to reuse battle scenes from Farewell to Yamato (even though the entire fleet battle in that film was literally only five minutes long), but not a single cel from Farewell appears in this episode. Ishiguro would walk away from Yamato after Series 2 ended, but his mark will endure forever.
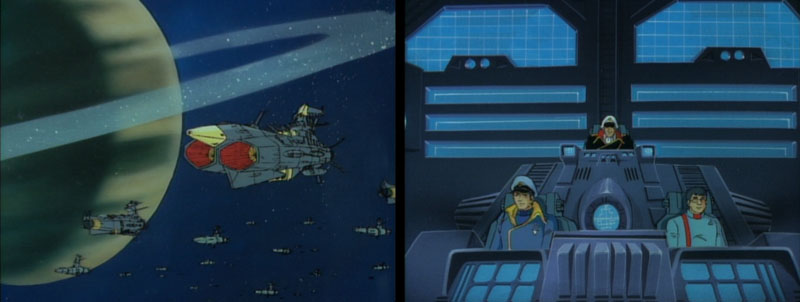
As the Comet Empire fleet approaches Saturn’s moon Hyperion, Gideon briefly addresses the assembled Earth Defense Forces, stressing the importance of this battle.
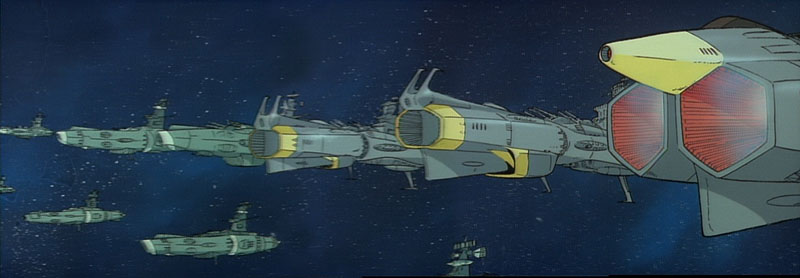
While the flagship Andromeda isn’t a great deal larger than the Argo (its extended prow gives it only about 5 extra meters of length), its bridge appears much more spacious, containing 4 video panels on the sloping front ceiling; ideal for commanding a fleet.
Story note: In episode 20, the Baruze fleet is said to be 1.2 million km away. At the beginning of episode 21, it is 100,000 space km away. It was written in the Japanese recording script as “X0,000 space km” and decided during the actual voice recording. This is because “space km” was never clearly defined. The “100,000 space km” mentioned in the original dialogue could have been an exaggeration of “X0,000.”
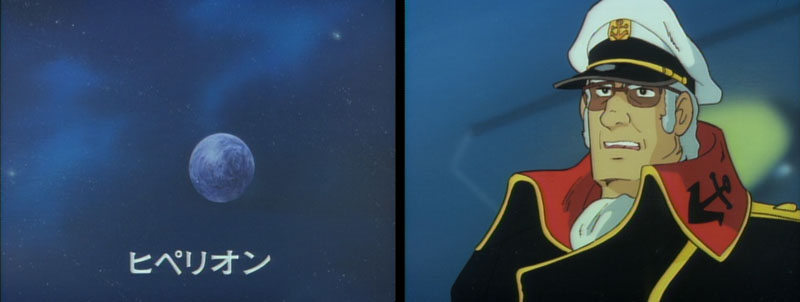
In Yamato 2, there is a quick establishing shot of Hyperion (with caption) before the introduction of the EDF’s Hyperion fleet. The bespectacled commander of the fleet is never named in the original show, but Star Blazers refers to him as Captain Slate. (If you care about such things, the Star Blazers DVD extras reveal his first name as Alan.) Gideon instructs Slate to outflank the enemy, a maneuver which fails to impress the Comet Empire’s fleet commander, General Bleek. “So that’s their tactic,” Bleek says. “We’ll take care of that.”
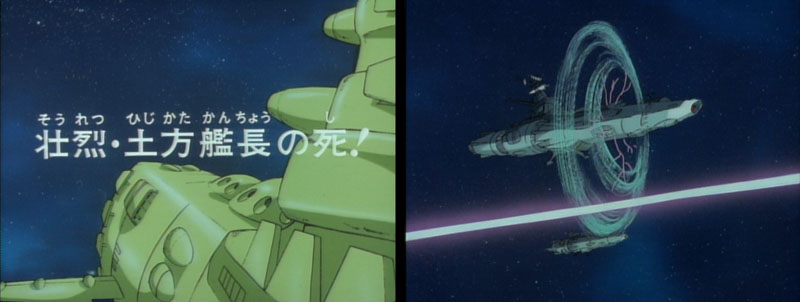
In Yamato 2, several large Comet Empire battleships break away to engage the Hyperion defenders. The scene freezes for the episode title, “The Tragic Death of Captain Hijikata!” So much for spoilers.
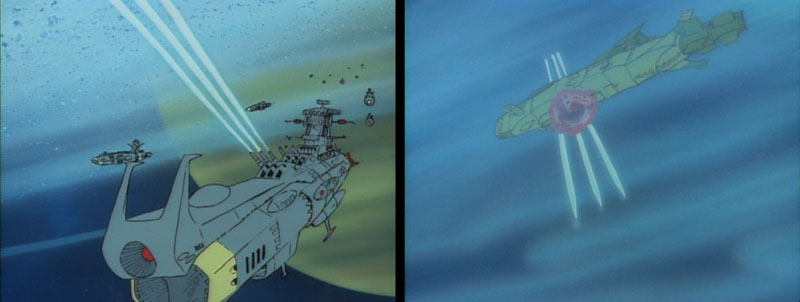
Slate’s fleet opens fire, but if they hit anything, it’s not shown. The CE fleet responds with shock cannons (a.k.a. impulse cannons). These weapons are only seen in this brief conflict, but they prove to be very effective. Instead of directly hitting its target, the beams form a vortex of energy that runs down the length of the ship and tears it apart. Several of Slate’s ships are gone within seconds. Gideon watches the destruction on his monitors. He notes that the enemy is striking fast out of necessity, since the Star Force destroyed their backup.

The main part of the enemy fleet continues toward Titan, leaving their impulse/shock cannon battleships behind to finish off Slate’s contingent. The onslaught soon reaches the Hyperion command ship. “This is Captain Slate. We’re… taking heavy fire…” are Slate’s last words before his battleship explodes. Star Blazers contained a brief edit, barely more than a second, of Slate disappearing in the explosion.
With their flanking maneuver a no-go, Gideon prepares for a frontal attack. All ships ready their main guns and advance forward. Bleek counters by having his ships close ranks, planning to push right through the middle.
With the enemy now grouped together, Gideon changes his tactic. All Wave-Motion Gun-equipped ships line up and prepare to fire. In Yamato 2, the dialog suggests that these WMGs are all of the dispersal variant, as seen in the movie Farewell To Yamato. This means the Wave-Motion energy bursts apart at a certain point, creating an umbrella of destructive energy.
The Wave-Motion Gun was once described as having an “almost unlimited” range, but here we’re given a defined range of 1,000 Megameters. (That may actually be the “burst point” of the dispersal WMG, and not the true range of its effectiveness.) 1,000 Mm is 100 times the range of the Argo‘s shock cannons, which is 10 Mm. Yamato 2‘s listed range is 110,000 space kilometers.
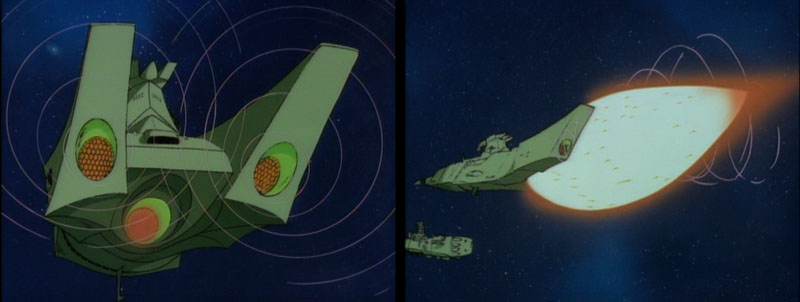
Faced with multiple Wave-Motion Guns, Bleek unveils his own super-weapon, the Magna-Flame Gun. There appears to be only one of these guns, and it’s built into his own flagship, the Medaluza. When it is fired, the energy disappears in the mouth of the gun. The beam then reappears right next to its target. The key to this gun lies in the concentric circles of energy at both sides of the cannon’s mouth. It’s a warp field, which teleports the beam. It’s similar to the SMITE projectors used by the Gamilons, only instead of transporting ships, it transports energy. Since there is only one of these weapons, it may be new technology. Perhaps the Comet Empire got the idea from analyzing Desslok’s flagship, and hasn’t had a chance to mass-produce them yet.
Production note: The Medaluza is the only Comet Empire ship designed exclusively for Yamato 2, since it didn’t appear in Farewell to Yamato. Thus, it did not come out of the celebrated Studio Nue, but rather from artist Katsumi Itabashi, who was brought on board by Leiji Matsumoto. Itabashi would stay on the saga all the way through Final Yamato. The “magna-flame” gun was called the “super electromagnetic direct hit gun” in the recording script.
The Magna-Flame Gun isn’t as powerful as a Wave-Motion Gun, but its ability to “ambush” its targets makes it a considerable threat. It’s powerful enough to take out several capital ships with one shot, and can be fired many times in succession, with only a small recharge time in between.
Gideon’s XO (Executive Officer, or, uncharitably, “Excess Officer”) estimates the gun’s range is about twice as long. (This is revealed specifically in Yamato 2, where the gun is fired from 220,000 space km away, exactly twice the WMG’s range.) At a loss, Gideon asks his command staff for suggestions. Receiving none, he decides to retreat back to Saturn.
Bleek presses his advantage and pursues the retreating Earth forces, ignoring an officer’s suggestion to wait for the fleet to regroup. The Bleek character in Yamato 2, General Baruze, is a bit more sensible. His officer actually tells him that their Second Fleet (the one that broke off to engage the Hyperion fleet) has already rejoined them, which means they are back at full strength. Bleek continues to hammer away at the retreating Earth ships.
About 7 minutes into this episode, we finally see the heroes of the saga, the Star Force, rushing back from their battle near Phoebe. At Gideon’s request, the Argo‘s Black Tigers are launched to provide some air cover. Since the Argo was built for long missions, it was designed to be self-sufficient and versatile, so it carries its own air support. The newer EDF ships are more specialized, with only the carriers having fighter squadrons. All of the EDF’s carriers are with the Argo.
The Star Force’s first scene contained two additional clips in Yamato 2. First, there’s Tokugawa [Orion] and Nanbu [Dash] reacting to how badly the battle is going. The second clip begins with Analyzer [IQ-9] rushing onto the bridge proclaiming “It’s gone!” We then segue to Shinmai [Royster] on the Second Bridge, where he shows Kodai [Wildstar] and Sanada [Sandor] a recent surveillance shot of the Comet Empire fortress. It was being tracked through the solar system when it suddenly disappeared.
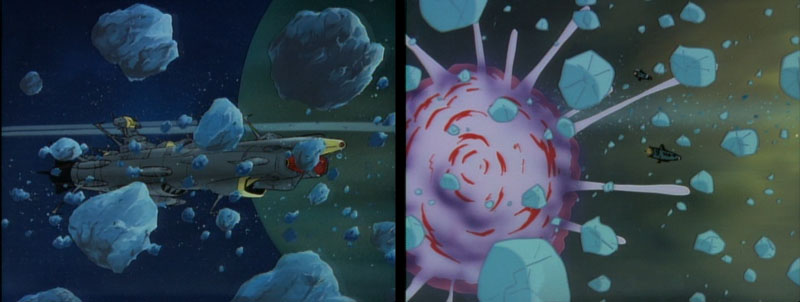
The EDF Fleet enters Saturn’s rings. Bleek fires his Magna-Flame Gun. The energy from the beam rematerializes in the ring, vaporizing a small section and sending ice particles and water vapor flying outward. Andromeda, while not directly hit by the beam, struggles against the resulting turbulence.
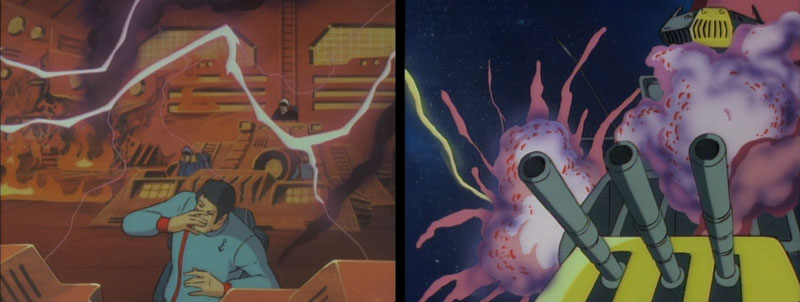
When Gideon receives word that the Black Tigers are approaching, he allows himself a hopeful smile. He’s counting on the Tigers to force the enemy fleet into the ring. One thing I always notice about this scene: the corners of Gideon’s smile never leave his face. When he speaks, he has double lips in the corner of his mouth.
Production note: This was either the result of a cel not being removed by the cameraman, or an indelible drawing not being covered up. Either way, the occasional animation error was unavoidable in an episode this demanding. In fact, it’s remarkable that there are so few.
Bleek waves off the danger posed by the Black Tigers, saying that “they can’t do any real damage.” The Tigers begin their attack. Conroy is allowed to say a line, but Hardy’s only comment in this episode (“enemy detected”) was cut from Star Blazers. Contrary to Bleek’s assessment, the fighters begin to inflict “real damage.”
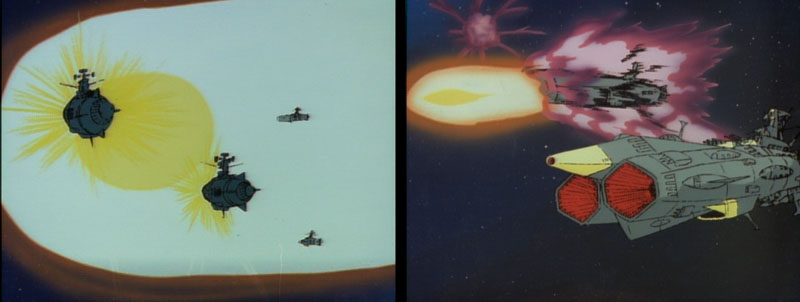
The fleet defends itself. Two Tigers are taken out by one shock/impulse cannon shot, torn apart by the “energy whirlpool” effect. A third gets clipped by an energy bolt and rams into the nearest battleship, destroying it. Given the nature of some of the edits in Star Blazers, it’s amazing that the pilot’s kamikaze act was preserved.
To escape the Black Tigers, Bleek’s fleet enters Saturn’s rings. The Black Tigers skim the edge and pull away, unable to follow. The ice particles that form Saturn’s rings range in size from 1 cm to a Tiger-smashing 10 meters (33 ft). Gideon’s XO claims the temperature in Saturn’s rings is 100 below freezing, which is much warmer than the actual temperature. In 2004, the Cassini-Huygens probe reported ring temperatures ranging from -163 to -203 degrees Celsius. The XO’s comment in Japanese was that EDF forces were approaching the Cassini Division.
Background note: The observations of Voyager 1 in 1980 roughly divided Saturn’s ring into four zones of A-D. Andromeda enters the Cassini Division, a region about 2800km wide between the A ring and the B ring. At present, Saturns rings have been further divided from A-F. The thickness of the drifting ice is estimated at about 15km.
The Magna-Flame Gun is fired. The energy released at the mouth of the cannon causes all the nearby ring particles to vaporize, creating a powerful storm. Unprepared, the Comet Empire fleet gets knocked around by the wild tides and smash into each other. The beam was knocked off-target, sparing its intended victims from damage.
I’m not familiar enough with space physics to know if firing a powerful energy weapon like a Magna-Flame gun in Saturn’s rings would have the kind of effect we see here, but it seems rather extreme. I can’t picture the section of the vaporized ring as having near enough volume to create more than a slight breeze, let alone a sustained hurricane force wind.
With enemy forces in disarray, the EDF regroups and counter-attacks. Bleek orders the Magna-Flame Gun to fire, only for a Scots-accented (!) tech to report that “It’s impossible, sir! We can’t aim it!” A shot from an EDF ship strikes the Medaluza. This results in another odd one-off voice, a tech who shouts “port side damaged!” in falsetto.
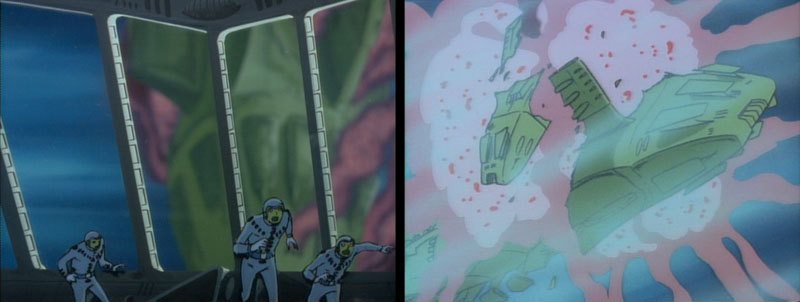
The whole EDF fleet opens fire on the helpless enemy fleet. At one point, a CE battleship explodes. Its bow section remains intact and careens into another battleship. Star Blazers removed the scene of the crew of the second battleship running away (to where?) as the wreckage, seen outside the bridge window, comes barreling toward them.
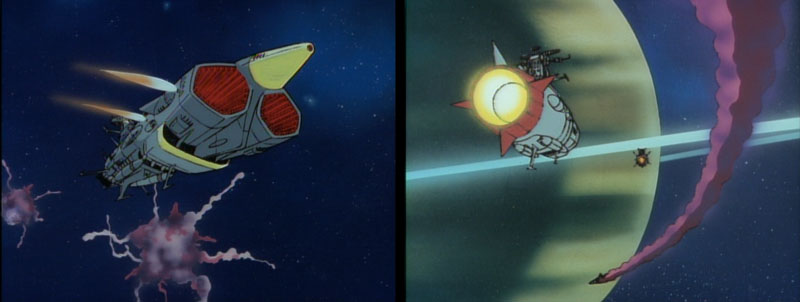
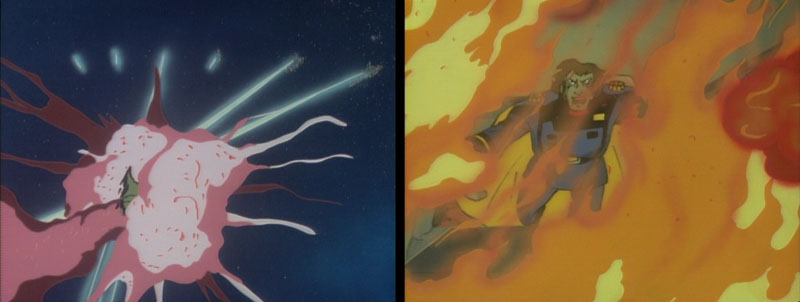
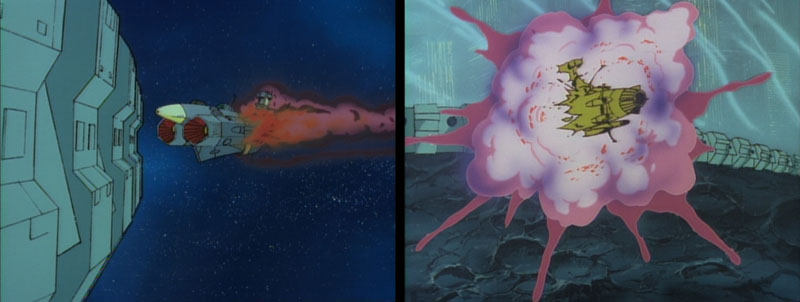
The Medaluza appears to be the only survivor of the ring-storm slaughter, but is critically damaged and pursued by the entire EDF fleet. If Bleek even considered retreat, he learns it’s hopeless as the Star Force’s task force cuts off his escape. Bleek decides that, even with the Magna-Flame gun useless, he can still destroy the Andromeda. But the entire EDF fleet cuts loose on the Medaluza, which disappears in a ball of pink flame. Baruze is allowed a death scene in Yamato 2, collapsing to the floor of his burning bridge, offering an apology to Zordar as he falls.
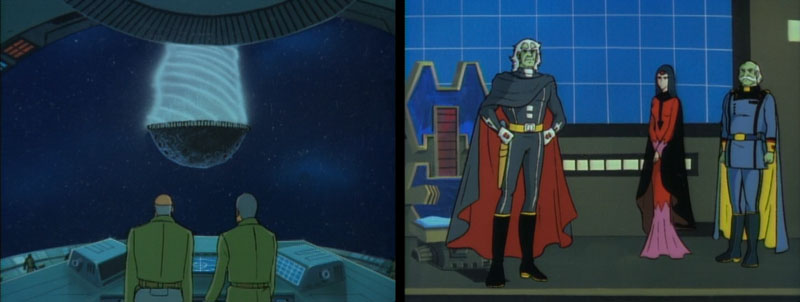
The Star Force and Andromeda salute each other as the great fleet battle ends with a decisive victory for Earth Forces. But the celebration is short lived; the White Comet itself materializes behind the Argo. Since Star Blazers didn’t show the Comet’s disappearance, Wildstar kindly provides us with an explanation: the Comet performed a space warp!
The White Comet’s ability to warp should not only be obvious from its sudden appearance, but from the fact that it has covered billions of light years in just a few months. What is surprising is that the fortress warped in so close to Saturn. The Argo doesn’t seem to perform very many warps within a solar system, probably due to gravitic interference from nearby planets and stars. Of course, the Comet Empire fortress is much sturdier than a battleship and protected by a plasma shield, so it isn’t concerned with crashing into a planet or two.
The Comet’s strong gravity field has an instant effect on the Argo and the carriers. The Argo is quick enough to boost its engines, which keep it in place. A battle cruiser isn’t so lucky, and careens into the Argo. The engine room takes major damage. Yamato 2 footage depicts several engineers engulfed in flames. One survivor radios up to the bridge to report that the engine’s on fire. Immediately after sending this message in Yamato 2, this poor guy gets blasted by a secondary explosion.
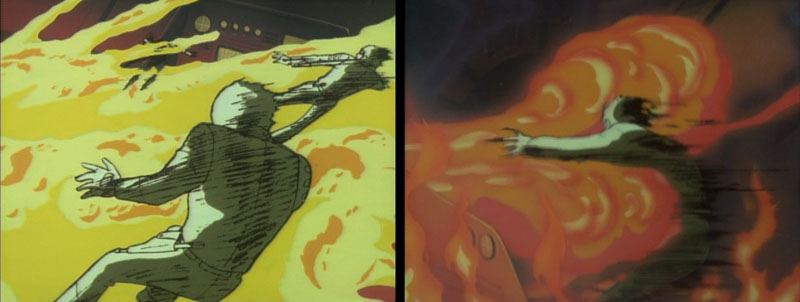
Orion and Sandor rush to the engine room as Venture struggles with the helm. Star Blazers omits another brief clip here of a crewman running into the hallway on fire. A nearby Marine grabs an extinguisher and douses him.
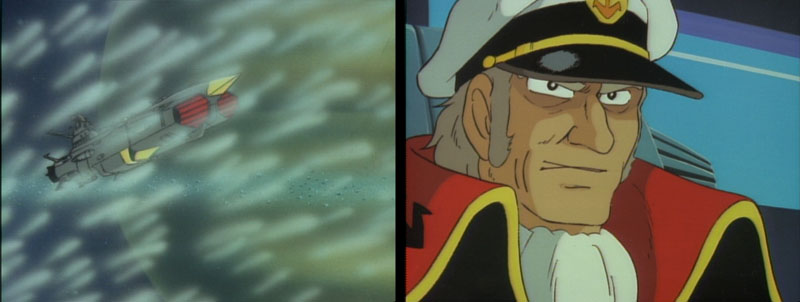
Although the Comet Empire’s gravity field was strong, the collision with the battleship had enough impact to knock the Argo free of its influence. Out of control, it spins away from the battle area. Gideon is informed of its plight and tries to contact Wildstar, but there’s no response.
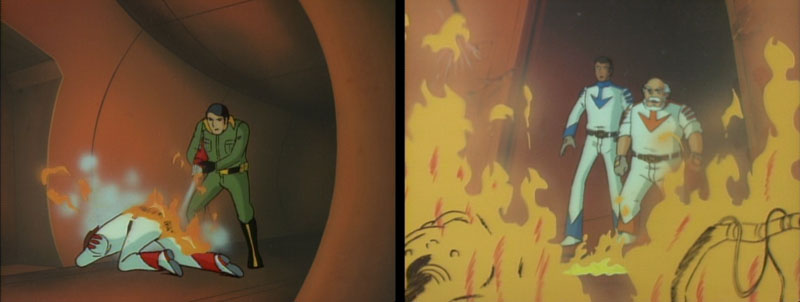
Sandor and Orion reach the engine room. Orion shouts “call the firefighters!” If the Argo has a dedicated firefighter team (more likely, it would be part of the science/damage control group) they must be busy elsewhere since Sandor is the only one we see fighting the fire (using extinguishers brought by IQ and Knox). Neither Sandor nor Orion have time to put on protective gear.
With the “safety partition” malfunctioning, Orion says the only option is to cut off the conduction pipe, a move Sandor claims is risky. Orion responds that if the pipe is not severed the fire could reach the Wave-Motion Gun, causing the ship to explode.

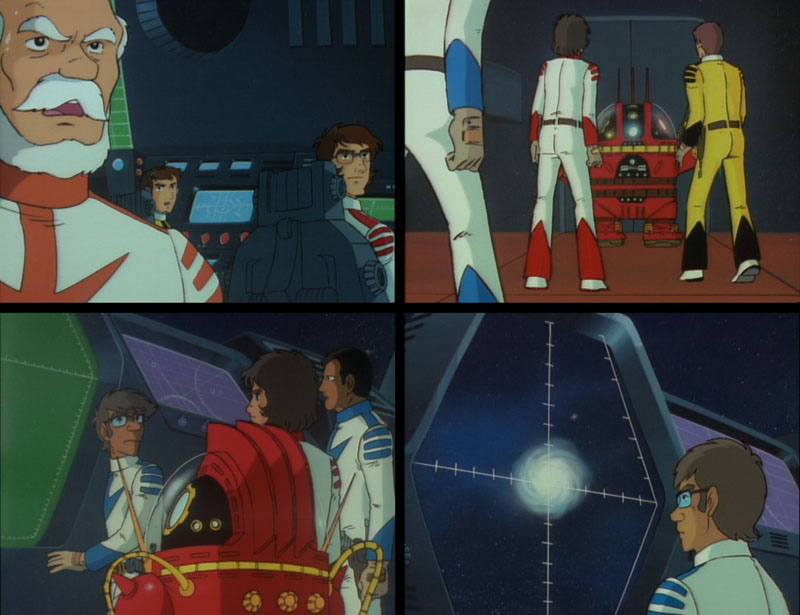
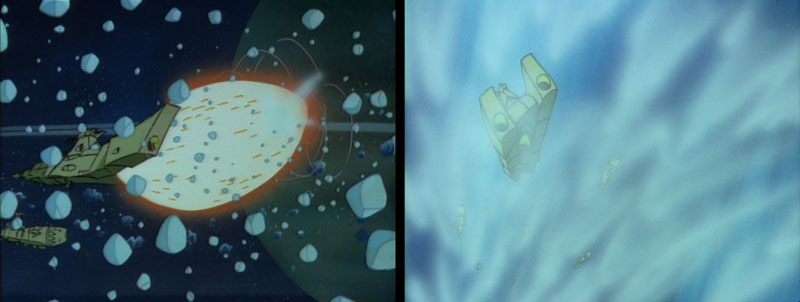
Wildstar orders all crew to abandon ship. The Black Tigers take everyone they can and pack them into all available craft. Orion, Sandor, and IQ-9 have started to burn through the pipe by the time the evacuation takes place. Wildstar remains on the bridge. He’s shocked to see Conroy and the evacuated crew hovering just outside the ship. Wildstar tries to shoo them away, but Conroy refuses. Nova also shows her stubbornness when she rushes into the bridge. “If you’re staying then I’m staying,” she vows. Dr. Sane enters and Wildstar leaves Nova in his care while he dashes out of the bridge.
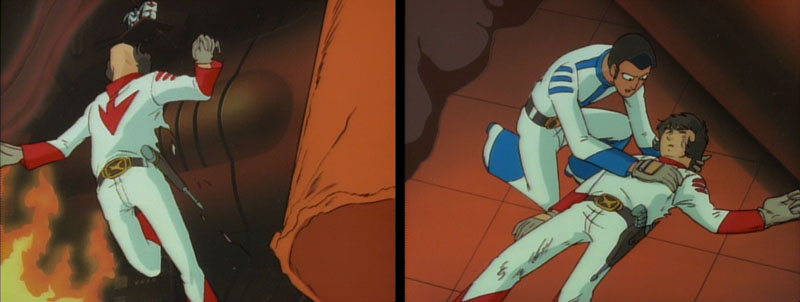
Wildstar runs through the burning hallways down to the engine room. Just as he enters the engine room, one end of the conduction pipe severs and swings down towards him, catching him in the back. Orion and Sandor rush to his side. He’s in great pain and barely conscious.

Meanwhile, back at the battlefield, Gideon prepares the fleet for a simultaneous Wave-Motion Gun attack on the Comet Empire. This type of attack had absolutely no effect on the fortress in Farewell to Yamato, but Yamato 2 is a (slightly) different story. After the firing, the Comet’s energy shield turns from its normal blue-white to yellow-orange. It starts to burn away, revealing the city, Gatlantis. Gideon orders an all-out attack against the fortress, all ships advancing as they fire.
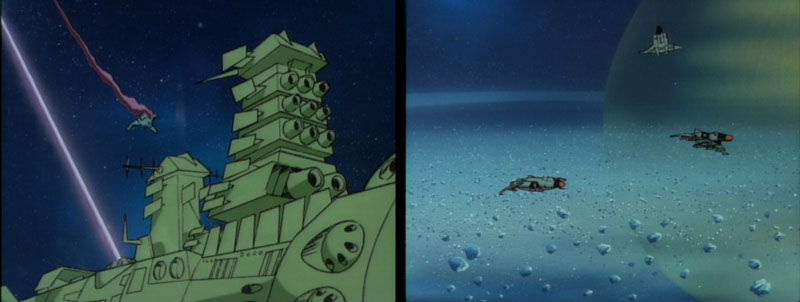
The lower hemisphere of the fortress appears as sturdy solid rock and the upper, a city of towering spires. Gideon opts to attack the city. But the equatorial belt starts spinning, creating a secondary “shield bubble” around the city. The belt also has offensive capabilities, unleashing a barrage of giant missiles. Gideon must have deemed it too stressful on the fleet for a second Wave-Motion Gun firing, so his strategy is to hit the shield with a hope that something will get through. Nothing does.
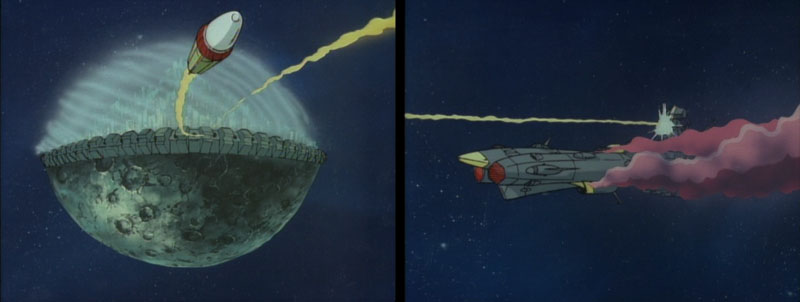
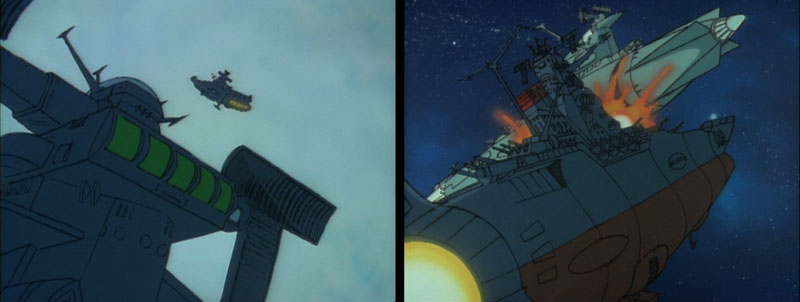
The Andromeda gets struck by several missiles, including two that smash into the superstructure. In Yamato 2, there are a couple glimpses of its bridge. Many stations are on fire and the bridge officers quickly fall as consoles explode. Already dealt a fatal blow and heading straight for the Comet’s impenetrable force field, Gideon sends out a call to Wildstar. He advises them to attack the bottom half of the fortress.
Orion and Sandor have managed to get Wildstar up to the bridge in time to hear Gideon’s final words. In Yamato 2 footage, there is an explicit scene of the Andromeda smashing into the Comet Empire’s shield. In Corn Pone Flicks’ documentary on Star Blazers, Matt Murray makes a compelling case that the Star Blazers edit was actually a better choice. It’s doubtful that artistic merit was on the minds of the editing staff, but nevertheless, it’s much more haunting to hear Gideon’s demise rather than see it. It puts us in the characters’ shoes, allowing us to experience this event as they would, not with colorful, close-up views of destruction (although that is fun to watch), but a horrifying final message cut off by an explosion.
While it’s not played up in the episode, the Andromeda‘s automation may have had a role in its downfall. With a limited crew, there was no one to make snap decisions in its moment of crisis. After those few hits on the bridge, the ship was probably locked into its final course. Similar fates may have befallen the rest of the fleet.
Next is a chilling scene from the EDF Command room, with Commander Singleton watching the Comet Empire on his screen as the last remnants of the Andromeda–as far as he knows, the last remnants of the Earth fleet–get whisked away by the Comet Empire’s spinning shield.
And thus, the Earth fleet is defeated, leaving the Star Force as the only ones who can save the day. This deliberately echoes Japan’s WWII experience, where the most powerful home fleet–showing much success in early engagements–is utterly destroyed by a force that is now poised for invasion. And like the real life Yamato, the anime version is set up for a last, suicidal attack to stave off utter defeat.
Story note: It is estimated that EDF Admiral Ryu Hijikata [Captain Draco Gideon] is killed in action February 16, 2202.
You’re wrong about the Andromeda’s extended prow (nosecone) making it only 5m or so longer than the Argo. If you had the starblazers perfect album and looked in the tech specs sehction where they have the length, height & beam measurements for some of the ships in both series, you would see that the length of the Argo is listed at 265m and the Andromeda at 600m. So, tell me what happened to the other 335m of length the Andromeda is supposed to have over the Argo? The missing meters would make the Andromeda almost 2x longer and possibly 2x bigger than the Argo!
The simple answer is that the 335m figure was an error. Some of the information in the Star Blazers Perfect Album was based on data developed for the Star Blazers Fleet Simulator game, which took some of its own liberties for gameplay purposes. In the specs for the original anime (and the Bandai model kits), Andromeda is indeed only slightly longer than Yamato. You can also see this for yourself in the shots where they appear together. If Andromeda were really 600m long, Yamato would be less than half its size.
Ok,I agree with you on the liberties of dimensions in the perfect album. Simply because if 1000m is a kilometer, after i thought about that standard for measuring and finding the results to be excessive, then Zordars dreadnaught would have been sticking out in places on the cityship surface by at least a km or two. According to the perfect album, cityship: 9.7 km=9700m, dreadnaught: 12,200m=12.2km.so like i said before, i will agree with you on said liberties. However, why didn’t the artist say that the dimensions listed are for a rpg and not to be taken as fact for the show? Even without looking in the album, as a kid watching the show i was awed by how huge Zordars ship was compared to the Argo, I even had a couple of the large dreadnaught models with the cityship/Zordar display card and had the mega cannon, which could be moved up or down from it’s spot on two slats. Also when you put the model together, there’s a spring you put into it, you push in the barrel and it recoils back out as if the mega cannon had just fired. Sorry just reminiscing about my childhood.
Voyager 1 reached Saturn in November 1980 not 1987.
Fixed. Thanks.
Does anyone know where to find the version of the Andromeda theme that plays during the EDF’s counterattack? It’s a really cool track, but I haven’t been able to find it.
All of the Yamato 2 score was released on two CDs in the Sound Almanac series. If it sounds sort of like a disco tune, it can be found on the “New Disco Arrange” album in the same series.